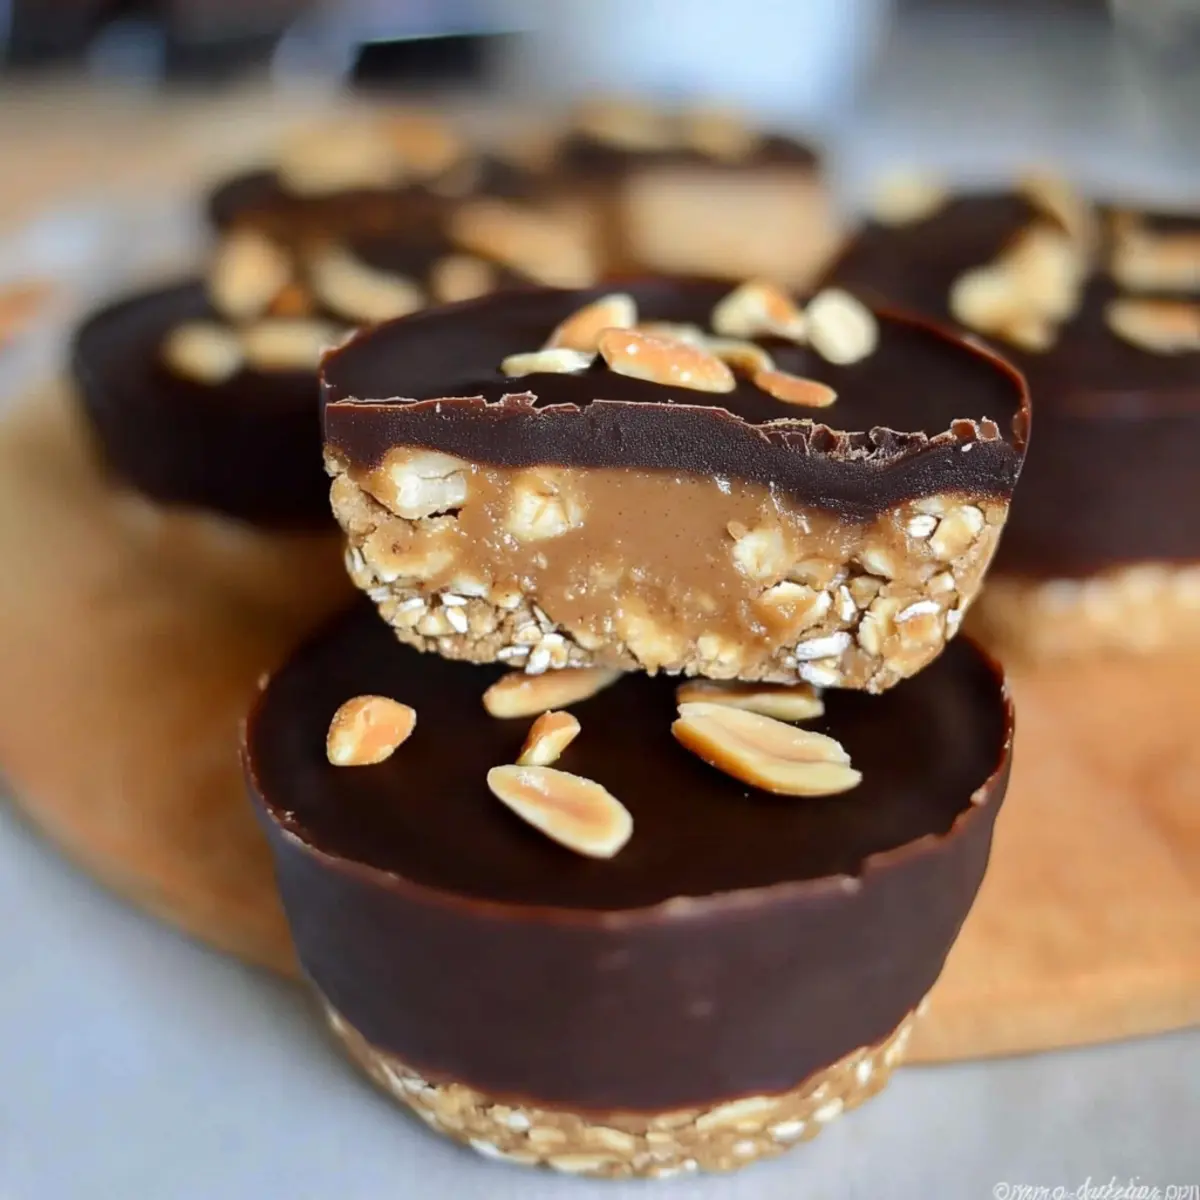
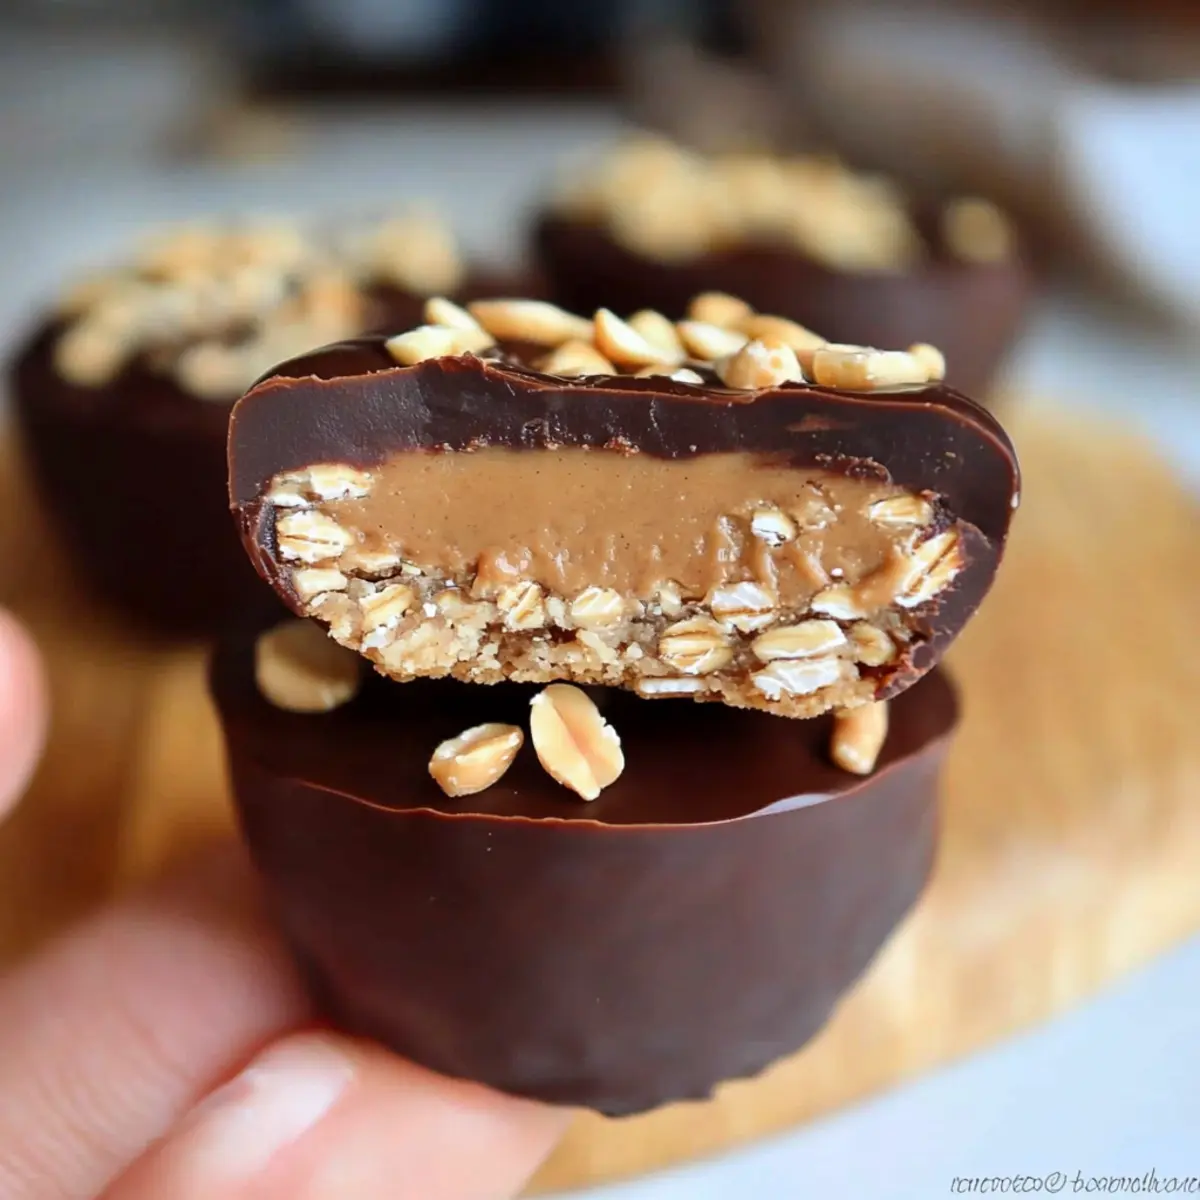
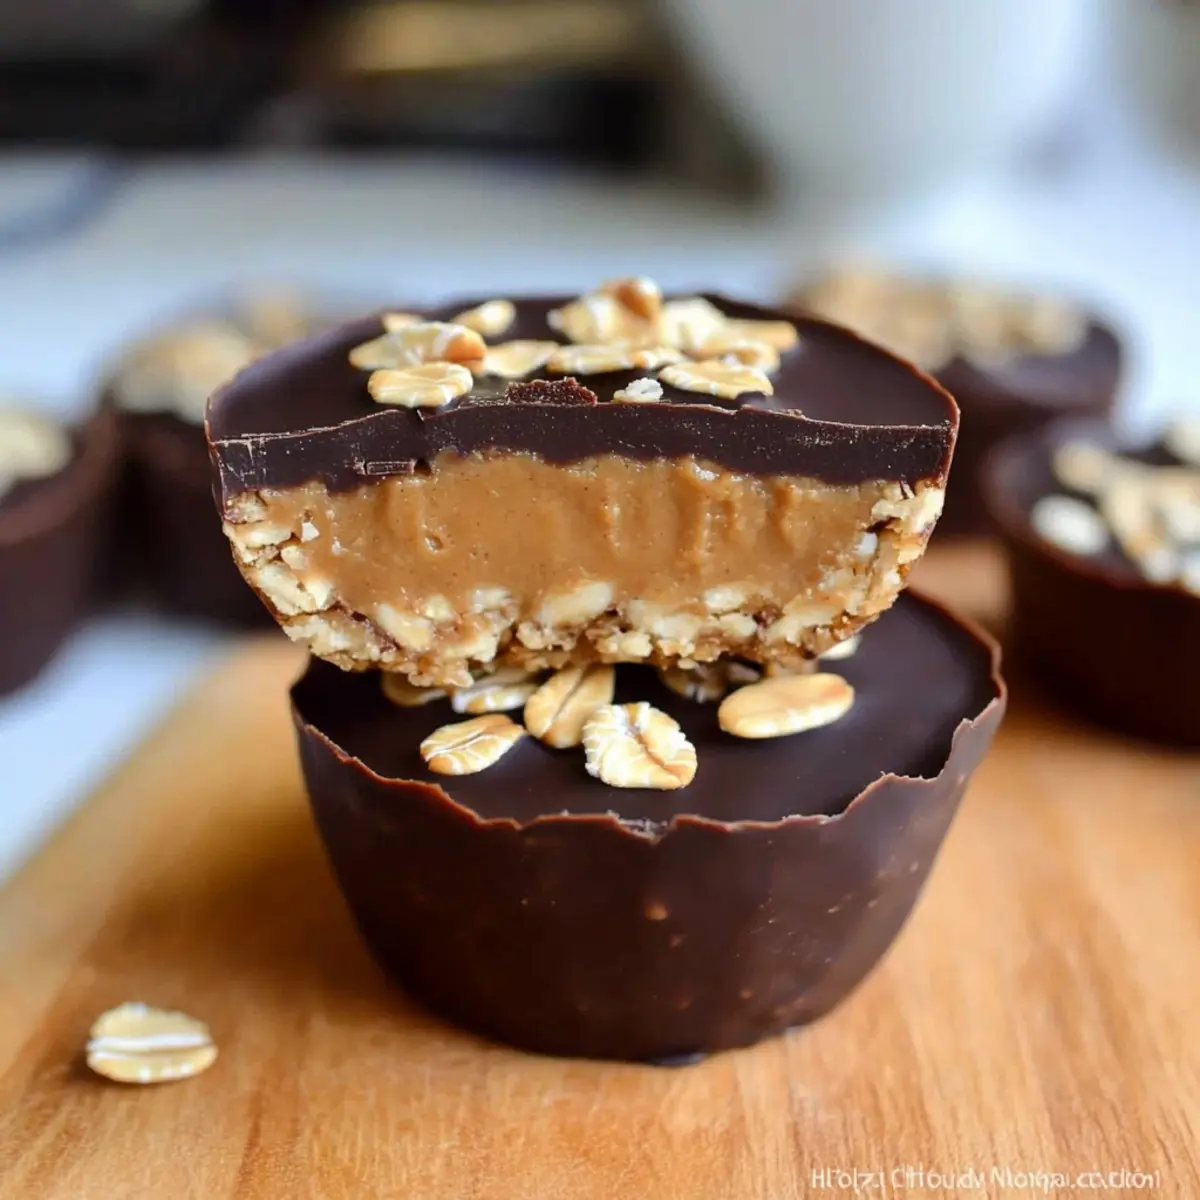
I never knew a handful of pantry staples could unite to create something so delightful until I stumbled upon these No Bake Peanut Butter Oat Cups. Each chewy morsel marries the creamy richness of peanut butter with the wholesome heartiness of oats, making them a favorite for both kids and adults alike. Whipping these together takes mere minutes—no oven required—perfect for busy days when you crave something deliciously satisfying. They’re an effortless treat great for lunchboxes or an indulgent midnight snack, aligning with your quest for healthier alternatives. Curious about how simple it can be to transform everyday ingredients into a batch of joy? Let’s dive into this easy and mouthwatering recipe!

Why are No Bake Peanut Butter Oat Cups perfect?
Quick Preparation: In mere minutes, you can whip up a batch of these delightful oat cups, making them an ideal snack for busy lifestyles.
Nutritious Ingredients: Packed with wholesome oats and natural peanut butter, these treats provide sustained energy without any guilt.
Customizable Bliss: Feel free to swap in your favorite nut butters or add toppings like dark chocolate for a personal twist.
No Baking Required: Avoid the hassle of preheating ovens and avoid spending all day in the kitchen—simply mix and chill!
Family-Favorite Appeal: Kids love their chewy texture and sweet taste, while adults can appreciate the healthier snack option without compromising on flavor.
Pair these with a scoop of yogurt or crumble them over fresh fruits to elevate your snacking game even further!
No Bake Peanut Butter Oat Cups Ingredients
• Here’s everything you need to create these delightful snacks!
For the Base
- Rolled Oats – Provides structure and heartiness; for a gluten-free version, be sure to choose certified gluten-free oats.
- Creamy Peanut Butter – Adds richness and creaminess; natural peanut butter can be used for a cleaner option.
- Honey or Maple Syrup – Acts as a sweetener and binding agent; if you prefer a vegan option, go for maple syrup.
- Coconut Oil (melted) – Adds healthy fat and aids in setting; substitute with melted butter if desired.
- Vanilla Extract – Enhances the overall flavor; feel free to swap in almond extract for a unique twist.
- Sea Salt – Complements the sweetness beautifully; can be omitted if you’re monitoring sodium intake.
For the Topping
- Dark Chocolate Chips – Adds sweetness and depth; opt for dairy-free chocolate if you need a vegan option.
- Chopped Peanuts (optional) – Provides crunch and texture; substitute with your favorite nuts or omit for a nut-free delight.
With these No Bake Peanut Butter Oat Cups ingredients on hand, you’re one step closer to whipping up a satisfying snack that will have your family begging for more!
Step‑by‑Step Instructions for No Bake Peanut Butter Oat Cups
Step 1: Prepare the Muffin Tin
Begin by lining a standard muffin tin with paper liners. This will ensure that your No Bake Peanut Butter Oat Cups are easy to remove once set. Take a moment to smooth out any wrinkles in the liners for a neater finish. Set the muffin tin aside as you gather your ingredients.
Step 2: Combine the Base Ingredients
In a large mixing bowl, combine the rolled oats, creamy peanut butter, honey or maple syrup, melted coconut oil, vanilla extract, and a pinch of sea salt. Use a sturdy spatula to mix everything together until well incorporated and you have a sticky, cohesive mixture. This should take about 2-3 minutes; it’s important to ensure no dry pockets of oats remain.
Step 3: Form the Oat Cups
Scoop about 2 tablespoons of the mixture into each muffin liner, using your fingers or the back of a spoon to press down firmly. You want to create a compact base that holds together well, so take the time to ensure each one is packed. You should see a uniform layer across all cups—this step is crucial for stability.
Step 4: Melt the Chocolate
Next, take a microwave-safe bowl and add the dark chocolate chips. Microwave in 30-second intervals, stirring between each, until the chocolate is fully melted and smooth—this should take about 1-2 minutes. Be careful not to overheat; the chocolate should be glossy and fluid, ready to drizzle over your oat cups.
Step 5: Add the Chocolate Topping
Using a spoon, drizzle the melted chocolate over each pressed oat cup, ensuring an even coating. If you like, leave some cups plain or drizzle extra chocolate for a gourmet touch. Optionally, sprinkle chopped peanuts over the tops for added texture and a nutty crunch that complements your No Bake Peanut Butter Oat Cups beautifully.
Step 6: Chill to Set
Place the muffin tin in the refrigerator and allow the cups to chill for at least 2 hours, or until they are firmly set. This cooling period is essential for the layers to bond together, making them easy to lift out of the liners. You may know they’re ready when the chocolate is solid, and the oat cups feel firm to the touch.
Step 7: Remove and Serve
Once the No Bake Peanut Butter Oat Cups are perfectly chilled and set, carefully peel away the paper liners from each cup. Serve them chilled as a quick snack or an indulgent dessert. Store any leftovers in an airtight container in the refrigerator for up to a week, or freeze them for longer enjoyment.
Helpful Tricks for No Bake Peanut Butter Oat Cups
- Mix Well: Ensure all ingredients are combined thoroughly to avoid dry pockets of oats, which can affect the texture of your No Bake Peanut Butter Oat Cups.
- Chill Properly: Refrigerate for at least 2 hours to allow the cups to set properly. This step is essential for easier handling and removal.
- Use Liners: Employing muffin liners makes it easy to remove the cups. If using silicone molds, lightly greasing them can help with easy removal.
- Even Pressing: Press the mixture firmly into the muffin tin to create a stable base. This ensures your No Bake Peanut Butter Oat Cups hold their shape.
- Customization: Feel free to swap ingredients like nut butter or toppings for a personalized touch, making each batch uniquely yours!
What to Serve with No Bake Peanut Butter Oat Cups?
These sweet and nutty oat cups create the perfect foundation for a delightful meal experience.
-
Creamy Yogurt: The smoothness of yogurt contrasts the chewy texture of the oat cups, creating a delightful treat. For a pop of flavor, top it with fresh berries to bring some brightness.
-
Fresh Fruit Salad: A colorful mix of seasonal fruits adds a juicy and refreshing element, balancing out the richness of the peanut butter. Add a drizzle of honey for an extra touch of sweetness.
-
Nutty Granola: Sprinkle some crunchy granola on top for added texture and flavor. This combination enhances the wholesome essence, making each bite a delightful journey.
-
Smoothies: A banana or berry smoothie pairs well, offering a deliciously creamy sip that complements these oat cups beautifully. Choose almond or oat milk to keep it aligned with the nutty theme.
-
Chocolate Milk: A glass of cold chocolate milk echoes the rich flavors of the oats and chocolate chips, turning snack time into a nostalgic treat reminiscent of childhood.
-
Dark Chocolate Dipped Strawberries: For an elegant touch, serve these delightful strawberries alongside your oat cups. Their natural sweetness will beautifully enhance the overall dessert experience.
-
Nut Butter Drizzle: Add a simple drizzle of your favorite nut butter on top of the oat cups, amplifying their creamy elements and personalizing each serving.
-
Iced Coffee or Tea: Both drinks refreshingly complement the flavors of the oat cups while providing that necessary pick-me-up for those busy days.
-
Mini Cheesecakes: Serve a mini cheesecake on the side for a divine duo of desserts. The creamy cheesecake balances out the chewy texture of the peanut butter oat cups, creating a truly satisfying experience.
No Bake Peanut Butter Oat Cups Variations
Feel free to let your creativity shine when making these delightful oat cups—there’s a world of flavor waiting!
-
Nut Butter Swap: Replace peanut butter with almond or sunflower seed butter for a twist on taste and texture. Each option brings its own unique flavor profile to the cups.
-
Flavor Boost: Add a teaspoon of cinnamon or a dash of cocoa powder to the mixture for an aromatic touch. This little addition truly elevates the overall flavor experience.
-
Fruity Delight: Incorporate dried fruits like cranberries or raisins into the mix for a chewy, sweet surprise. They’ll add a delightful contrast to the creamy oat base.
-
Choco-Lover’s Dream: Drizzle extra melted chocolate over the tops before chilling for a rich, decadent touch. This simple upgrade transforms your oat cups into a chocolate lover’s paradise!
-
Seeds and Grains: Mix in chia seeds or flaxseeds for added nutrients and an unexpected crunch. Not only do they amp up the health benefits, but they also enhance the textural experience.
-
Tropical Twist: Include shredded coconut in the base for a tropical vibe. Coconut complements the peanut butter beautifully, making each bite feel like a mini-vacation!
-
Spicy Kick: Sprinkle in a pinch of cayenne or chili powder for a surprising twist that provides a hint of heat. It’s a fun way to spice things up for adventurous taste buds.
-
Nut-Free Delight: For a nut-free version, swap peanut butter with sun butter and skip the toppings. This way, everyone can enjoy these delicious cups worry-free!
To elevate your snacks even further, consider serving them alongside a scoop of yogurt or crumbled over fresh fruit. If you’re exploring more tantalizing recipes, check out my Christmas Peanut Butter, or indulge in a delightful No Bake Orange Pineapple dessert!
How to Store and Freeze No Bake Peanut Butter Oat Cups
Fridge: Store your No Bake Peanut Butter Oat Cups in an airtight container in the refrigerator, where they can last for up to 1 week. This keeps them fresh and ready to snack on at a moment’s notice.
Freezer: For longer storage, freeze the oat cups in a single layer on a baking sheet until firm, then transfer to a freezer-safe container. They can be stored for up to 3 months.
Thawing: To enjoy frozen cups, simply pull out the desired amount and allow them to thaw in the refrigerator for a few hours or enjoy them straight from the freezer for a cool treat.
Reheating: While these cups are best enjoyed chilled, if you prefer, you can warm them slightly in the microwave for just a few seconds to soften the chocolate topping.
Make Ahead Options
These No Bake Peanut Butter Oat Cups are perfect for meal prep, allowing you to enjoy a delicious snack any time! You can prepare the base mixture up to 24 hours in advance and store it in the refrigerator. Just mix together the rolled oats, peanut butter, honey, melted coconut oil, vanilla extract, and sea salt, then refrigerate. When you’re ready to serve, simply scoop the mixture into muffin liners, add the melted chocolate topping, and chill for a couple of hours until set. For optimal quality, keep them in an airtight container to maintain their chewy texture. Enjoy the convenience of having these tasty treats on hand for busy days!
No Bake Peanut Butter Oat Cups Recipe FAQs
How do I choose the right ripe ingredients for No Bake Peanut Butter Oat Cups?
Absolutely! For the best results, look for fresh ingredients. Choose rolled oats that are whole and unbroken for a sturdier base. Ensure your peanut butter is creamy and natural if possible—this gives a rich texture. For sweeteners, honey should be golden and viscous, while maple syrup should have a rich aroma. The coconut oil should be clear when melted, ensuring it mixes in well with the rest of the ingredients.
How should I store No Bake Peanut Butter Oat Cups, and how long will they last?
You can store your No Bake Peanut Butter Oat Cups in an airtight container in the refrigerator, where they will stay fresh for up to a week. This keeps them chewy and delicious, ready for you to indulge whenever the craving strikes. Just make sure to separate layers with parchment paper to prevent them from sticking together!
Can I freeze No Bake Peanut Butter Oat Cups, and what’s the best way to do it?
Very! To freeze No Bake Peanut Butter Oat Cups, lay them flat on a baking sheet in a single layer for about 1-2 hours, allowing them to freeze until firm. Then, transfer them to a freezer-safe container or zip-top bag and store them for up to 3 months. When you want a treat, just pull out your desired amount and let them thaw in the fridge for a few hours, or enjoy them right from the freezer for a refreshing snack!
What should I do if my No Bake Peanut Butter Oat Cups are falling apart?
Don’t worry, it happens! Make sure to mix the ingredients thoroughly so that all oats are well coated. If you notice the mixture is too crumbly, you may need to add a bit more peanut butter or a touch of coconut oil to help bind it. Press the mixture firmly into the muffin liners to create a solid base. If they continue to be too crumbly, refrigerating them a little longer can help them set.
Are there any dietary considerations I should keep in mind for No Bake Peanut Butter Oat Cups?
Definitely! If you’re serving these to children or friends with allergies, it’s important to use allergy-friendly ingredients. Opt for gluten-free rolled oats and ensure your peanut butter is free from added oils and sugars. For a nut-free version, replace peanut butter with sunflower seed butter, and check your toppings! If you’re following a vegan diet, make sure to use maple syrup and dairy-free chocolate chips to keep them in line with your dietary preferences.
Irresistible No Bake Peanut Butter Oat Cups for Quick Snacking
Ingredients
Equipment
Method
- Prepare the Muffin Tin: Line a standard muffin tin with paper liners.
- Combine the Base Ingredients: In a large bowl, mix rolled oats, peanut butter, honey or maple syrup, coconut oil, vanilla extract, and sea salt until cohesive.
- Form the Oat Cups: Scoop about 2 tablespoons of the mixture into each muffin liner and press down firmly.
- Melt the Chocolate: Microwave dark chocolate chips in intervals, stirring until melted and smooth.
- Add the Chocolate Topping: Drizzle melted chocolate over each oat cup and optionally sprinkle with chopped peanuts.
- Chill to Set: Place the muffin tin in the refrigerator for at least 2 hours until the cups are set.
- Remove and Serve: Peel away the liners and serve chilled or store in an airtight container.
Leave a Reply