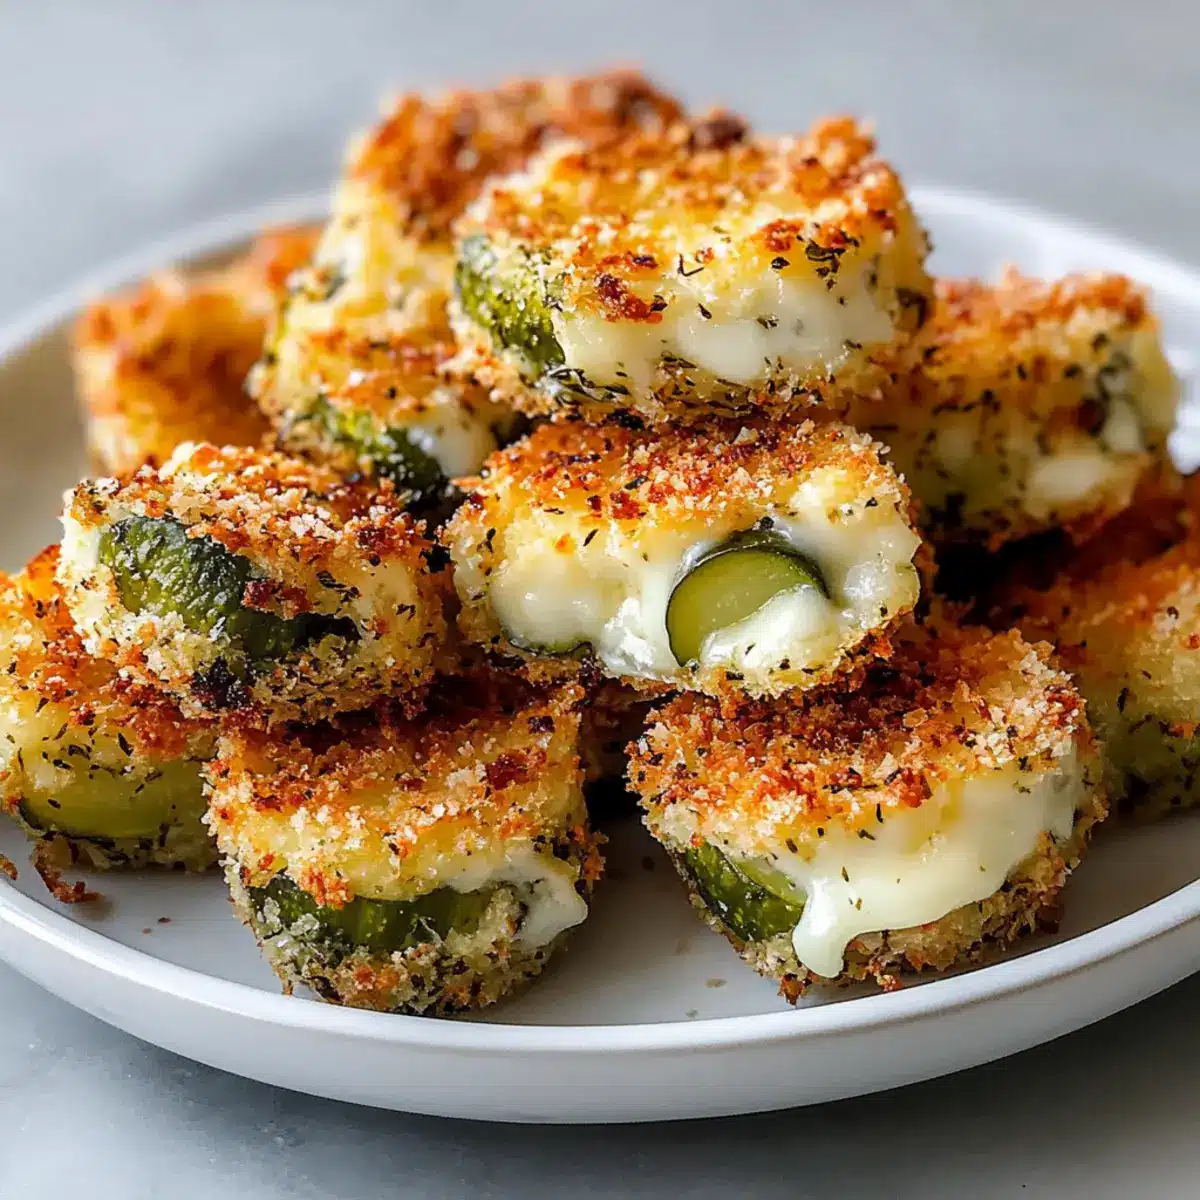
The first time I tasted Crispy Pickle Cheese Bites, I was instantly hooked by their delightful crunch and gooey interior. These irresistible snacks perfectly blend the sharp tang of dill pickles with the creamy indulgence of melted cheeses, all enveloped in a crispy coating that promises satisfaction in every bite. Ideal for spirited game night gatherings or cozy movie marathons, these bites are also a wonderful comfort food to enjoy after a hectic day. They’re quick to make and genuinely crowd-pleasing, ensuring even your most discerning guests will come back for seconds. What’s your favorite dip to pair with these flavorful goodies? Let’s dive into this mouthwatering recipe together!
Why are Crispy Pickle Cheese Bites so addictive?
Irresistible flavor blend: The combination of crunchy dill pickles and gooey cheese creates a unique taste that keeps you coming back for more.
Quick and easy: With just a handful of ingredients and simple steps, you can whip these up in no time, making them perfect for unexpected guests or late-night cravings.
Perfect for sharing: These bites are a total crowd-pleaser, great for parties or game nights, and pair beautifully with dips like ranch or spicy mayo. You might also enjoy them alongside a refreshing Pomegranate Feta Cheese dip for extra flair!
Customizable options: Feel free to experiment with different cheese blends or add cooked bacon for a twist on the classic.
Versatile snacking: Whether you’re indulging after a busy day or serving them at a gathering, their crispy texture and zesty flavor make them the ideal snack for any occasion.
Crispy Pickle Cheese Bites Ingredients
For the Cheese Mixture
• Shredded Cheddar Cheese – Provides a creamy texture and sharp flavor; feel free to substitute with any hard cheese for a different taste.
• Shredded Mozzarella Cheese – Adds stretchiness and mild flavor; alternatively, mix in a cheese blend or additional cheddar for extra cheesiness.
• Finely Chopped Dill Pickles – Contributes tang and crunch; other pickles can be used for diverse flavor profiles, such as sweet pickles.
• Garlic Powder – Enhances flavor; fresh garlic can be used but remember to reduce the amount to prevent overpowering.
For the Coating
• Breadcrumbs (optional) – Gives an extra layer of crispiness; use gluten-free breadcrumbs for a GF version.
• Nonstick Spray or Parchment Paper – Prevents sticking during baking, ensuring your bites come out perfectly.
Enjoy these Crispy Pickle Cheese Bites on game day or as an evening snack, and watch them disappear!
Step‑by‑Step Instructions for Crispy Pickle Cheese Bites
Step 1: Preheat and Prepare
Start by preheating your oven to 375°F (190°C). While the oven heats up, line a baking sheet with parchment paper or lightly spray it with nonstick spray. This will ensure that your Crispy Pickle Cheese Bites won’t stick during baking, allowing for that perfect golden crust.
Step 2: Mix the Cheese and Pickles
In a large mixing bowl, combine the shredded cheddar cheese, shredded mozzarella cheese, finely chopped dill pickles, and garlic powder. Stir the mixture well until all ingredients are evenly distributed, creating a cohesive and flavorful filling. This cheese and pickle blend will form the heart of your crunchy bites, so take your time to mix thoroughly.
Step 3: Shape the Bites
Using your hands, scoop out small portions of the cheese mixture and form them into bite-sized balls, roughly the size of a tablespoon. Place each formed ball onto the prepared baking sheet, ensuring they are spaced apart to allow even cooking. Visually check that each bite is well-rounded; this will help them cook uniformly and maintain their shape.
Step 4: Add Breadcrumb Coating
If you desire an extra crispy texture, sprinkle a light dusting of breadcrumbs over each formed bite. Use a spoon or your fingers to gently press the breadcrumbs onto the surface, ensuring they stick well. This adds a delightful crunch to the outside of your Crispy Pickle Cheese Bites once they bake.
Step 5: Bake to Perfection
Carefully place the baking sheet in the preheated oven and bake the bites for 15 to 20 minutes. Keep an eye on them during the last few minutes; you’re looking for a beautiful golden-brown color and a crispy exterior. This visual cue indicates that your Crispy Pickle Cheese Bites are ready to come out of the oven and be devoured.
Make Ahead Options
These Crispy Pickle Cheese Bites are perfect for meal prep, saving you valuable time on busy weeknights! You can mix the cheese and pickle filling up to 24 hours in advance, storing it in an airtight container in the refrigerator. Additionally, you can form the bites into balls and refrigerate them for up to 3 days before baking. Just remember to pat the pickle slices dry to keep the bites crispy. When you’re ready to serve, simply arrange the balls on a baking sheet, sprinkle with breadcrumbs (if using), and bake as directed. With these make-ahead tips, you’ll have delicious snack bites ready to enjoy in no time!
Expert Tips for Crispy Pickle Cheese Bites
• Pat the Pickles Dry: Ensure your dill pickles are properly dried with a paper towel before mixing; excess moisture can make the bites soggy instead of crispy.
• Don’t Overcrowd the Pan: When baking, allow space between the bites on the baking sheet. This promotes even baking and helps maintain that perfect crispy texture.
• Watch Baking Time: Keep a close eye on your bites towards the end of the baking process to prevent burning; they can go from golden to overdone quickly.
• Experiment with Cheese: Feel free to mix cheese types for a flavor twist! Incorporating sharp cheddar or spicy pepper jack can elevate your Crispy Pickle Cheese Bites.
• Serving with Dips: These bites shine when paired with dips like ranch or spicy mayo, bringing an extra layer of flavor to your snacking experience.
How to Store and Freeze Crispy Pickle Cheese Bites
Fridge: Store leftover Crispy Pickle Cheese Bites in an airtight container for up to 3 days to maintain their flavor and texture.
Freezer: For longer storage, freeze baked bites in a single layer on a baking sheet, then transfer to a freezer-safe bag. They can last up to 2 months.
Reheating: To reheat, bake from frozen at 375°F (190°C) for 15-20 minutes, or use an air fryer for about 8 minutes, ensuring they’re heated through and crispy again.
Cooking Ahead: Prepare the mixture and form the bites, then store them in the fridge for up to a day before baking, making it easy to serve warm, freshly baked snacks.
Crispy Pickle Cheese Bites Variations
Feel free to unleash your culinary creativity and personalize these bites to suit your taste preferences!
-
Spicy Twist: Add diced jalapeños to the cheese mixture for an extra kick of heat. This spiced-up version will tantalize your taste buds!
-
Bacon Lovers: Mix in cooked, crumbled bacon to the cheese filling for a smoky, savory flavor. The combination of cheese and bacon is a match made in heaven!
-
Herb Infusion: Consider adding fresh chopped herbs like dill or parsley for a fragrant touch that brightens each bite. These subtle flavor enhancements will elevate your snack experience.
-
Cheese Blend: Swap out cheddar and mozzarella for pepper jack or gouda for a unique twist. Each cheese offers its own distinct creamy texture and flavor profile.
-
Sweet & Tangy: Substitute dill pickles with sweet pickles for a delightful contrast in flavors. This twist will surprise your palate with every crispy crunch.
-
Baked Alternative: For a healthier option, air-fry the bites instead of baking. They turn out just as crispy but offer a lighter approach, making them perfect for guilt-free snacking.
-
Cheese Stuffing: Stuff the cheese mixture into whole pickles instead of forming bite-sized balls. This offers a fun and surprising presentation that pickles lovers will adore.
-
Zesty Dipping Sauce: Pair these bites with flavored sauces such as sriracha mayo or a zesty yogurt dip for a refreshing balance of flavors that complements their crunchiness.
With so many delightful variations, your Crispy Pickle Cheese Bites will never get boring! Serve them alongside a tangy Strawberry Cream Cheese dip for a sweet finish or enjoy them with a zesty Cheese Danish Melts recipe for a delightful appetizer spread!
What to Serve with Crispy Pickle Cheese Bites
Pairing these delightful bites with the right sides can elevate your snack experience to new heights, making it even more memorable.
-
Ranch Dip: A classic pairing, this creamy dip complements the tangy pickles perfectly while adding coolness to each bite.
-
Spicy Mayo: Add a kick with this zesty sauce, which enhances the flavor profile of the Crispy Pickle Cheese Bites for those who love a bit of heat.
-
Fresh Veggie Platter: Crisp vegetables like carrot sticks, celery, and bell peppers provide a refreshing contrast to the rich, cheesy bites, creating a balanced meal.
-
Buffalo Sauce: For those who crave bold flavors, drizzling these bites with buffalo sauce introduces an exciting twist with its tangy and spicy notes.
-
Coleslaw: A creamy coleslaw brings a delightful crunch and a touch of sweetness, complementing the crunch of the bites while adding a Southern comfort touch.
-
Pickle Chips: For pickle lovers, serving extra dill pickle chips on the side creates a fun and flavorful exploration of the tangy taste you already adore.
-
Iced Tea or Lemonade: A refreshing drink option, whether sweetened or unsweetened, pairs well with the cheesy, crunchy bites, enhancing the Southern comfort vibe.
-
Soft Pretzels: Enjoy these bites alongside pretzels for a fun, snacky vibe reminiscent of old-fashioned fairs and festivals, perfect for a casual gathering.
-
Beer: A cold, crisp beer can complement the rich flavors and crispy texture of the bites, making it a favorite at any gathering.
-
Brownies: End your snack with a touch of sweetness. The fudgy texture of brownies is a delightful contrast to the crunchy bite you’ve just enjoyed.
Crispy Dill Pickle Cheese Bites Recipe FAQs
How do I select the best dill pickles for this recipe?
Absolutely! Look for dill pickles that are firm and crunchy, avoiding those with dark spots or soft patches. The best pickles will enhance the texture of your Crispy Pickle Cheese Bites, so I often choose brands that pack their pickles with salt for that extra crunch!
What’s the best way to store Crispy Pickle Cheese Bites?
To keep your bites crunchy, store them in an airtight container in the refrigerator for up to 3 days. Make sure they cool completely before sealing. If you happen to have leftovers, they make a great midday snack!
Can I freeze Crispy Pickle Cheese Bites?
Yes, you can! For freezing, place the bites in a single layer on a baking sheet, then transfer them to a freezer-safe bag once frozen. They can last up to 3 months in the freezer. When you’re ready to enjoy, just thaw them in the fridge overnight before reheating!
What if my cheese mixture is too dry?
If your mixture feels a bit dry and crumbly, don’t worry! Simply melt a tablespoon of butter and mix it into the cheese and pickle blend. This not only helps bind it together but also brings in extra flavor, making your Crispy Pickle Cheese Bites even more delightful.
Are these bites suitable for people with dietary restrictions?
Absolutely! You can customize these bites to cater to gluten-free diets by using gluten-free breadcrumbs. Additionally, feel free to replace the cheeses with dairy-free options if lactose is a concern. Just ensure that any pickles used do not contain allergens!
How can I make my Crispy Pickle Cheese Bites extra crispy?
To elevate the crunch factor, pat the dill pickles dry with paper towels before mixing them into the cheese. Additionally, sprinkle breadcrumbs generously on top before baking, and use a convection bake setting if your oven has one for even better crispiness!
Crispy Pickle Cheese Bites: Irresistibly Crunchy Snacks!
Ingredients
Equipment
Method
- Preheat your oven to 375°F (190°C) and line a baking sheet with parchment paper or spray it with nonstick spray.
- In a mixing bowl, combine shredded cheddar cheese, shredded mozzarella cheese, dill pickles, and garlic powder until well mixed.
- Scoop small portions of the cheese mixture and form into bite-sized balls, placing them on the prepared baking sheet.
- Sprinkle breadcrumbs over each formed bite for added crunch and press them lightly to adhere.
- Bake in the preheated oven for 15 to 20 minutes, until golden brown and crispy.
Leave a Reply