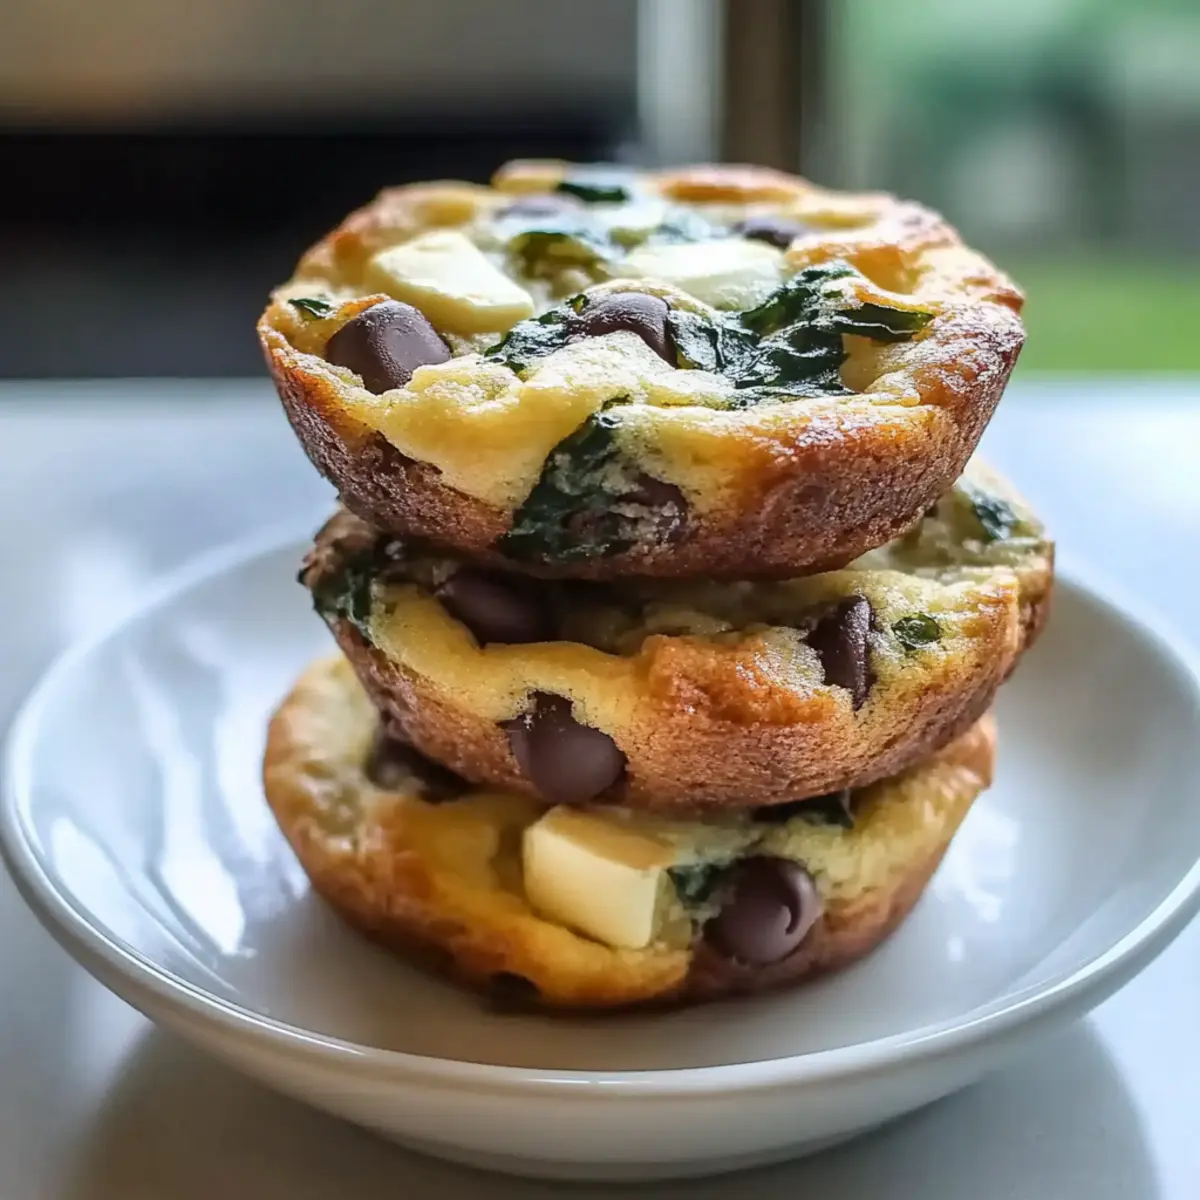
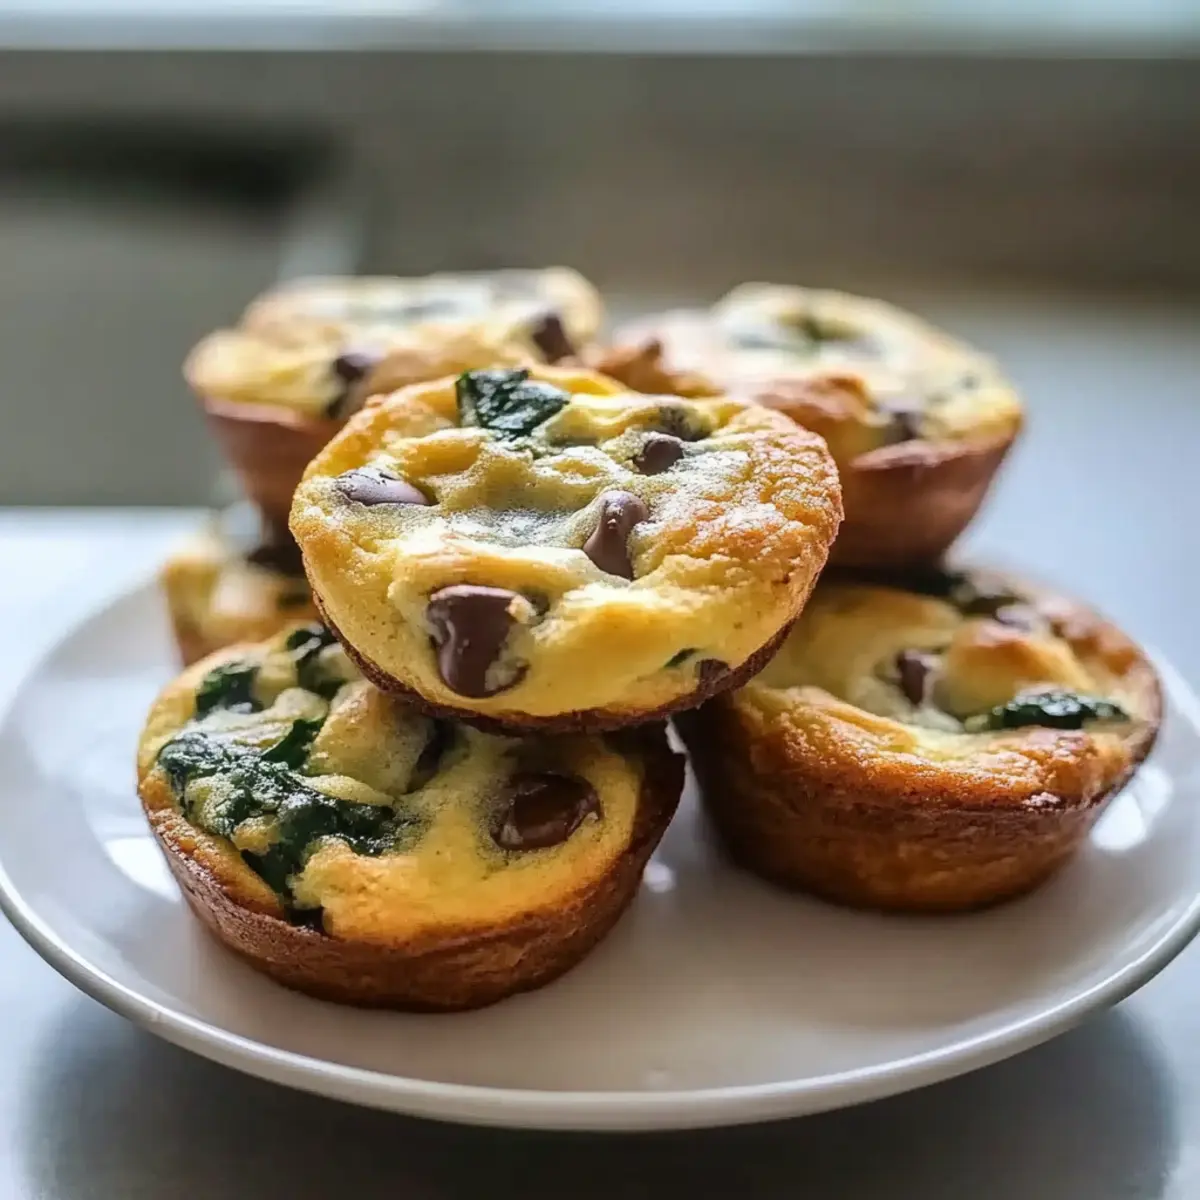
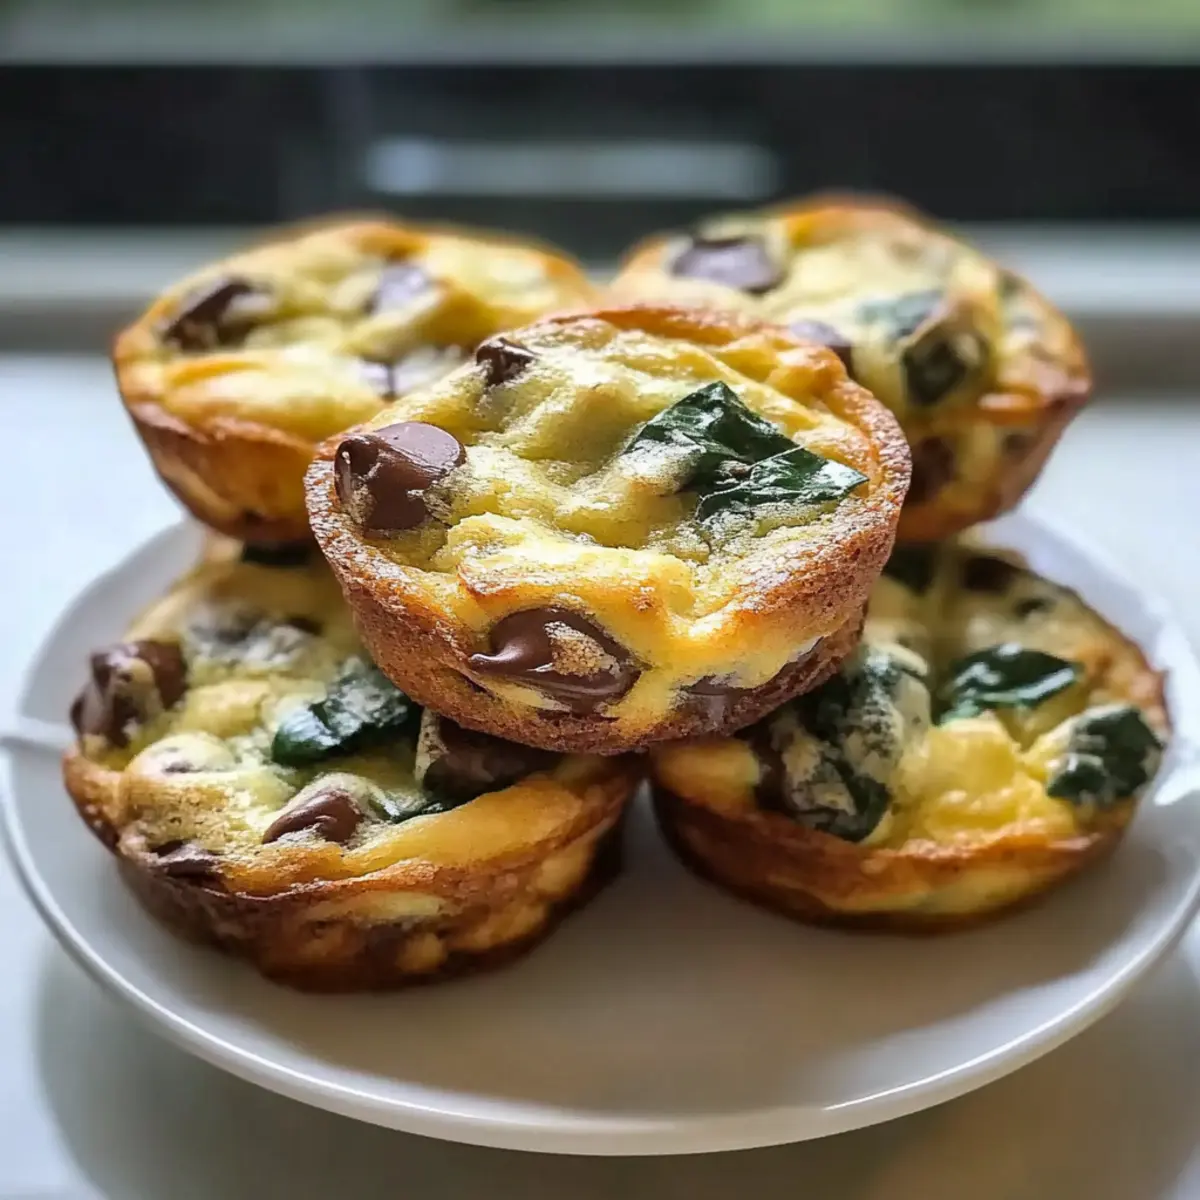
As I stood in my kitchen this morning, I noticed how the vibrant green spinach sat boldly next to the crumbled feta, ready to transform an ordinary breakfast into something truly special. This is the magic of Quick & Healthy Egg Muffins with Spinach and Feta. Not only are these little delights a breeze to prepare, but they also pack in nutrition without sacrificing flavor—perfect for busy mornings when time is tight. Plus, they’re incredibly versatile; you can swap in your favorite veggies or cheeses to make them your own. If you’re craving a wholesome meal that fuels your day without an ounce of guilt, then these egg muffins are the answer. What delicious twists will you add to your batch?
Why Are These Cookies A Must-Try?
Easy Preparation: With just a handful of simple ingredients, whipping up a batch of these cookies is a breeze, whether you’re a seasoned baker or just starting out.
Endless Customization: Love nuts or dried fruit? Feel free to add them! You can also try alternatives like gluten-free flour for a tailored treat.
Mouthwatering Flavor: Bursting with melty chocolate chips, every bite offers a perfect balance of sweetness and rich chocolate, ensuring a delightful experience every time.
Crowd-Pleasing Snack: Whether it’s a family gathering or a casual snack at home, everyone loves a classic chocolate chip cookie. They’re sure to be the star of any dessert table!
Perfect for any occasion: Serve them warm with a glass of cold milk or pack them for lunch – they make a delicious, satisfying treat for all ages. If you’re looking for healthy options as well, check out these Healthy Strawberry Muffins too!
Classic Chocolate Chip Cookie Ingredients
• To create the best classic chocolate chip cookies, gather these key ingredients to ensure maximum flavor and texture.
For the Batter
- Butter – Provides fat for richness and a tender texture. Note: Can be substituted with coconut oil for a dairy-free version.
- Brown Sugar – Adds sweetness and moisture, contributing to a chewy texture. Substitution: White sugar can be used, but the cookies will be less chewy.
- Granulated Sugar – Sweetens the cookies and helps achieve a crisp exterior. No notable substitutions suggested.
- Eggs – Binds ingredients together for structure. Note: For vegan options, flax eggs can be used (1 tablespoon flaxseed meal + 2.5 tablespoons water).
- Vanilla Extract – Enhances flavor and aroma. Ensure to use pure vanilla extract for the best results.
- All-Purpose Flour – Provides the structure for the cookies. Substitution: Use gluten-free flour blend for a gluten-free option.
- Baking Soda – Leavens the cookies, giving them height. Ensure it is fresh for the best rise.
- Salt – Enhances flavor and balances sweetness. No substitutions recommended.
- Chocolate Chips – Adds sweetness and decadence. Can be swapped with chunks or a mix of dark and milk chocolate for different flavor profiles.
Step‑by‑Step Instructions for Classic Chocolate Chip Cookies
Step 1: Preheat the Oven
Begin by preheating your oven to 350°F (175°C). This step ensures that your Classic Chocolate Chip Cookies bake evenly and achieve that perfect golden color. While the oven is heating up, prepare your baking sheets by lining them with parchment paper. This will prevent the cookies from sticking and make cleanup much easier.
Step 2: Cream the Butter and Sugars
In a large mixing bowl, add softened butter along with brown sugar and granulated sugar. Using an electric mixer, cream these ingredients together for about 2-3 minutes, until the mixture becomes light and fluffy. You’ll know it’s ready when the colors have lightened and the texture is silky. This step is crucial for creating rich, tender cookies.
Step 3: Incorporate Eggs and Vanilla
Next, crack in two eggs and pour in the pure vanilla extract into the creamed mixture. Mix on medium speed until everything is well combined, scraping down the sides of the bowl if necessary. This will create a smooth and cohesive batter, infused with delightful vanilla aroma, ensuring your Classic Chocolate Chip Cookies have the perfect flavor foundation.
Step 4: Combine Dry Ingredients
In a separate bowl, whisk together all-purpose flour, baking soda, and salt. This step helps to evenly distribute the leavening agent and seasoning throughout the flour. Once mixed, slowly add this dry mixture to the wet ingredients, stirring gently until just combined. Be careful not to over-mix, as this will impact the tenderness of your cookies.
Step 5: Fold in the Chocolate Chips
Now, it’s time to bring the cookie magic in with the chocolate chips! Gently fold them into the dough using a spatula, ensuring an even distribution throughout. The rich chocolate will melt beautifully as the cookies bake, offering that gooey texture you love. Take a moment to admire the delectable batter—it’s a treat in itself!
Step 6: Scoop the Cookie Dough
Using a tablespoon or a cookie scoop, portion out tablespoon-sized balls of dough and place them onto your prepared baking sheets. Be sure to leave enough space between each cookie (about 2 inches) to allow for spreading. This step ensures that your Classic Chocolate Chip Cookies have room to grow and become perfectly shaped as they bake.
Step 7: Bake to Perfection
Carefully place the baking sheets in your preheated oven and bake for 10-12 minutes. Keep an eye on them—the cookies are done when the edges are golden brown and the centers appear soft but set. The aroma will be irresistible as they bake, signaling that you’re just moments away from enjoying your homemade cookies.
Step 8: Cool and Enjoy
Once baked, remove the cookies from the oven and allow them to cool on the baking sheet for about 5 minutes. This will help them firm up a little more before transferring them to a wire rack to cool completely. The result? Warm, gooey, and utterly delicious Classic Chocolate Chip Cookies ready for devouring!
Expert Tips for Classic Chocolate Chip Cookies
-
Butter Temperature: Always use room temperature butter to ensure it creams well with the sugars, creating a fluffy texture, essential for tender cookies.
-
Mix With Care: Avoid over-mixing the dough once you add dry ingredients; this helps prevent tough cookies and keeps them perfectly soft.
-
Chill for Chewiness: For chewier cookies, refrigerate the dough for at least 30 minutes before baking. This allows the flavors to meld beautifully.
-
Fresh Ingredients: Ensure your baking soda is fresh for maximum lift. If it’s expired, your cookies might not rise properly.
-
Watch Baking Time: Keep a close eye on your cookies while baking; they should be golden at the edges and slightly soft in the center, so they stay gooey.
Quick & Healthy Egg Muffins Variations
Feel free to put your unique spin on these egg muffins, inviting flavors and ingredients that excite your taste buds!
-
Vegetable Boost:
Add chopped bell peppers, onions, or mushrooms for extra nutrition and texture. Veggies brighten up these muffins, enhancing both flavor and color. -
Cheese Swap:
Substitute feta with shredded cheese like cheddar or mozzarella for a melty delight. Experimenting with different cheese varieties can create a creamier muffin! -
Herb Infusion:
Toss in fresh herbs such as basil or parsley for an aromatic touch that elevates the dish. Fresh herbs bring brightness and a garden-fresh taste to your muffins. -
Protein-Packed:
Mix in cooked bacon, sausage, or turkey for a hearty, protein-rich breakfast. This addition makes the muffins filling and perfect for a busy morning. -
Vegan Option:
Use flax eggs instead of regular eggs for a plant-based twist. To make this swap, mix 1 tablespoon flaxseed meal with 2.5 tablespoons water for each egg. -
Spicy Kick:
Add diced jalapeños or a sprinkle of red pepper flakes for a little heat. These spicy notes can awaken your taste buds and add excitement to each bite! -
Sweet Surprise:
For a breakfast treat, incorporate diced apples or berries to add natural sweetness. Sweet additions make for a delightful contrast with the savory flavors of spinach and feta!
If you’re enjoying these muffins, you might also like to try some Healthy Strawberry Muffins or even explore the delightful world of Sugar Pumpkin Muffins. Each recipe offers a unique twist on wholesome flavor!
Make Ahead Options
These Classic Chocolate Chip Cookies are perfect for busy home cooks looking to save time! You can prepare the dough up to 3 days in advance by mixing all the ingredients and then refrigerating the dough wrapped tightly in plastic wrap. This not only allows the flavors to develop but also makes it easy to scoop and bake fresh cookies whenever the craving strikes. If you want to prep even further ahead, you can freeze the dough in individual scooped portions for up to three months. Just remember to thaw the dough in the refrigerator overnight before baking, and you’ll have fresh, warm cookies ready to enjoy with minimal effort on a busy day!
What to Serve with Classic Chocolate Chip Cookies?
Indulging in fresh-baked cookies opens up a world of delightful pairings that can elevate your experience.
-
Classic Milk: A tall glass of cold milk perfectly complements the gooey sweetness of the cookies, adding a refreshing contrast with every bite.
-
Creamy Vanilla Ice Cream: Transform your cookie into a decadent dessert with a scoop of vanilla ice cream, creating a luscious cookie sandwich.
-
Fresh Fruit Salad: Brighten up your plate with a medley of seasonal fruits. The natural sweetness and juicy textures provide a lovely balance to the rich cookies.
-
Coffee or Espresso: Brewed coffee or a shot of espresso brings out the deep flavors of the chocolate chips, making for a cozy and comforting pairing.
-
Chocolate Milkshake: For a fun twist, whip up a chocolate milkshake. The creaminess and chocolaty goodness will take the cookie experience to the next level.
-
Chopped Nuts: A bowl of lightly salted nuts provides a satisfying crunch that contrasts beautifully with the soft, chewy cookies.
These delightful options not only enhance your enjoyment but also transform a simple treat into a memorable gathering. The magic of homemade cookies truly shines when shared with complementary flavors!
Storage Tips for Classic Chocolate Chip Cookies
Room Temperature: Store cookies in an airtight container at room temperature for up to one week. This keeps them soft and fresh, ready for snacking anytime!
Freezer: For longer storage, freeze cookies in a single layer on a baking sheet for about 1 hour, then transfer to an airtight container or freezer bag. They can be frozen for up to three months.
Reheating: To enjoy a warm cookie, reheat in the microwave for about 10-15 seconds. This will revive the melty chocolate and soft texture, making them irresistible again!
Classic Chocolate Chip Cookies Recipe FAQs
What is the best way to select ripe ingredients?
Absolutely! For the best cookies, choose fresh ingredients with quality in mind. Your butter should be unsalted and at room temperature for easy creaming. When it comes to eggs, opt for the freshest you can find—these will enhance the cookies’ richness. If you’re going for chocolate chips, try to find ones that are semi-sweet or dark with a cocoa content of at least 60% for a richer taste.
How should I store my cookies after baking?
Very! Store your Classic Chocolate Chip Cookies in an airtight container at room temperature for up to one week. This method keeps them soft and delectable, ready for a snack anytime you please! If you want to keep them longer, consider freezing them—just remember to layer parchment paper between stacked cookies to keep them from sticking together.
Can I freeze the cookie dough for later baking?
Absolutely! Freezing your cookie dough is a fantastic option. After scooping it onto a baking sheet lined with parchment paper, freeze the dough balls for about 1 hour until solid. Then, transfer them to an airtight container or freezer bag. This way, they can be stored for up to three months! When you’re ready to bake, preheat your oven and add a couple of extra minutes to the baking time.
What should I do if my cookies are too flat?
Oh no! If your cookies come out too flat, there are a couple of things to check. Firstly, ensure your baking soda is fresh—old leavening agents can affect the rise. Also, try chilling the dough for at least 30 minutes before baking next time. This step solidifies the fats and results in a puffier cookie. Lastly, avoid over-creaming the butter and sugars, as this can lead to excess air, which causes collapsing during baking.
Are these cookies safe for people with dietary restrictions?
Very! To accommodate specific dietary needs, you can adapt the recipe easily. For a gluten-free alternative, swap all-purpose flour with a gluten-free flour blend. For a dairy-free option, substitute butter with coconut oil. If you have egg allergies, using flax eggs (1 tablespoon flaxseed meal + 2.5 tablespoons water per egg) works beautifully. Just ensure to communicate any changes if serving to others, to keep everyone safe!
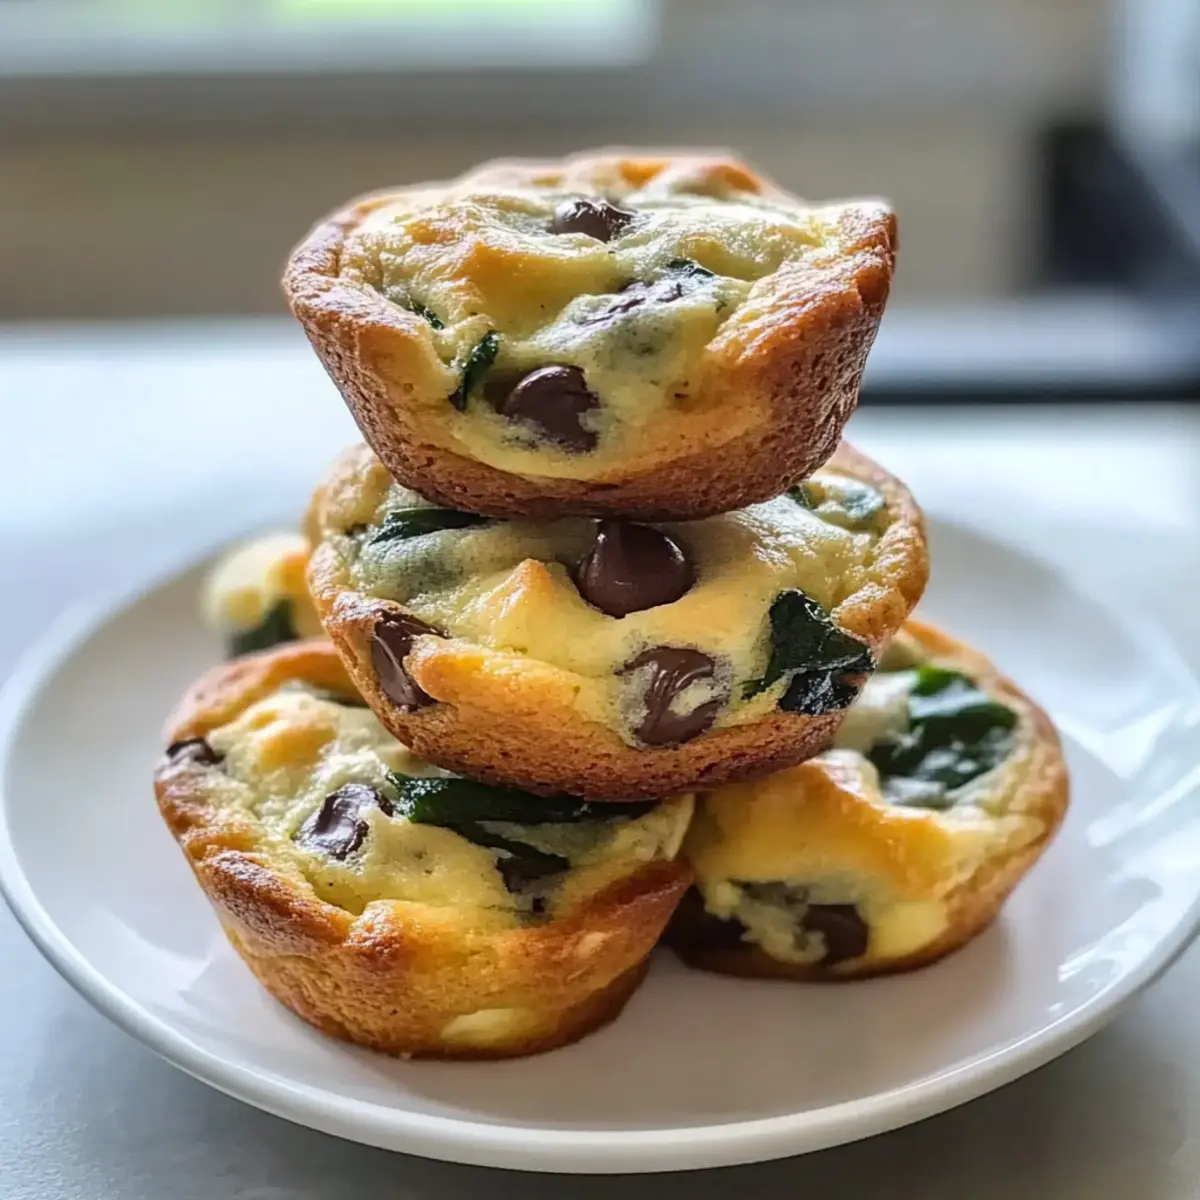
Quick & Healthy Egg Muffins with Spinach and Feta Bliss
Ingredients
Equipment
Method
- Preheat your oven to 350°F (175°C) and grease or line a muffin tin.
- In a mixing bowl, whisk together the eggs and milk until well combined.
- Stir in the chopped spinach, crumbled feta, salt, pepper, garlic powder, and onion powder.
- Pour the mixture evenly into the muffin tin cups, filling each about 2/3 full.
- Bake for 18-20 minutes or until the egg muffins are set and lightly golden.
- Allow to cool for a few minutes before removing from the tin.
- Enjoy warm or store in an airtight container in the refrigerator.
Leave a Reply