There’s nothing quite like the festive aroma wafting through your kitchen as you whip up a batch of treats that bring joy to family and friends. My Easy Christmas Cake Pops are a delightful twist on traditional holiday desserts, perfect for celebrating the season with style. Not only are these customizable pops a breeze to make—allowing you to tailor flavors and colors to suit every taste—but they’re also a budget-friendly option that guarantees smiles all around. With minimal baking skills required, these bite-sized wonders are ideal for everyone, from seasoned bakers to newbies just entering the kitchen. Ready to discover how to create these Delicious Christmas Cake Pops to Sweeten Your Holidays? Let’s dive in and make some holiday magic together!
Why Choose These Cake Pops?
Simplicity at Its Best: These delightful pops require minimal effort, making them perfect for busy holiday schedules without compromising on flavor.
Customizable Fun: You can tailor each cake pop with unique coatings and toppings—think colorful sprinkles or rich chocolate—ensuring there’s a variety for everyone.
Budget-Friendly Treat: Delight your guests without breaking the bank as these cake pops are made from affordable ingredients, proving that festive doesn’t have to mean expensive.
Crowd-Pleaser: Their bite-sized nature makes them the ideal party treat, easy to enjoy for both kids and adults at any holiday gathering.
Perfect for All Skill Levels: From novice bakers to confident chefs, everyone can create these cake pops with ease. They’re a fantastic way to introduce baking to the curious cook in your life!
So, if you love creative and delicious treats, this recipe is a must-try. Pair your cake pops with a warm drink, or explore more festive options like Christmas Pancakes Holiday that your guests will adore!
Delicious Christmas Cake Pops Ingredients
For the Cake Base
- Vanilla Cake Mix – A quick foundation for the cake pops; using a high-quality mix enhances the flavor.
- Eggs – Acts as a binding agent; be sure to follow the package instructions for preparation.
- Oil – Provides moisture and richness; refer to the package for the correct amount.
- Water – Necessary for preparing the cake mix as per the instructions.
For the Mixture
- Vanilla Frosting – Binds cake crumbs together and adds sweetness; you can also try chocolate or cream cheese frosting for a twist.
For the Coating
- White Chocolate or Vanilla Candy Melts (12 ounces) – The glossy exterior gives the pops an inviting look; dark chocolate or colored candy melts can also be used for variety.
For Assembly
- Cake Pop Sticks (24 pieces) – Essential for holding your pops; ensure they are food-safe.
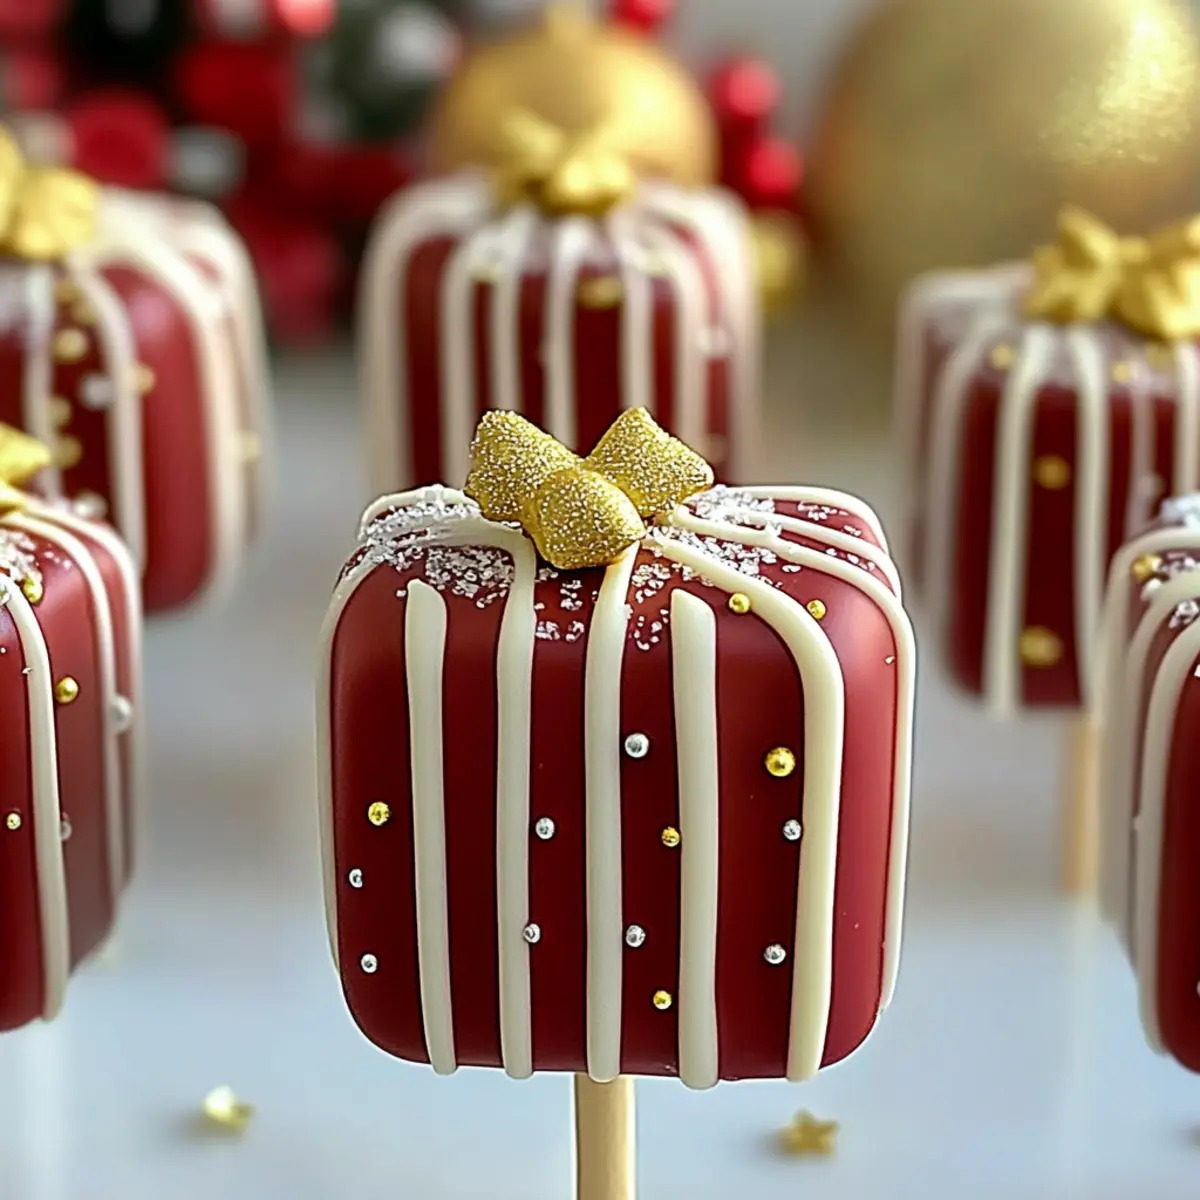
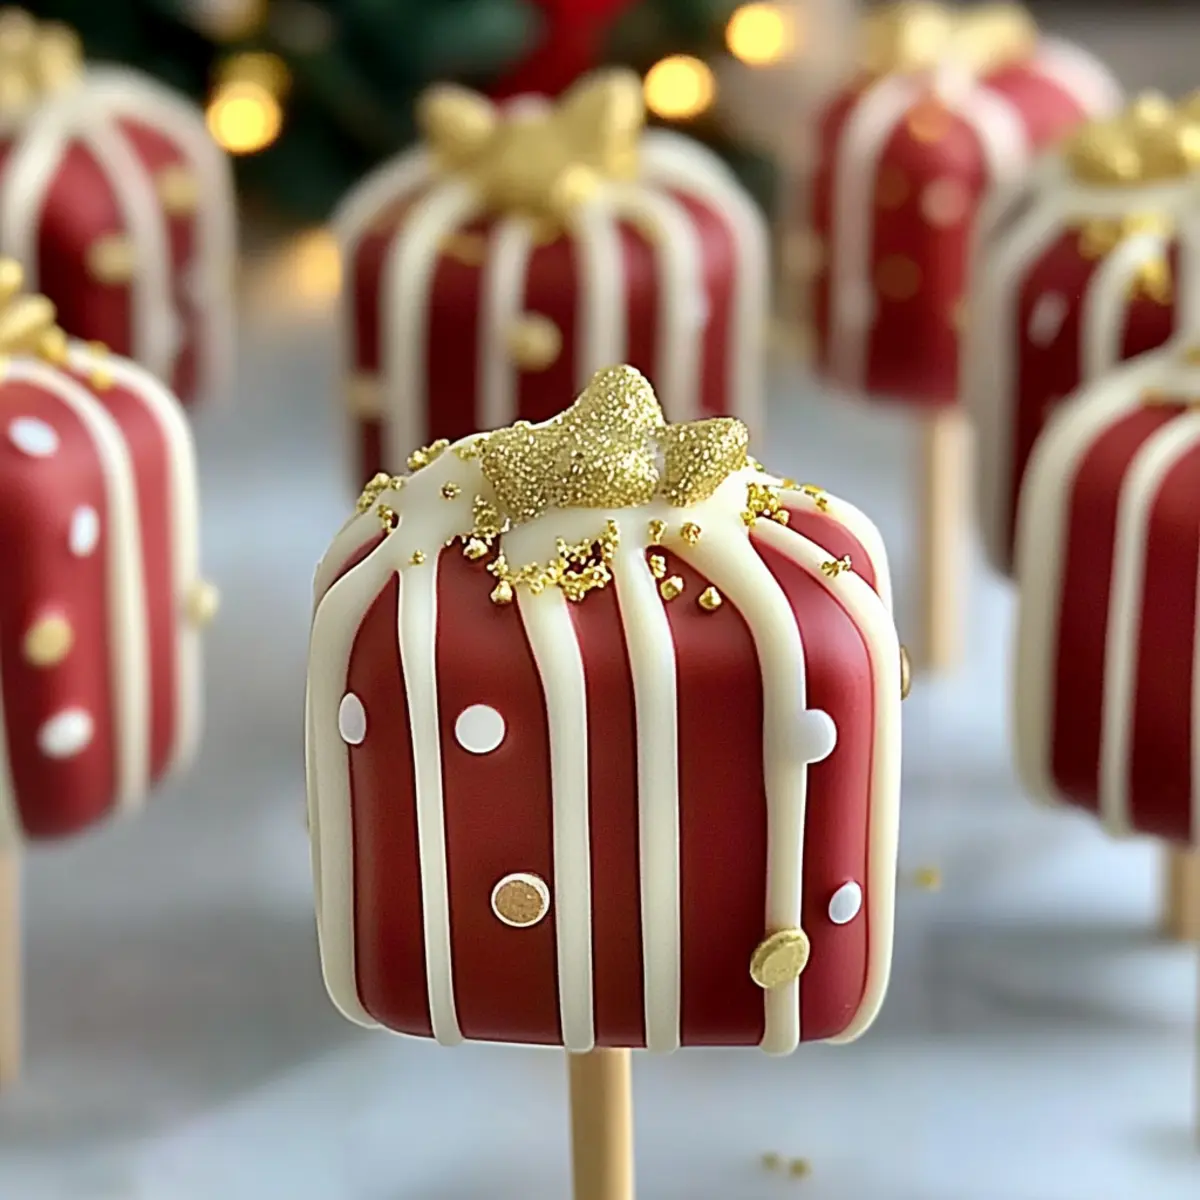
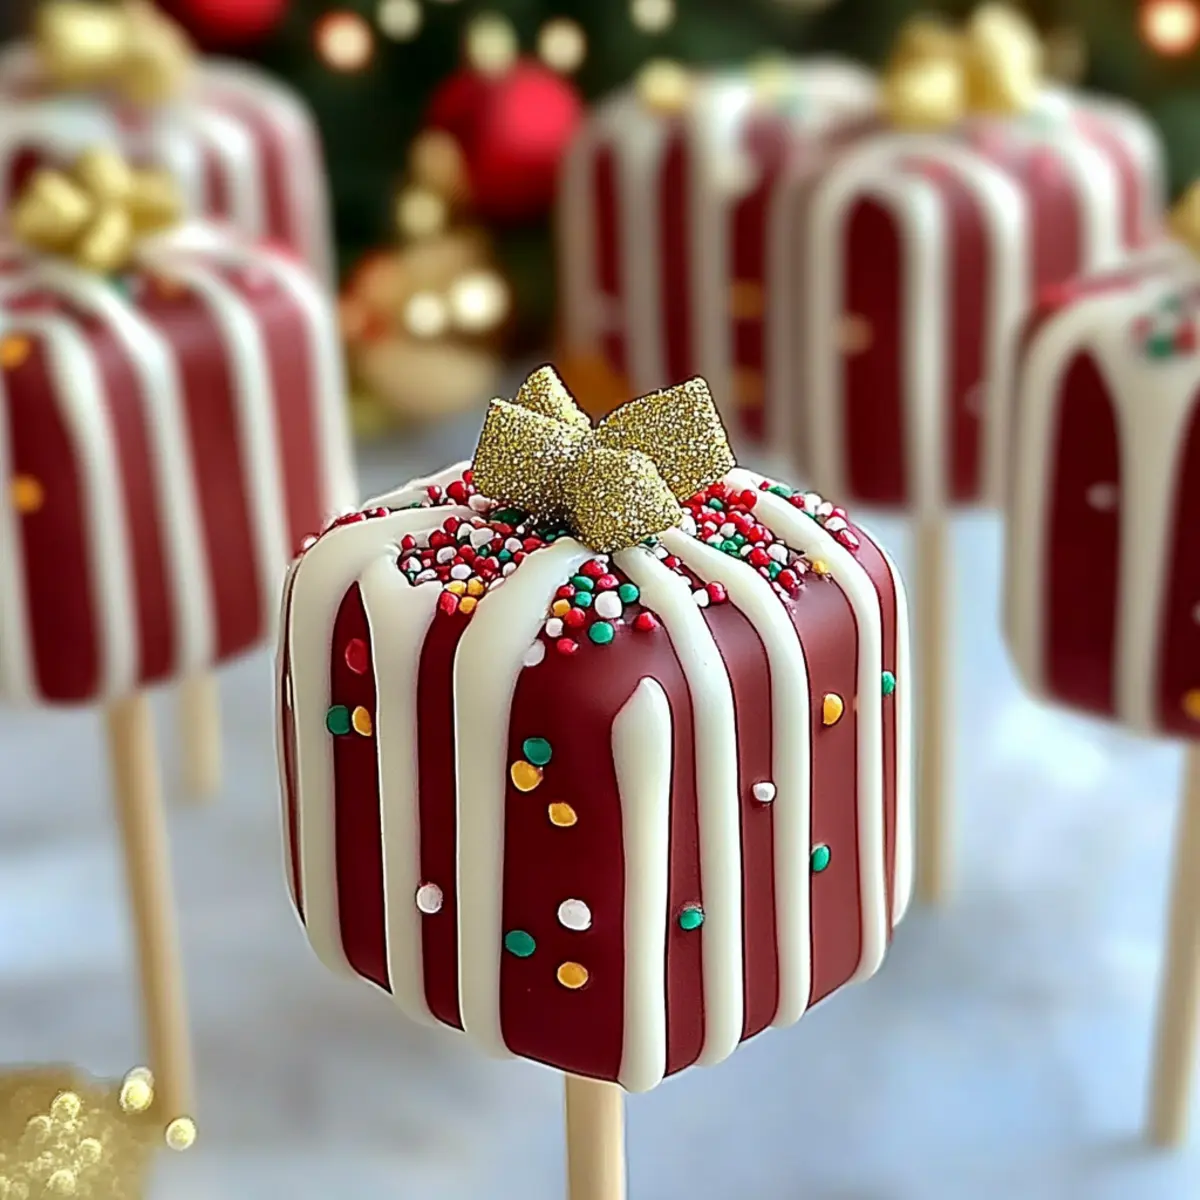
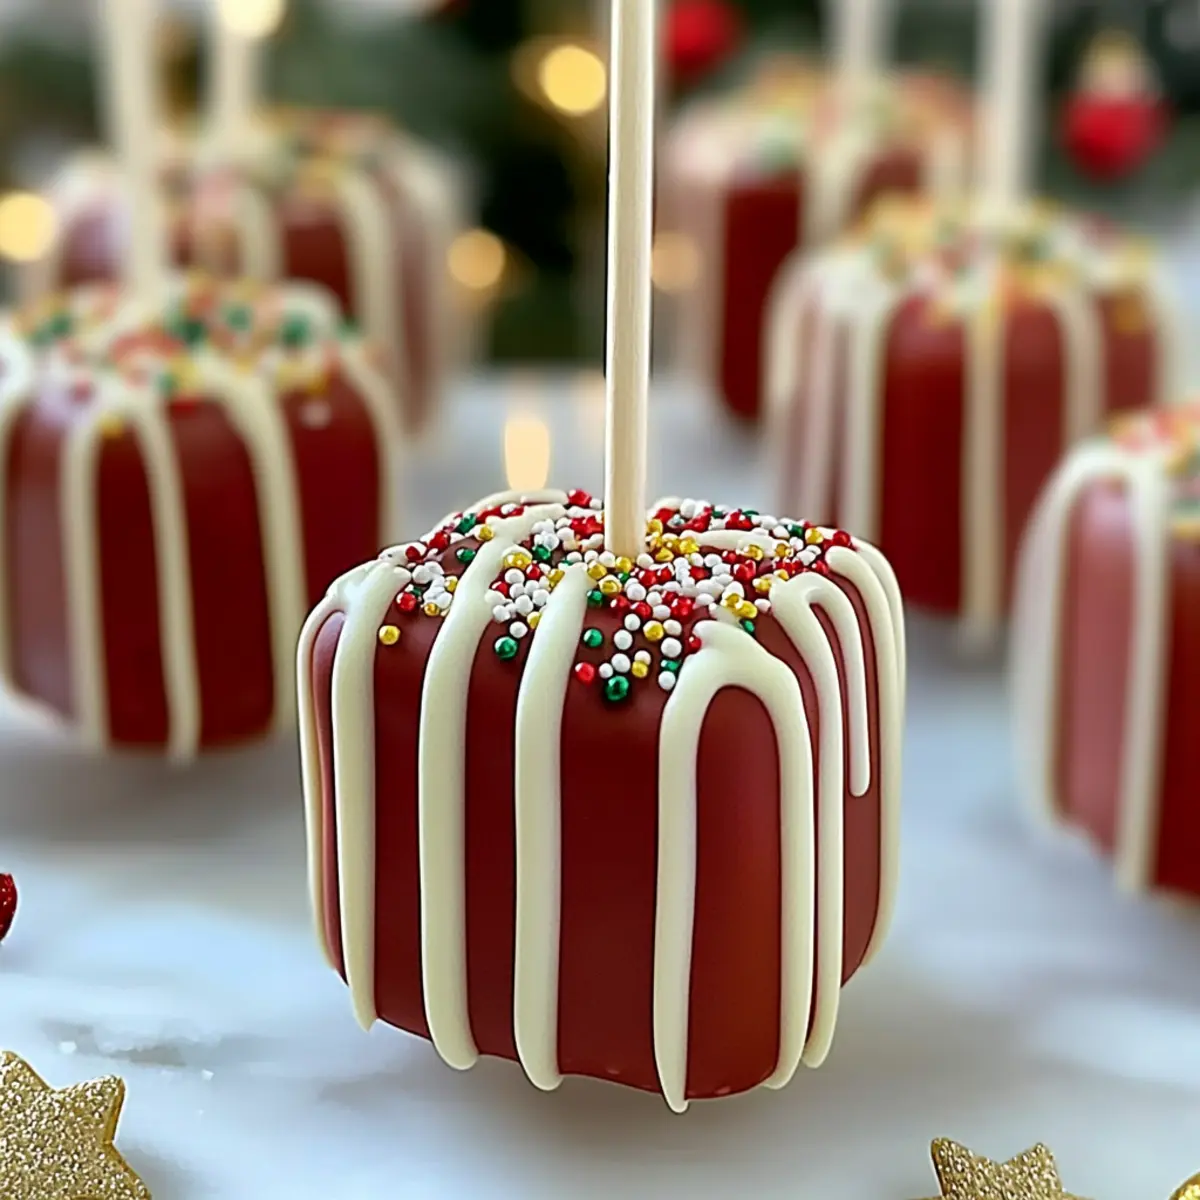
- Sprinkles or Toppings – For added festive flair; variations can include crushed peppermint or edible glitter to match the holiday spirit.
Get ready to sweeten your holidays with these delicious Christmas cake pops!
Step‑by‑Step Instructions for Delicious Christmas Cake Pops to Sweeten Your Holidays
Step 1: Bake the Cake
Preheat your oven to 350°F (175°C). Prepare the vanilla cake mix according to the package instructions, combining eggs, oil, and water. Pour the batter into a greased 9×13 inch baking pan and bake for 25-30 minutes. The cake is ready when a toothpick inserted in the center comes out clean. Once baked, allow the cake to cool completely on a wire rack.
Step 2: Crumble the Cake
Once the cake has cooled, transfer it to a large mixing bowl. Using your hands or a fork, crumble the cake into fine pieces until it resembles coarse crumbs. This step is crucial for creating the perfect texture for your Delicious Christmas Cake Pops. Aim for uniformity to ensure even binding in the next step.
Step 3: Mix with Frosting
Add ½ cup of vanilla frosting to the crumbled cake and mix thoroughly until a dough-like consistency forms. If the mixture appears too dry or crumbly, gradually incorporate more frosting until it holds together well without being overly sticky. This binding step is essential to form the cake pop shape, so ensure it’s well-mixed.
Step 4: Shape the Pops
With clean hands, scoop out small portions of the mixture and roll them into uniform one-inch balls. You should aim for about 24 cake pops. Place each ball on a parchment-lined baking sheet, allowing some space between them. This shaping process is important for the aesthetics and enjoyable bites of your Delicious Christmas Cake Pops.
Step 5: Insert Sticks
For added stability, melt a small portion of the candy melts in the microwave for about 30 seconds, stirring until smooth. Dip the ends of your cake pop sticks into the melted candy, then gently insert them halfway into each cake ball. This helps to secure the sticks and is a crucial step before chilling to maintain shape. Chill the pops in the refrigerator for 1 hour.
Step 6: Coat Cake Pops
After chilling, melt the remaining candy melts in the microwave, stirring every 30 seconds until fully melted and smooth. Dip each chilled cake pop into the melted candy, ensuring it’s thoroughly coated. Allow excess coating to drip off. Work quickly to add your choice of sprinkles or toppings before the coating sets, making your Delicious Christmas Cake Pops festive and vibrant.
Step 7: Dry
Stand the coated cake pops upright in a foam block or cake pop stand, ensuring they don’t touch each other. Let them set at room temperature for about 30 minutes until the candy coating hardens. This final step is crucial for ensuring your cake pops retain their shape, making them picture-perfect for your holiday celebrations.
What to Serve with Easy Christmas Cake Pops?
Creating a cozy holiday atmosphere is all about the right pairings that enhance those delightful bites of sweet joy.
-
Creamy Hot Cocoa: This rich, warm drink is a perfect companion to the sweet flavors of cake pops, ensuring a comforting treat.
-
Spiced Apple Cider: The warm spices in cider bring out the festive essence of your cake pops, making every bite feel like a holiday hug.
-
Gingerbread Cookies: Soft and spicy, they complement the sweetness of cake pops while adding a delightful crunch to your dessert spread.
-
Vanilla Ice Cream: The cool creaminess offers a great contrast to the warm flavors and texture of the cake pops, creating a delightful dessert duo.
-
Cheesecake Bites: These bite-sized delights provide a contrasting texture to the cake pops, and their creamy richness balances the sweetness.
-
Festive Fruit Platter: Fresh fruit adds refreshing bursts of flavor and color to the table, enhancing the holiday appeal while providing a healthier option.
-
Peppermint Hot Chocolate: The festive minty flavor enriches the cake pop experience, adding a cool twist to the warm sensations of the holidays.
-
Sparkling Cranberry Punch: Bright, fizzy, and festive, this drink enhances holiday cheer while perfectly matching the festive spirit of your cake pops.
-
Sugar Cookies: Their soft, buttery flavor and a hint of vanilla echo the sweet notes of the cake pops, providing a charming holiday treat.
-
Chocolate Fondue: A fondue station invites creativity—dippers like strawberries or pretzels elevate the dessert experience alongside your cake pops.
Storage Tips for Delicious Christmas Cake Pops
Room Temperature: Store your cake pops in an airtight container at room temperature for up to 2 days to keep them fresh and delicious.
Fridge: If you need to keep leftovers, refrigerate cake pops in an airtight container for up to 1 week. This will maintain their moisture and flavor.
Freezer: For longer storage, individually wrap each cake pop in plastic wrap and place them in a freezer-safe bag; they can be frozen for up to 3 months. Allow to thaw in the fridge before enjoying.
Reheating: There’s no need to reheat cake pops; simply thaw and enjoy! The texture and taste will still remain delightful for your festive gatherings.
Expert Tips for Decorating Christmas Cake Pops
-
Stick Stability: Dip the ends of sticks in melted chocolate before inserting to reinforce adherence and avoid pops sliding off after coating.
-
Chill Well: Don’t rush the chilling step after inserting sticks; proper chilling helps maintain the shape and integrity of your Delicious Christmas Cake Pops.
-
Coating Techniques: For a smooth finish, tap gently after dipping to remove excess coating; this prevents drips and achieves a professional look.
-
Creative Combo: Mix and match toppings—such as colorful sprinkles, crushed nuts, or coconut—to create a vibrant display that delights the eyes and taste buds.
-
Flavor Varieties: Experiment with flavored frostings and cake mixes for a unique twist; try lemon or chocolate cake to add versatility to your festive cake pops.
Make Ahead Options
These Easy Christmas Cake Pops are perfect for busy home cooks looking to save time during the holiday rush! You can prepare the cake base and crumble it up to 24 hours in advance, ensuring you store it in an airtight container to maintain freshness. Additionally, you can roll the cake mixture into balls and chill them for up to 3 days before coating. Just remember to refrigerate the pops after inserting the sticks to keep them firm. When you’re ready to serve, simply melt the candy coating and dip each ball, adding festive toppings for a delightful finishing touch. This way, your Delicious Christmas Cake Pops are just as delicious and ready to impress with minimal last-minute effort!
Delicious Christmas Cake Pops Variations
Feel free to let your creativity shine as you customize these delightful cake pops for your next holiday celebration!
-
Gluten-Free: Substitute the vanilla cake mix with a gluten-free blend, ensuring everyone can enjoy the fun without worry. Use certified gluten-free frosting as well for a perfect match.
-
Vegan: For a plant-based twist, choose a vegan cake mix and replace the eggs with apple sauce or flaxseed meal mixed with water. Opt for dairy-free frosting and candy melts to keep things vegan-friendly.
-
Chocolate Lovers: Switch to a chocolate cake mix for a rich, decadent flavor that pairs wonderfully with chocolate or white candy melts. Add chocolate sprinkles for an extra boost!
-
Flavor Infusion: Enhance your cake pops with extracts—add almond extract for a unique flavor or peppermint extract for a refreshing holiday twist. A dash of cinnamon could elevate the festive spirit too!
-
Fruity Surprise: Fold in small bits of dried fruits like cranberries or chopped cherries into the cake mixture. They’ll add a delightful burst of flavor and color to each bite!
-
Nutty Touch: Incorporate finely chopped nuts, such as walnuts or almonds, into the cake mixture for added texture and flavor. Drizzle melted chocolate on top for a crunchy finish.
-
Fun Toppings: Why not go beyond sprinkles? Use crushed cookies, coconut flakes, or even edible glitter for a dazzling look. Your cake pops will surely be a visual and tasty treat!
-
Heat It Up: For added excitement, sprinkle a pinch of cayenne pepper or chili powder in the coating. This unexpected kick will spice things up and delight adventurous taste buds.
For even more festive joy, don’t forget to explore Christmas Cupcakes Festive and Christmas Tree Cupcake recipes that will complement your cake pops perfectly!
Easy Christmas Cake Pops Recipe FAQs
How do I choose the right vanilla cake mix?
Absolutely! Opt for a higher-quality vanilla cake mix as it profoundly enhances the flavor and texture of your cake pops. Look for mixes that contain real vanilla and avoid those with artificial flavoring. This small selection tweak can elevate your Delicious Christmas Cake Pops to new heights!
What’s the best way to store leftover cake pops?
Very simple! You can store your cake pops in an airtight container at room temperature for 2 days. If you want to keep them fresh for a longer period, refrigerate them for up to 1 week. Just make sure the container is well-sealed to maintain moisture and avoid drying out.
Can I freeze the cake pops, and if so, how?
Definitely! For longer storage, wrap each cake pop individually in plastic wrap. Place them in a freezer-safe bag and they’ll last for up to 3 months. When you’re ready to enjoy them, simply thaw the pops in the refrigerator overnight. No need to reheat—just enjoy them as they are!
What should I do if the cake pop mixture is too dry?
If your mixture seems dry, don’t worry! Just knead in more frosting gradually until you reach a dough-like consistency. Start with an additional tablespoon of frosting and mix well; you’ll want the mixture to hold together without being overly sticky. Keep experimenting until it feels just right!
Are these cake pops suitable for people with dietary restrictions?
Absolutely! You can easily make these Delicious Christmas Cake Pops gluten-free by using a gluten-free vanilla cake mix and opting for gluten-free toppings. For those avoiding dairy, use vegan frosting and dairy-free candy melts. This way, you can ensure everyone enjoys a sweet treat during the holidays!
Delicious Christmas Cake Pops to Sweeten Your Holidays Fun
Ingredients
Equipment
Method
- Preheat your oven to 350°F (175°C). Prepare the vanilla cake mix according to the package instructions, combining eggs, oil, and water. Pour the batter into a greased 9x13 inch baking pan and bake for 25-30 minutes. Allow the cake to cool completely on a wire rack.
- Once the cake has cooled, crumble it into fine pieces in a large mixing bowl until it resembles coarse crumbs.
- Add ½ cup of vanilla frosting to the crumbled cake and mix until a dough-like consistency forms.
- Roll small portions of the mixture into one-inch balls, placing each ball on a parchment-lined baking sheet.
- Melt a small portion of the candy melts and dip the ends of the sticks into the melted candy before inserting them halfway into each cake ball. Chill in the refrigerator for 1 hour.
- After chilling, melt the remaining candy melts, dip each chilled cake pop into the melted candy, and add your choice of sprinkles or toppings.
- Stand the coated cake pops upright in a foam block and let them set at room temperature for about 30 minutes.
Leave a Reply