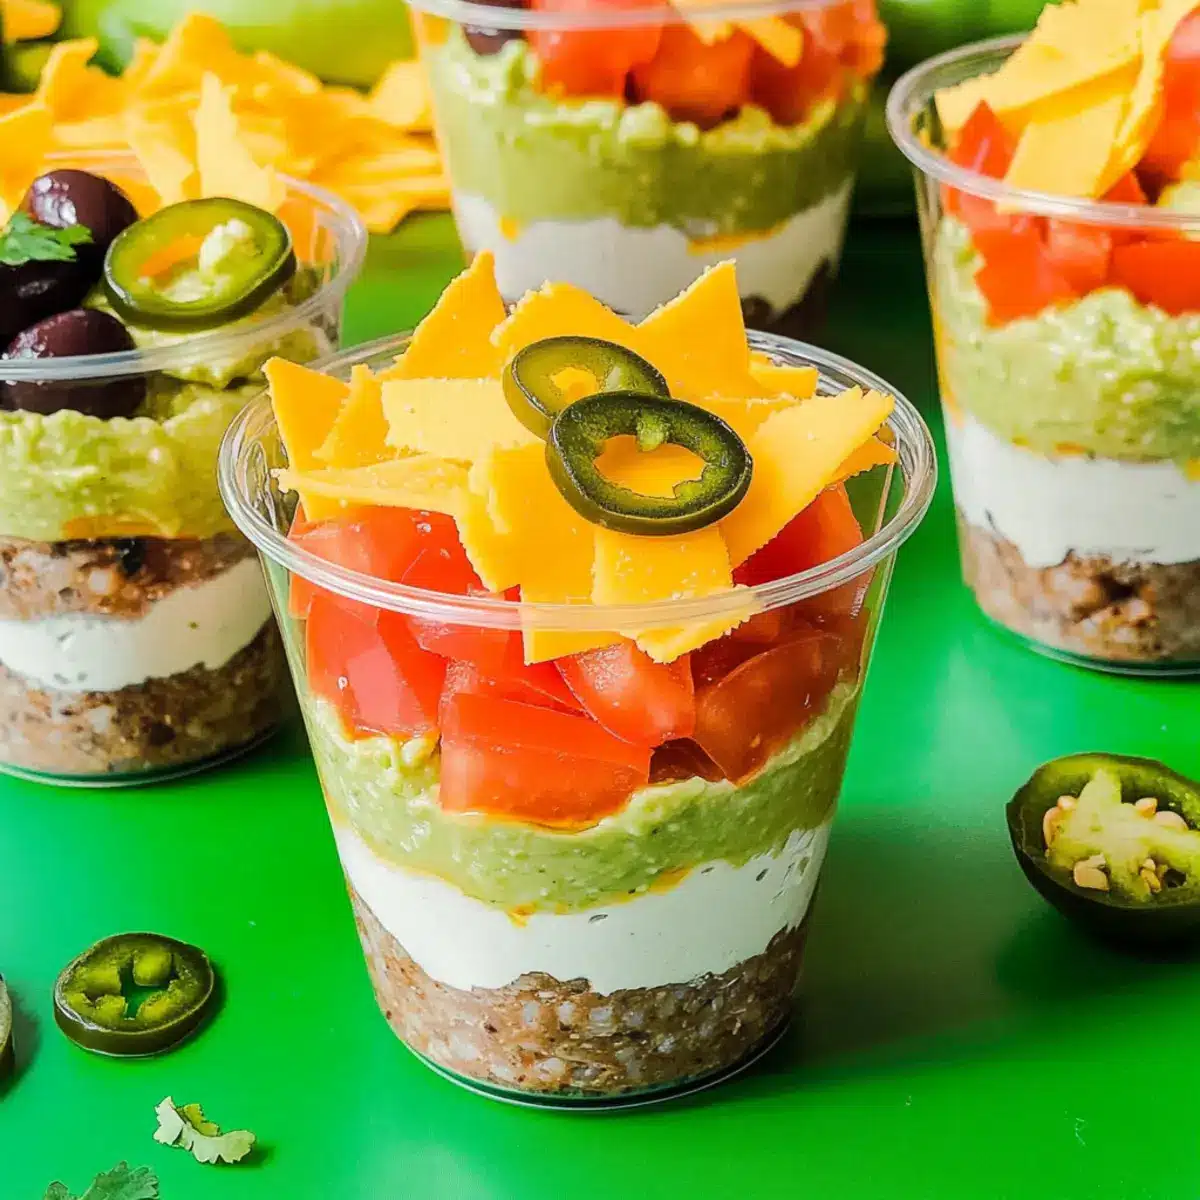
As I stood in my kitchen, the flavors of Mexico swirled around me, reminding me why I love homemade food so much. Enter these Mexican 7 Layer Dip Cups, a delightful twist on the classic that will not only catch your eye but also steal the show at any gathering. These vibrant, customizable appetizers make for easy serving, and their layered presentation is sure to impress your friends and family. With each cup, you’ll enjoy the perfect blend of creamy refried beans, zesty guacamole, and vibrant toppings—all in a single scoop! On top of being a crowd-pleaser, they’re great for any occasion, from taco nights to game days. Who wouldn’t want to dig into a cup bursting with flavors and textures? Ready to elevate your next event with these delicious Mexican dip cups? Let’s get started!
Why will you love these dip cups?
Customization at its finest: Each cup can be tailored to your taste, allowing you to swap ingredients easily—try adding ground turkey or spicy salsa for a twist!
Eye-catching presentation: These vibrant layers not only look appealing but also make serving a breeze—no more messy platters!
Quick to prepare: You can whip these up in under 30 minutes, making them ideal for last-minute gatherings or casual get-togethers.
Bold flavors: The combination of creamy refried beans and zesty guacamole, topped with fresh vegetables, brings an explosion of taste in every bite.
Crowd favorite: From game days to parties, everyone will rave about these flavorful cups; they’re sure to become a staple in your appetizer repertoire!
Pair your dip cups with a refreshing drink, such as a margarita to complement the flavors!
Mexican 7 Layer Dip Ingredients
These layers of flavor will have your guests coming back for more!
For the Base
- Refried Beans – A creamy, savory foundation; consider using black bean dip for a lighter twist.
- Cream Cheese – Adds a rich creaminess that harmonizes the layers; let it soften for easy mixing or opt for dairy-free cream cheese for a vegan version.
For the Layers
- Guacamole – Refreshing and creamy; you can use store-bought for speed or whip up your own for that personal touch.
- Sliced Black Olives – Briny and salty; feel free to skip them if olives aren’t your thing.
- Sliced Tomatoes – Juicy and fresh; pico de gallo makes an excellent spicy substitute if you want to kick it up a notch.
- Sliced Jalapeños – Adds a spicy crunch that you can adjust to your taste; swap with sweet bell peppers for a milder experience.
- Cheddar Cheese – Offers sharpness and creaminess; dairy-free cheese works well for those looking for vegan alternatives.
For Serving
- Nachos or Tortilla Chips – Perfect vehicle for dipping; baked chips provide a lighter option without sacrificing crunch.
With these Mexican 7 Layer Dip Cups, you’re on your way to an irresistible appetizer that is as delightful to look at as it is to eat!
Step‑by‑Step Instructions for Mexican 7 Layer Dip Cups
Step 1: Prepare the Bean Mixture
In a medium bowl, combine 1 cup of refried beans with 8 ounces of softened cream cheese. Use a hand mixer or a sturdy spatula to blend until the mixture is smooth and creamy, about 2-3 minutes. Make sure there are no lumps to ensure a delightful texture for your Mexican 7 layer dip cups. Once combined, set this mixture aside and let the flavors meld while you prepare the next layer.
Step 2: Chill the Mixture (Optional)
For a refreshing taste, cover the bean and cream cheese mixture with plastic wrap and refrigerate for about 1 hour. This step is optional but highly recommended, as chilling helps enhance the flavor and creates a crisper contrast in temperature. If you’re in a hurry, you can skip this step and assemble the dip cups right away, but the chill adds a refreshing quality.
Step 3: Layer the Ingredients
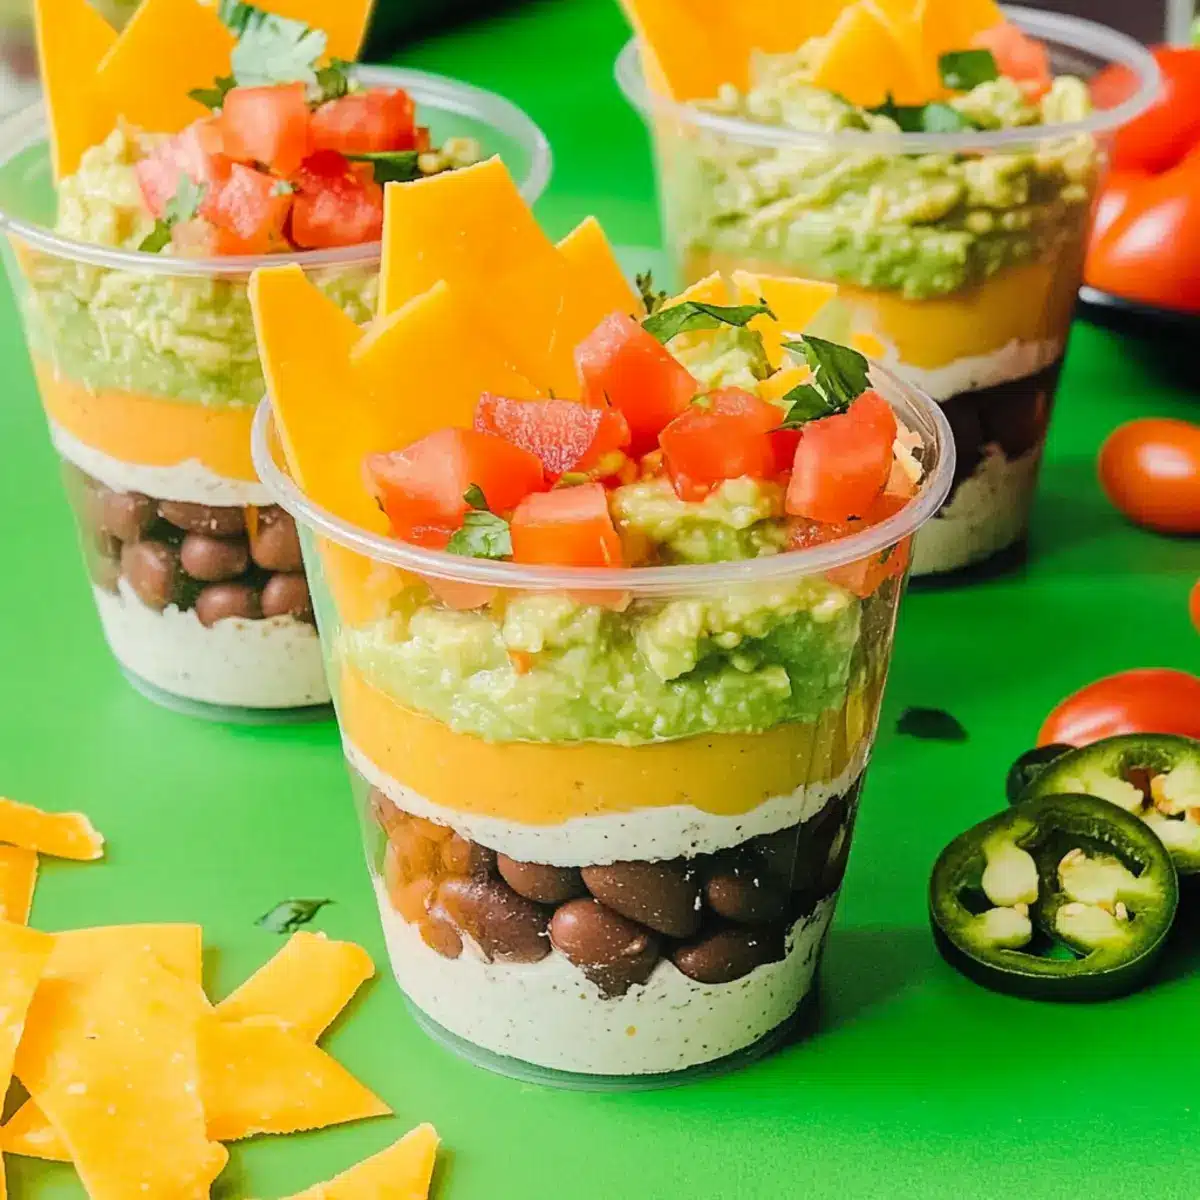
Begin by assembling your Mexican 7 layer dip cups. Take small cups or bowls and spoon about 2 tablespoons of the creamy bean mixture into each cup, spreading it evenly. The key is to create a solid base that holds up under the weight of the toppings, providing a delicious foundation for your layers.
Step 4: Add Guacamole
Next, add approximately 3 tablespoons of guacamole on top of the bean layer in each cup. Make sure to spoon the guacamole gently so it layers nicely without mixing too much with the bean mixture. The creamy guacamole adds a fresh taste and vibrant color that elevates your dip cups.
Step 5: Incorporate Sour Cream
Now, dollop around 2 tablespoons of sour cream over the guacamole layer in each cup. This layer not only adds creaminess but also balances the flavors beautifully. Spread it evenly, making sure it slightly overlaps with the guacamole for a cohesive look in your Mexican 7 layer dip cups.
Step 6: Sprinkle the Toppings
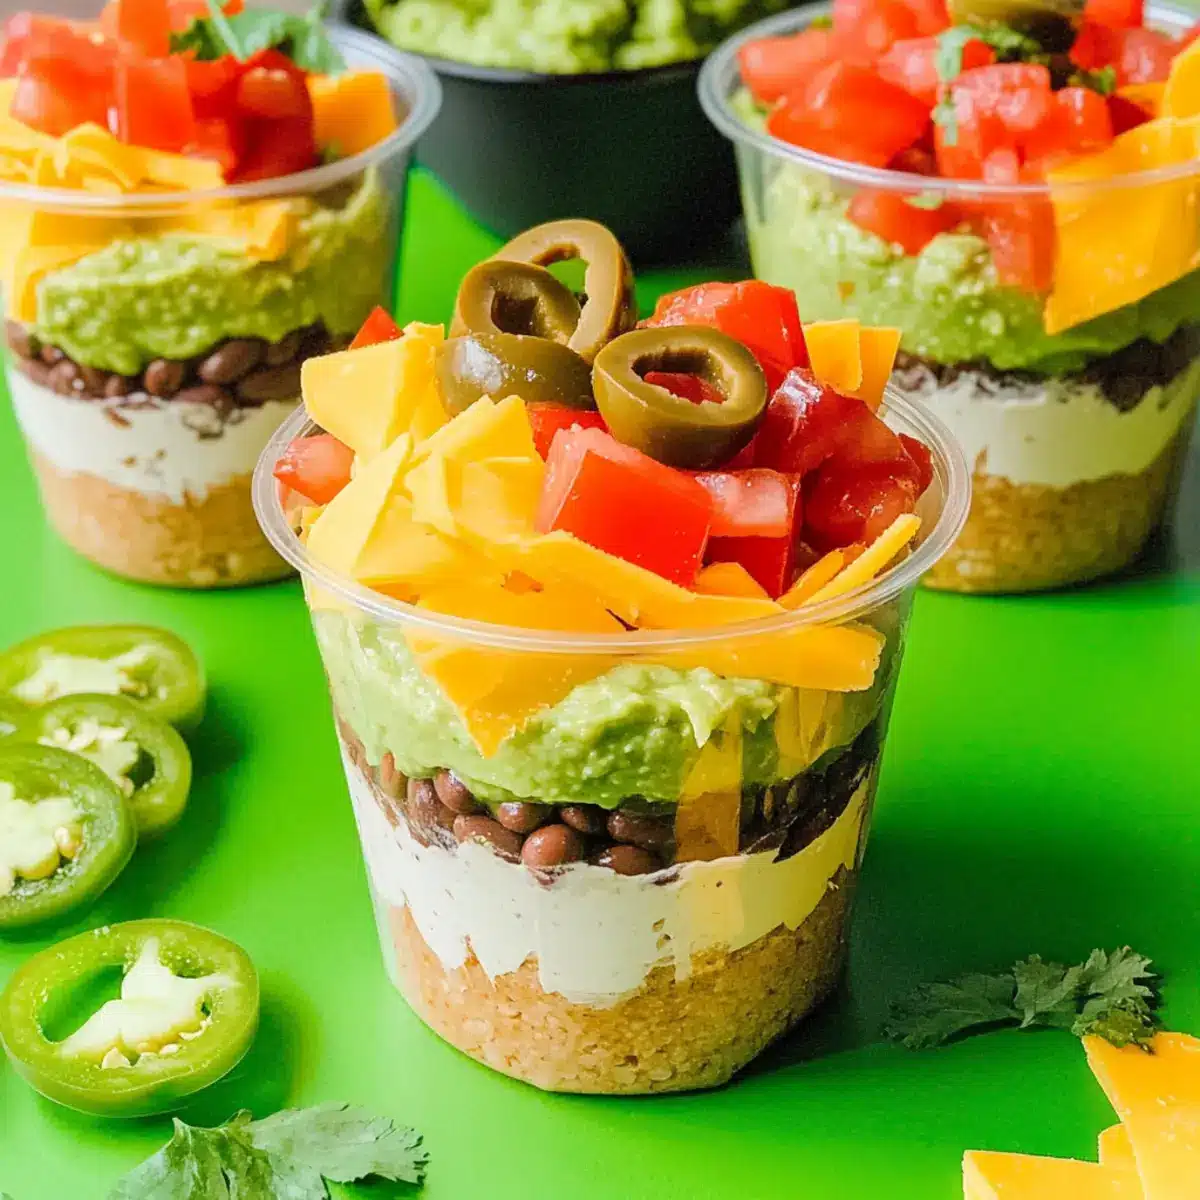
Sprinkle about 1/4 cup of shredded cheddar cheese over the sour cream layer in each cup, ensuring an even distribution for a flavorful bite. Follow up by adding sliced black olives, diced tomatoes, and a slice of jalapeño on top. These toppings add vibrant colors and textures, making each cup visually appealing and enjoyable.
Step 7: Garnish with Chips
To finish off your Mexican 7 layer dip cups, garnish with a few nacho chips or tortilla chips placed around the top of each cup. This not only makes for a great presentation but also gives your guests a wonderful option for scooping and enjoying the dip. The crunchy chips provide an excellent contrast to the creamy layers below.
Step 8: Serve or Store
You can serve your Mexican 7 layer dip cups immediately, or if you prefer, cover them and refrigerate until you’re ready to enjoy. They can be stored in the fridge for up to 2-3 days in an airtight container, making them a perfect make-ahead appetizer for any gathering.
What to Serve with Mexican 7 Layer Dip Cups?
Let’s create the ultimate spread to complement your vibrant Mexican 7 Layer Dip Cups, turning a simple gathering into a culinary fiesta!
-
Crispy Tortilla Chips: Perfect for pairing, they offer a satisfying crunch that enhances the creamy layers of the dip. Guests can dip away!
-
Tasty Salsa Verde: The tangy freshness of salsa verde cuts through the richness of the dip, adding a delightful zing with each bite.
-
Cherry Tomato Salad: A light, vibrant salad adds a refreshing contrast; toss with olive oil, lime, and cilantro for a zesty kick.
-
Guava Margaritas: These sweet and fruity drinks not only captivate the palate but also perfectly balance the flavors of the dip.
-
Cilantro Lime Rice: This fluffy side evokes flavors of a classic Mexican meal; its zesty essence brings harmony to the table.
-
Mexican Street Corn: Sweet corn tossed with lime, mayo, and Cotija cheese makes for an irresistible side—rich and creamy yet refreshingly bright.
-
Churros for Dessert: End the meal on a sweet note with crispy, cinnamon-sugar churros; their warm crunch will leave your guests swooning!
Remember, with these flavorful pairings, you’ll transform your gathering into a memorable celebration of taste and joy!
Mexican 7 Layer Dip Cups Variations
Feel free to let your creativity shine with these delightful customization options that will take your dip cups to the next level!
-
Dairy-Free: Swap cream cheese and cheddar for dairy-free alternatives to create a vegan-friendly version without sacrificing flavor. The taste remains rich and creamy.
-
Spicy Kick: Add a layer of spicy salsa or replace jalapeños with sliced serrano peppers for an extra burst of heat. Your taste buds will enjoy the fiery touch!
-
Protein-Packed: Mix in cooked ground turkey or tofu crumbles between the layers for a heartier option that elevates the nutritional value. It’s perfect for turning these cups into a meal.
-
Fresh Herbs: Sprinkle chopped cilantro or green onions on top for a vibrant flavor boost that complements the richness of the dip perfectly. Fresh herbs will liven up your presentation!
-
Bean Variety: Use a mix of refried pinto and black beans for a colorful layered effect. This combination adds depth of flavor and makes each bite a little more exciting.
-
Guacamole Twist: Incorporate a hint of lime juice or diced mango into your guacamole for a zesty sweetness that pairs beautifully with the savory layers. Your guests will love this refreshing twist!
-
Crunchy Texture: Add a layer of crushed tortilla chips inside the cups for an added crunch that invites a delightful contrast to the creamy ingredients. It’s a simple switch that changes the game!
-
Sweet Heat: Top with a drizzle of honey or agave mixed with sriracha to achieve the perfect balance between sweet and spicy. This unique finishing touch will have everyone asking for more!
For more delicious inspiration, consider trying these Feta Cheese Dip or upgrade your flavor profile with the delightful Falafel Spiced Turkey for a different indulgence!
Make Ahead Options
These Mexican 7 Layer Dip Cups are a fantastic option for meal prep enthusiasts looking to save time! You can prepare the refried bean and cream cheese mixture up to 24 hours in advance, refrigerating it in an airtight container to maintain its creamy texture. Additionally, chop your veggies and mix the guacamole ahead of time, storing them separately in the fridge (to prevent browning). When you’re ready to serve, simply layer your components in cups and add the toppings right before your gathering. This keeps everything fresh and colorful, ensuring that your dip cups are just as delicious as when freshly made!
Expert Tips for Mexican 7 Layer Dip Cups
-
Use Room Temperature Cream Cheese: This ensures smooth mixing with the refried beans, preventing lumps that can disrupt the creamy texture of your Mexican 7 layer dip cups.
-
Chill for Enhanced Flavor: Allow the bean and cream cheese mixture to chill for at least one hour. It enhances the flavors and adds a refreshing quality to each bite.
-
Layer Neatly: Use a piping bag for layering to achieve a visually appealing presentation. This also speeds up the process and makes assembly easier.
-
Customize Wisely: Feel free to swap ingredients to suit your taste; just ensure that you keep the proportions similar for balance.
-
Serve Immediately for Best Texture: While these dip cups can be made in advance, they are best enjoyed fresh, maintaining their delightful textures.
Storage Tips for Mexican 7 Layer Dip Cups
Fridge: Store leftover dip cups in an airtight container for up to 2-3 days. Keep the chips separate to maintain their crunch and prevent them from getting soggy.
Make-Ahead: Prepare the layers in advance and store each component in airtight containers. Assemble the cups just before serving to keep everything fresh and flavorful.
Freezer: For longer storage, you can freeze the bean and cream cheese mixture separately for up to 2 months. Thaw in the fridge overnight before using, and layer fresh ingredients before serving.
Reheating: If you prefer warm layers, gently reheat the bean mixture in the microwave before assembling your Mexican 7 layer dip cups for a comforting twist.
Mexican 7 Layer Dip Cups Recipe FAQs
How should I choose ripe avocados for guacamole?
Absolutely! When selecting avocados, look for ones that are slightly soft to the touch but not mushy. A perfectly ripe avocado will give gently when pressed, and the skin should have a rich green hue without dark spots. If they’re too firm, leave them at room temperature for a couple of days to ripen.
How long can I store the prepared dip cups in the fridge?
Very! You can store your Mexican 7 Layer Dip Cups in an airtight container for up to 2-3 days. However, keep the tortilla chips separate until serving to ensure they stay crispy and don’t get soggy.
Can I freeze the components of the dip for later use?
Of course! You can freeze the bean and cream cheese mixture for up to 2 months. To do this, transfer the mixture into an airtight container or freezer bag and label it with the date. When you’re ready to use it, simply thaw it in the fridge overnight and layer with fresh ingredients before serving.
What should I do if my refried beans are too thick?
If your refried beans are a bit too thick for your liking, simply stir in a tablespoon or two of milk or sour cream until you achieve your desired consistency. This will help create a smoother mixture that’s easy to layer in your Mexican 7 Layer Dip Cups.
Are there any dietary considerations I should keep in mind?
Definitely! If you’re cooking for guests with dietary restrictions, remember to opt for dairy-free options for cream cheese and cheddar cheese. Additionally, if anyone has allergies to certain ingredients like olives or peppers, feel free to leave those out or substitute with safer options. Always check labels for allergens in store-bought items like guacamole or sour cream.
What’s the best way to garnish my dip cups for presentation?
For a stunning finish, sprinkle fresh cilantro or add a few bright wedges of lime on top of your assembled dip cups. You could also arrange tortilla chips around the cups for that festive touch. Using a piping bag for neat layering also gives them a lovely, professional appearance!

Mexican 7 Layer Dip Cups for Fun Tailgating Treats
Ingredients
Equipment
Method
- In a medium bowl, combine refried beans with softened cream cheese. Use a hand mixer or spatula to blend until smooth and creamy, about 2-3 minutes.
- Cover the mixture with plastic wrap and refrigerate for about 1 hour to enhance flavor (optional).
- Spoon about 2 tablespoons of the bean mixture into small cups or bowls as a base.
- Add approximately 3 tablespoons of guacamole on top of the bean layer.
- Dollop around 2 tablespoons of sour cream over the guacamole layer.
- Sprinkle about 1/4 cup of shredded cheddar cheese, followed by sliced black olives, diced tomatoes, and jalapeño.
- Garnish with a few nacho or tortilla chips placed around the top of each cup.
- Serve immediately or refrigerate until ready to enjoy.
Leave a Reply