As I stood in my kitchen one sunny morning, the aroma of fresh baked pastry mingled with the rich scent of cream cheese, instantly whisking me away to cozy European cafés. There’s something truly magical about creating your own Ultimate Cheese Danish—whether you opt for the convenience of puff pastry or decide to craft your dough from scratch, the reward is a delightful treat ready to impress at brunch or with your afternoon coffee. The best part? Not only is this recipe straightforward, but it also sparks creativity with endless filling variations. Are you ready to embark on this delightful baking adventure? Let’s dive into the art of making your very own flaky cheese Danish!

Why is this Cheese Danish Recipe irresistible?
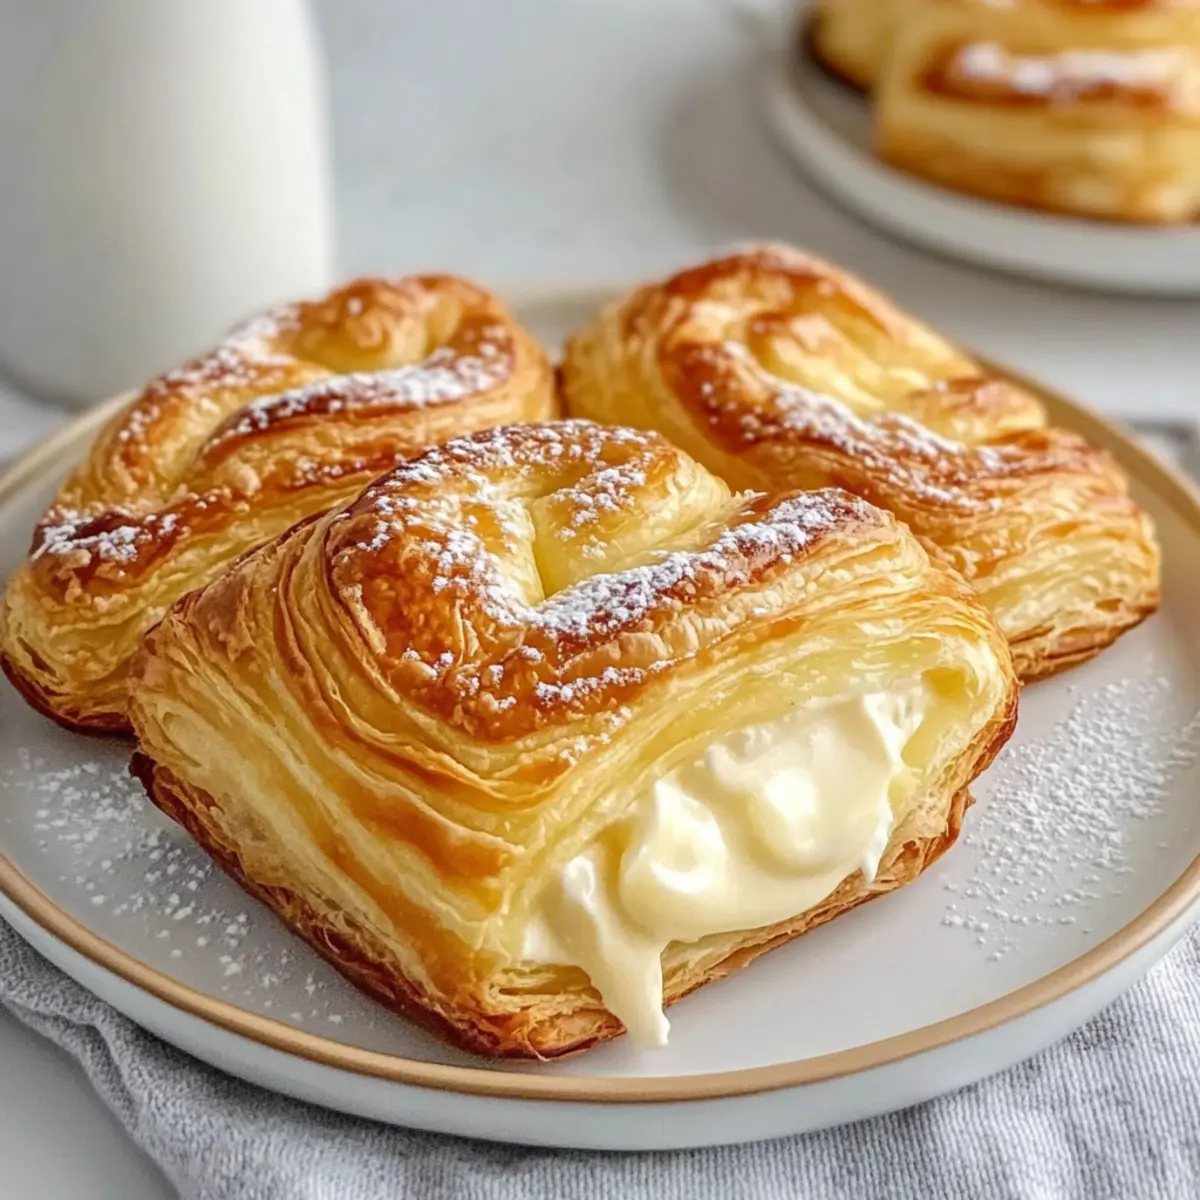
Flaky Perfection: The Ultimate Cheese Danish features a wonderfully flaky pastry that melts in your mouth, making each bite a true delight.
Two Methods: Choose between an easy puff pastry for quick preparation or a homemade dough for an authentic touch—both guarantee delicious results!
Endless Creativity: Get adventurous with fillings by adding options like fruit preserves or even chocolate, making it exceptionally versatile for any palate.
Perfect for Any Occasion: This recipe is not just a brunch star; it pairs beautifully with coffee or tea, elevating your cozy afternoons and special gatherings.
Impressive Yet Easy: With straightforward steps and simple ingredients, you can impress your family or friends without spending all day in the kitchen.
For another delightful feeling, check out my Pomegranate Feta Cheese for a savory snack that complements your baking skills!
Ultimate Cheese Danish Recipe Ingredients
For the Cream Cheese Filling
• Cream Cheese – Use full-fat for the richest, creamiest texture.
• Granulated Sugar – Balances the cream cheese tang; powdered sugar can be used for a smoother blend.
• Vanilla Extract – Enhances the filling’s flavor; almond extract offers a delightful twist.
• Lemon Juice (optional) – Adds brightness; can be omitted if missing.
• Egg Yolk – Binds and enriches the filling, resulting in that luscious texture.
For the Dough
• Puff Pastry – Quick and flaky; homemade dough takes it to another level if you’re up for it.
• All-Purpose Flour – Provides structure; substitute with pastry flour for a softer dough.
• Active Dry Yeast – Essential for rising homemade dough, making it light and airy.
• Whole Milk – Hydrates the dough; warmth helps activate the yeast.
• Unsalted Butter – Cold butter is key for creating flaky layers in homemade dough.
For the Glaze
• Powdered Sugar – Creates a sweet finish; adjust milk or lemon juice for desired consistency.
With this Ultimate Cheese Danish Recipe, you’ll be well on your way to creating a delightful pastry that brings the charm of a European café right to your kitchen!
Step‑by‑Step Instructions for Ultimate Cheese Danish Recipe
Step 1: Preheat Oven and Prepare Baking Sheet
Begin by preheating your oven to 400°F (200°C). While the oven is heating, line a large baking sheet with parchment paper to prevent sticking. This will ensure that your Ultimate Cheese Danish bakes evenly and easily releases when they’re golden and flaky.
Step 2: Prepare Cream Cheese Filling
In a mixing bowl, combine cream cheese, granulated sugar, vanilla extract, lemon juice (if using), egg yolk, and a pinch of salt. Mix these ingredients until smooth and creamy, with no lumps remaining. This rich filling will be the heart of your cheese Danish, offering a delightfully tangy contrast to the sweet pastry.
Step 3: Puff Pastry Method
If you’re opting for the puff pastry approach, unfold the sheet and cut it into eight equal squares. Place each square on the prepared baking sheet. Gently fold down the edges about half an inch to create a small border, then spoon a generous amount of the cream cheese mixture in the center.
Step 4: Apply Egg Wash
In a small bowl, whisk together one egg with a tablespoon of water to create an egg wash. Using a pastry brush, carefully apply the egg wash to the edges of the puff pastry. This will help achieve that beautifully golden and shiny finish when baking your Ultimate Cheese Danish.
Step 5: Bake the Pastries
Slide the baking sheet into the preheated oven and bake for 15 to 18 minutes, or until the pastries are puffed and golden brown. Keep an eye on them in the final minutes; the contrasting colors between the flaky pastry and creamy filling will be visually appealing once they’re done.
Step 6: Cool Before Glazing
Once baked, remove the cheese Danishes from the oven and let them cool on the baking sheet for a few minutes. This cooling period is essential for allowing the filling to set slightly. Once they are cool enough to handle, transfer them to a wire rack to cool completely before glazing.
Step 7: Glaze the Danishes
For the glaze, mix powdered sugar with a splash of milk or lemon juice until you reach a drizzleable consistency. Once the Ultimate Cheese Danishes have cooled completely, use a spoon to drizzle the glaze over the tops. This step adds the final touch of sweetness and makes your pastries shine beautifully.

How to Store and Freeze Ultimate Cheese Danish
Fridge: Store leftover cheese Danishes in an airtight container for up to 3 days. This keeps them fresh while preventing them from drying out.
Freezer: For longer storage, freeze the unbaked pastries individually on a baking sheet, then transfer to a freezer-safe bag for up to 3 months. Bake from frozen, adding extra time to ensure a golden finish.
Reheating: To refresh stored pastries, reheat in the oven at 350°F (175°C) for about 10 minutes, which will help maintain their crispness instead of microwaving.
Wrap Carefully: If freezing baked Danishes, wrap them tightly in plastic wrap and aluminum foil to prevent freezer burn, ensuring they taste fresh when you indulge in your Ultimate Cheese Danish later!
Make Ahead Options
These Ultimate Cheese Danishes are perfect for meal prep, allowing you to savor the aroma of freshly baked pastries without the last-minute rush! You can prepare the cream cheese filling up to 3 days in advance; simply store it in an airtight container in the refrigerator to maintain its rich, creamy texture. Additionally, you can cut the puff pastry squares and arrange them on a baking sheet, covering them tightly with plastic wrap for up to 24 hours before baking. When you’re ready to enjoy, just fill the pastry with the chilled cream cheese mixture, apply the egg wash, and bake according to the instructions. This way, you’ll have delightful, flaky Ultimate Cheese Danishes with minimal effort when the craving strikes!
What to Serve with Flaky Ultimate Cheese Danish with Creamy Filling
As you savor the delightful warmth of fresh pastry, imagine how a few perfect pairings can elevate your brunch experience to new heights.
- Fresh Berries: Juicy strawberries and blueberries add a pop of color and a refreshing tartness that balances the richness of the cheese Danish.
- Greek Yogurt: Creamy, tangy Greek yogurt provides a protein boost and complements the sweetness, making for a well-rounded breakfast option.
- Café-Style Coffee: A rich, aromatic coffee will enhance the flavors of your cheese Danish, creating a café-inspired moment each time you sip.
- Zesty Citrus Salad: A vibrant salad with citrus fruits like oranges and grapefruits brings a refreshing brightness alongside the sweet pastries.
- Nutty Granola: Adding a sprinkle of nutty homemade granola introduces a satisfying crunch that contrasts beautifully with the soft filling of the Danish.
- Champagne Mimosa: Celebrate your indulgent treat with a sparkling mimosa; the bubbly adds a festive flair perfect for brunch gatherings.
- Honey Drizzle: A light drizzle of honey elevates the sweetness of the cheese filling and adds a touch of elegance to your brunch presentation.
- Herbal Tea: Pair with a fragrant herbal tea, such as chamomile or mint, for a soothing contrast to the flaky pastry texture.
Ultimate Cheese Danish Recipe Variations
Feel free to get creative with this recipe—your kitchen deserves your personal touch!
- Lighter Filling: Fold in whipped cream for a fluffier texture and lighter taste. This twist makes every bite feel extra airy and delightful.
- Flavored Cream Cheeses: Use varieties like honey or strawberry for a quick, delicious twist on the classic filling. These unexpected flavors can bring a new profile that surprises and delights.
- Fruit Additions: Mix in fruit jams or fresh berries into the filling. This adds vibrant colors and flavors, making your Danish not just tasty but visually appealing too.
- Chocolate Lovers: Introduce mini chocolate chips for a decadent chocolate-cream cheese hybrid. It’s a rich twist perfect for dessert lovers who crave that sweet fix!
- Savory Option: Swap the sweet filling for ricotta mixed with herbs for a savory spin. This makes for an intriguing brunch dish, contrasting beautifully against the flaky pastry.
- Glaze Variations: Experiment with citrus flavors in your glaze. Adding orange juice to your powdered sugar glaze can create a refreshing finish.
- Nutty Crunch: Top your cheese Danish with slivered almonds or chopped walnuts before baking for an added crunch. These nuts complement the creamy filling perfectly.
- Spice It Up: Add a pinch of cinnamon or nutmeg to the cream cheese filling for a warm, cozy flavor that’s perfect for cooler days. The comforting spices hug the sweet creaminess closely.
Don’t hesitate to get inspired! If you enjoy adding unique flavors, you might also love my Pomegranate Feta Cheese or the delightful Fried Strawberry Cheesecake. Embrace the journey of experimenting in your kitchen!
Expert Tips for Ultimate Cheese Danish
- Cold Ingredients: Always use cold butter and chilled dough to achieve those flaky layers that define a perfect cheese Danish.
- Don’t Overfill: Avoid the temptation tooverfill the pastries, as this can lead to leaks and a soggy base. A tablespoon of filling per pastry is ideal.
- Let Them Cool: Allow the cheese Danishes to cool completely before glazing. This ensures that the glaze sets nicely and doesn’t run off.
- Freezer-Friendly: Consider freezing unbaked pastries for a quick treat later. Bake directly from frozen, adding a few extra minutes to the baking time.
- Egg Wash Magic: Applying egg wash not only gives a beautiful golden hue but also enhances the taste; don’t skip this step!
- Experiment with Fillings: Don’t hesitate to get creative! Try flavored cream cheese or add fruit for a delicious twist on the classic Ultimate Cheese Danish recipe.

Ultimate Cheese Danish Recipe FAQs
What kind of cream cheese should I use for the filling?
Absolutely! For the best results, opt for full-fat cream cheese, as it provides the richest and creamiest texture for your filling. Reduced-fat varieties may not yield the same luscious consistency, so stick with the full-fat option for optimal flavor and creaminess.
How should I store leftover cheese Danishes?
Very! To keep your leftover Ultimate Cheese Danish fresh, store them in an airtight container at room temperature for up to 3 days. This helps prevent them from drying out. If you’re looking to preserve them longer, refrigerate and consume within a week.
Can I freeze the cheese Danishes for later use?
Absolutely! You can freeze unbaked cheese Danishes by placing them individually on a baking sheet until solid, then transferring them to a freezer-safe bag or container. They can be kept frozen for up to 3 months. When you’re ready to bake, simply add extra time to the baking (about 5-10 minutes) and pop them in the oven straight from the freezer!
What should I do if my cheese filling spills out during baking?
Oops! If this happens, don’t fret; it’s a common mishap! Next time, try not to overfill your pastries—about a tablespoon of filling is perfect. If leaks occur, you might want to check if the edges of the pastry are sealed well. You can use a dough scraper or your fingers to pinch the seams closed tighter before baking.
Are there any dietary considerations I should be aware of with this recipe?
Very! If you have guests with dietary restrictions, it’s simple to modify the Ultimate Cheese Danish recipe. For a gluten-free option, you can use a gluten-free puff pastry or dough. Always check the packaging to address any allergies, especially regarding cream cheese, which may contain additives. Additionally, if you’re feeding furry friends, avoid sharing these pastries, as sugary foods can upset a pet’s stomach!
Can I substitute any of the ingredients for a healthier version?
Definitely! If you want a lighter twist on this Ultimate Cheese Danish, consider using low-fat cream cheese and reducing the granulated sugar slightly. You might also fold in some whipped cream or Greek yogurt to achieve a fluffy filling without compromising texture. For a fruity variation, adding fresh berries or using flavored cream cheese can elevate flavors while keeping things delicious.
Irresistibly Flaky Ultimate Cheese Danish Recipe to Indulge In
Ingredients
Equipment
Method
- Preheat your oven to 400°F (200°C) and line a large baking sheet with parchment paper.
- In a mixing bowl, combine cream cheese, granulated sugar, vanilla extract, lemon juice (if using), and egg yolk. Mix until smooth.
- Unfold the puff pastry, cut into eight squares, and place on the baking sheet. Fold down edges to create a border and spoon filling in the center.
- Whisk together one egg and a tablespoon of water for egg wash. Brush the edges of the puff pastry.
- Bake for 15 to 18 minutes until puffed and golden brown.
- Let cool for a few minutes before transferring to a wire rack.
- Mix powdered sugar with milk or lemon juice for glaze, then drizzle over cooled pastries.
Leave a Reply