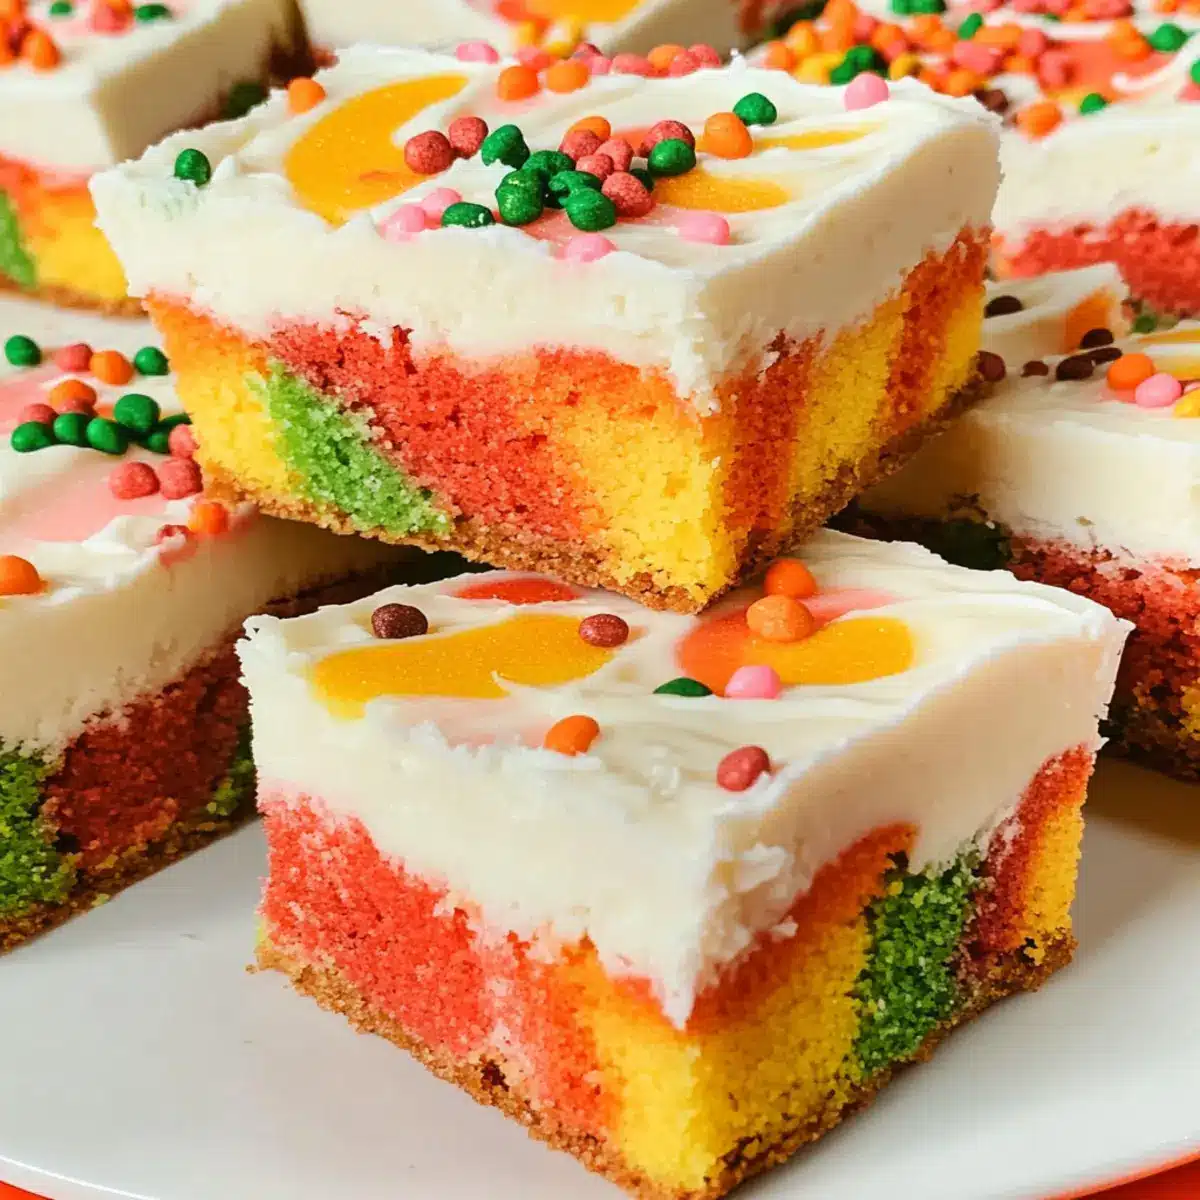
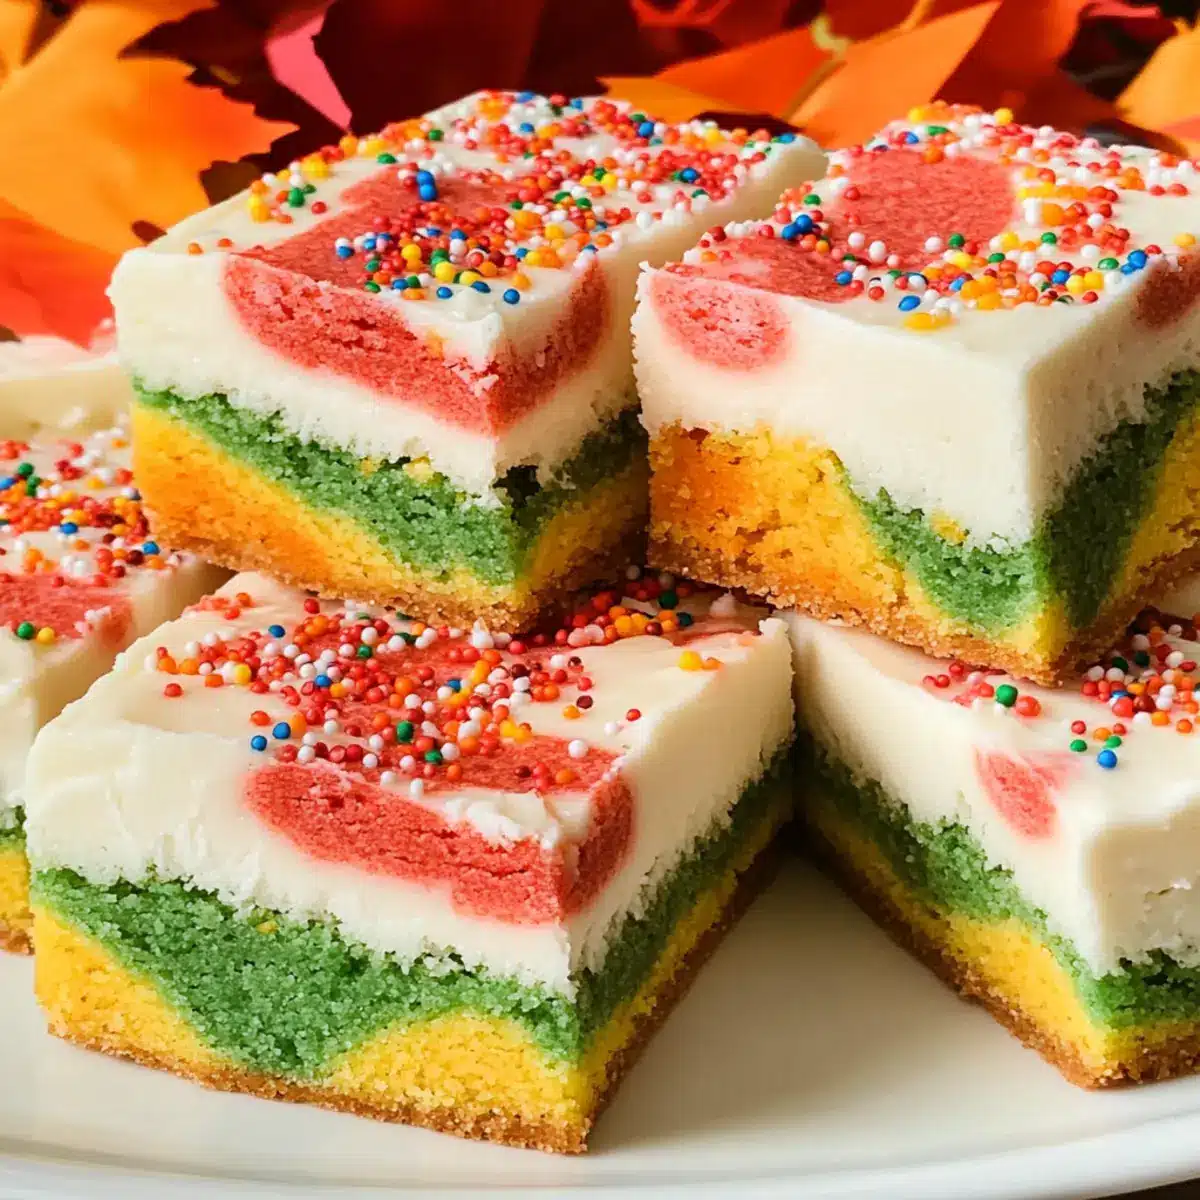
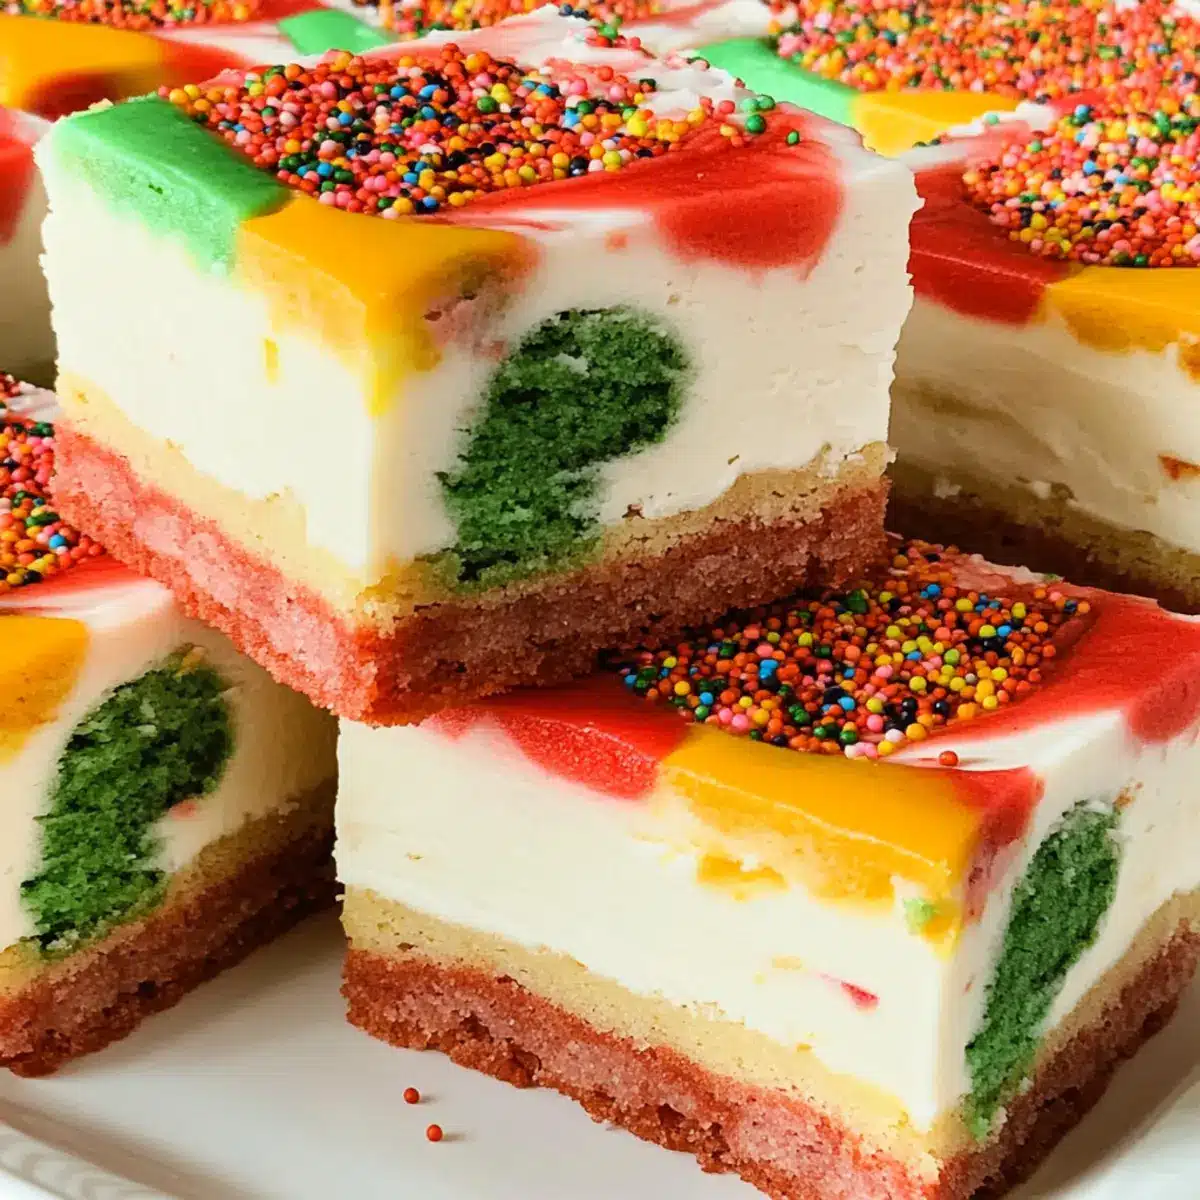
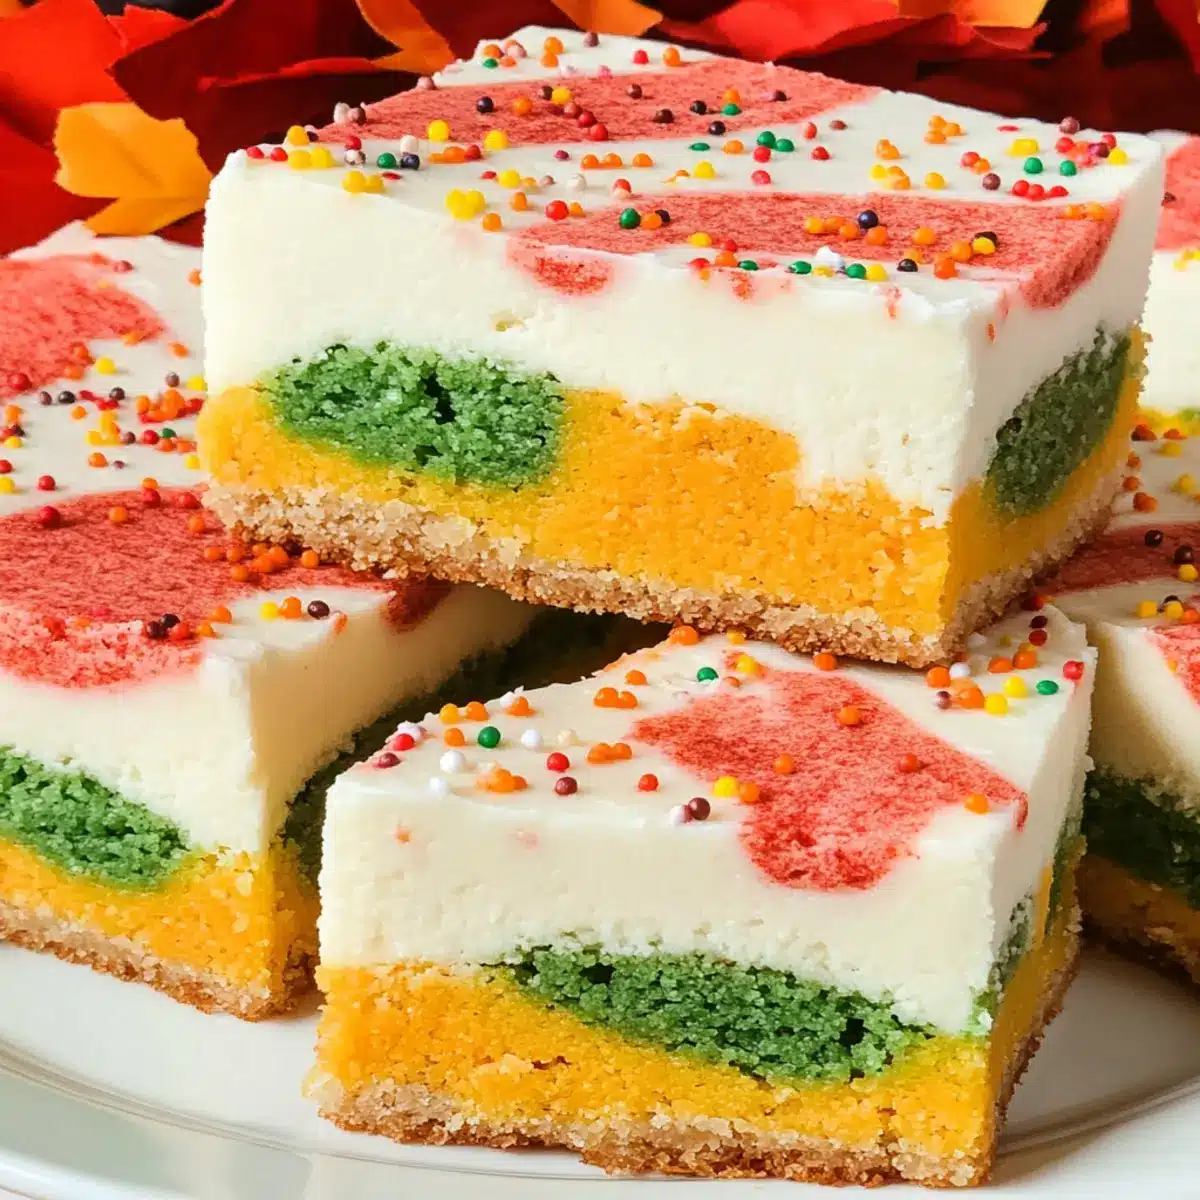
As I stirred the vibrant hues of red, orange, and gold into my cookie dough, the spirit of fall enveloped my kitchen. These Harvest Marble Sugar Cookie Bars bring the essence of the season right to your table, making them the perfect Thanksgiving dessert or a celebration of autumn during family gatherings. With their beautifully swirled appearance and soft, chewy texture, they’re not just a feast for the eyes but also a delightful treat that everyone will adore. Plus, with minimal prep time and a crowd-pleasing appeal, these bars take the stress out of holiday baking, leaving you with more moments to savor with your loved ones. What’s not to love about cake-like cookie bars topped with creamy buttercream frosting? Ready to indulge in this fall-inspired delight? Let’s get baking!
Why are Harvest Marble Cookie Bars Special?
Vibrant, Eye-Catching Colors: These cookie bars feature a stunning marbled effect that captures the essence of autumn, making them a showstopper at any gathering.
Effortless Baking: With simple steps and minimal prep time, you can whip up these delicious bars without the fuss, perfect for busy bakers.
Soft, Chewy Texture: Each bite offers a delightful chewiness that pairs perfectly with the creamy buttercream frosting, creating a scrumptious combo.
Versatile Treats: Adapt them using different food colorings or seasonal sprinkles for any occasion, from Thanksgiving to birthday parties.
Serve with Warm Beverages: These bars are ideal alongside a cup of hot apple cider or coffee, enhancing your cozy fall gatherings. Try pairing them with the delightful Cinnamon Sugar Pumpkin muffins for a memorable experience!
Harvest Marble Sugar Cookie Bars Ingredients
For the Cookie Bars
• Butter – Adds richness and moisture; make sure it’s softened for easy mixing.
• Granulated Sugar – Sweetens the bars; fully cream it with the butter for optimal texture.
• Eggs – Provides moisture and leavening; use large eggs for consistent results.
• Vanilla Extract – Enhances flavor; opt for pure vanilla for a more robust taste.
• All-Purpose Flour – Forms the structure of the bars; can substitute with gluten-free flour if necessary.
• Baking Soda – Acts as a leavening agent to give the bars lift.
For the Buttercream Frosting
• The Best Buttercream Frosting – Adds sweetness and a creamy texture; perfect for topping the bars.
Feel free to get creative with the decoration, but don’t forget: these Harvest Marble Sugar Cookie Bars are sure to bring the warm flavors of fall to your celebrations!
Step‑by‑Step Instructions for Harvest Marble Sugar Cookie Bars
Step 1: Cream the Butter and Sugar
In a large mixing bowl, combine softened butter and granulated sugar using an electric mixer. Beat on medium speed for about 3–4 minutes, until the mixture is light and fluffy, and appears pale yellow in color. This step is crucial for incorporating air into the dough, which helps create a chewy texture in your Harvest Marble Sugar Cookie Bars.
Step 2: Add Eggs and Vanilla
Incorporate the large eggs, one at a time, mixing until well combined after each addition. Then, add pure vanilla extract and blend for another minute. The mixture should be smooth and slightly thicker at this stage. This addition enhances the rich flavor of your Harvest Marble Sugar Cookie Bars, making them oh-so-deliciously aromatic.
Step 3: Mix in Dry Ingredients
Gradually sift the all-purpose flour and baking soda into the wet mixture. Stir using a spatula or the mixer on low speed until no dry flour is visible, about 1–2 minutes. The dough should be soft and somewhat tacky but hold its shape. This step is important for achieving the right consistency before introducing the colorful marbling in the next phase.
Step 4: Divide and Color the Dough
Once your dough is ready, divide it evenly into five portions in separate bowls. Leave one portion white and color the other four with food coloring (red, orange, gold, and sage) until you achieve the desired vibrant shades. This marbling will create captivating visuals in your Harvest Marble Sugar Cookie Bars, embodying the essence of autumn.
Step 5: Spoon the Dough onto Cookie Sheet
Using a spoon, randomly dollop the white dough onto a parchment-lined cookie sheet. Alternate this with scoops of each colored dough, spreading them out so they do not touch each other. This random distribution adds to the marbled effect; you will love how beautiful the Harvest Marble Sugar Cookie Bars will turn out!
Step 6: Flatten and Smooth the Dough
Gently press down on the dollops of dough to flatten them to about 3/4-inch thickness using your hands or a rolling pin, then cover with another sheet of parchment paper. Smooth the surface with your hands or a spatula to create a uniform layer, which helps in even baking. This step ensures that your Harvest Marble Sugar Cookie Bars have a perfect shape and texture.
Step 7: Bake the Cookie Bars
Preheat your oven to 375°F (190°C). Place the prepared cookie sheet in the oven and bake for 10–15 minutes. Keep a close eye; the bars should be just set and not overly golden, as they continue to cook slightly after being removed. A toothpick inserted in the center should come out with a few moist crumbs, indicating they’re perfectly done.
Step 8: Cool Completely
Allow the freshly baked bars to cool in the pan for about 15 minutes, then carefully transfer them to a wire rack. It’s important to let them cool completely—about 1 hour—before frosting, as this prevents the buttercream from melting. Your patience will pay off, ensuring a delightful finish to your Harvest Marble Sugar Cookie Bars.
Step 9: Frost and Decorate
Once your Harvest Marble Sugar Cookie Bars are completely cool, generously spread the best buttercream frosting across the top using an offset spatula. For a festive touch, sprinkle with fall-themed sprinkles to elevate their charm. The creamy frosting paired with the soft, chewy cookie bars creates an irresistible treat that everyone will love.
Step 10: Slice and Serve
After decorating, use a sharp knife to slice the cooled bars into squares or rectangles, as preferred. Serve them on a pretty platter during Thanksgiving or your next autumn gathering. These delightful Harvest Marble Sugar Cookie Bars will surely capture hearts and satisfy sweet cravings, making your celebration even more special.
Storage Tips for Harvest Marble Sugar Cookie Bars
Room Temperature: Keep any leftover bars stored in an airtight container at room temperature for up to 5 days, ensuring they stay chewy and fresh.
Fridge: For extended freshness, refrigerate your Harvest Marble Sugar Cookie Bars in an airtight container for up to 1 week. Just bring to room temperature before serving.
Freezer: For longer storage, freeze the bars wrapped in plastic wrap and then in foil or an airtight container for up to 3 months. Thaw in the fridge overnight before enjoying.
Reheating: If you’d like a warm treat, reheat individual bars in the microwave for about 10-15 seconds. This will give them that soft, freshly baked texture!
Make Ahead Options
These Harvest Marble Sugar Cookie Bars are perfect for meal prep enthusiasts! You can prepare the cookie dough up to 24 hours in advance by mixing all the ingredients and placing the colored dough portions into individual airtight containers. This keeps the dough fresh and prevents the colors from bleeding together. When you’re ready to bake, simply scoop and marble the dough onto your baking sheet, flatten, and bake as directed. For best results, frost the bars the same day to maintain the creamy texture of the buttercream. This way, you’ll ensure your Harvest Marble Sugar Cookie Bars taste just as delicious and look stunning for your gathering!
Expert Tips for Harvest Marble Sugar Cookie Bars
-
Cream Thoroughly: Take your time creaming the butter and sugar together for a light, airy dough. This step is key to achieving deliciously soft Harvest Marble Sugar Cookie Bars.
-
Watch the Bake Time: Keep a close eye on your cookie bars as they bake. Overbaking can lead to overly dry and crumbly texture—not what you want!
-
Use a Toothpick for Testing: Insert a toothpick in the center to check for doneness. The bars should look slightly underdone with a few moist crumbs clinging to the toothpick.
-
Cool Completely: Allow the bars to cool completely before frosting. Frosting on warm bars can cause a melty mess—definitely avoid this to keep your Harvest Marble Sugar Cookie Bars looking perfect!
-
Experiment with Colors: Get creative with food colorings to suit any occasion. A different combination of seasonal colors can make your cookie bars festive year-round!
What to Serve with Harvest Marble Sugar Cookie Bars
Gather your loved ones and create a cozy autumn feast filled with delightful flavors and warm memories.
-
Apple Cider Mimosa: This bubbly drink combines the sweetness of apple cider with champagne, adding a festive touch alongside your bars.
-
Cinnamon-Spiced Chai Latte: The warmly spiced flavors of chai perfectly complement the sweetness of the cookie bars, creating a comforting pairing for chilly evenings.
-
Honey-Roasted Pumpkin Soup: Its creamy texture and subtle sweetness enhance the buttery richness of the bars, making for a harmonious fall-inspired meal.
-
Mixed Green Salad with Maple Vinaigrette: The bright greens and tangy vinaigrette balance the sweetness of the bars, offering a refreshing contrast on your plate.
-
Chocolate-Covered Pretzels: The salty crunch beautifully complements the soft, chewy cookie bars, bringing a delightful texture variety to your dessert spread.
-
Caramel Drizzle: Drizzle warm caramel sauce over the sugar cookie bars for a decadent sweet touch that elevates the flavors beautifully.
-
Vanilla Ice Cream: A scoop of creamy vanilla ice cream alongside the bars creates a delightful contrast of temperatures and textures, enhancing the overall dessert experience.
-
Pumpkin Spice Latte: The seasonal favorite adds a cozy warmth to your gathering, with its spiced flavors echoing the essence of autumn present in your cookie bars.
Harvest Marble Sugar Cookie Bars Variations
Feel free to put your own spin on these delightful bars and make them your own!
-
Almond Extract: Replace vanilla extract with almond extract for a nutty twist. The aroma is enticing and adds a unique flair!
-
Seasonal Sprinkles: Dress up your bars with various seasonal sprinkles matching the occasion—think ghosts for Halloween or snowflakes for winter festivities!
-
Chocolate Chips: Fold in mini chocolate chips to the dough for a delightful chocolatey surprise. The melted chocolate adds richness that everyone will love.
-
Nutty Crunch: Add chopped nuts like pecans or walnuts into the dough for an added crunch. This variation creates an irresistible contrast in texture.
-
Gluten-Free Option: Swap all-purpose flour for a gluten-free flour blend to make these bars suitable for gluten-sensitive friends. They’ll never know the difference!
-
Fruity Flavors: Incorporate a hint of orange or lemon zest for a refreshing citrus touch. It brightens your bars while enhancing the seasonal flavors.
-
Bourbon Infusion: For an adult twist, consider adding a splash of bourbon to the frosting. It elevates the overall flavor and adds warmth to each bite.
-
Layered Version: For a stunning presentation, layer your dough colors separately in a baking dish to create vibrant stripes instead of a marble effect. It’s a visual feast!
These variations not only keep your baking exciting but are also perfect for impressing loved ones. And while you’re at it, why not serve these treats alongside delicious Cinnamon Sugar Pumpkin muffins for a real autumnal experience? Enjoy every bite!
Harvest Marble Sugar Cookie Bars Recipe FAQs
What’s the best way to select ripe ingredients for this recipe?
Absolutely! For the best flavor, choose high-quality, fresh ingredients. Look for butter that is creamy and pale yellow without any off smell. Eggs should be large, ideally farm-fresh, with uncracked shells. Each ingredient enhances the final flavor profile, so don’t skip on quality!
How should I store the Harvest Marble Sugar Cookie Bars?
To maintain their softness, store your cookie bars in an airtight container at room temperature for up to 5 days. If you wish to keep them fresh for longer, place them in the refrigerator for up to 1 week. Just be sure to allow them to reach room temperature before serving for the best taste!
Can I freeze these cookie bars for future enjoyment?
Certainly! To freeze your Harvest Marble Sugar Cookie Bars, first wrap them tightly in plastic wrap, then in foil or place them in an airtight container. They can be frozen for up to 3 months. When you’re ready to enjoy them, simply thaw in the fridge overnight before serving. If you want them warm, heat in the microwave for about 10-15 seconds!
What are some common issues when baking these bars, and how can I fix them?
Very good question! A common issue is bars turning out too dry—make sure not to overbake them! Keep a close eye during the last few minutes; they should be set but slightly underdone when you take them out. If they happen to be too crumbly, it may be that your butter wasn’t creamed long enough with the sugar, so ensure you beat it well for a fluffy texture!
Are there any dietary considerations for pets or allergies?
Yes! It’s essential to be cautious with ingredients if you have pets or guests with allergies. Both butter and eggs can be harmful to pets, so avoid giving them leftovers. Additionally, check for gluten allergies; if you’re serving someone who is gluten-sensitive, consider using a gluten-free flour substitute to keep everyone safe and happy!
Harvest Marble Sugar Cookie Bars That Brighten Your Fall
Ingredients
Equipment
Method
- Cream the Butter and Sugar by combining softened butter and granulated sugar using an electric mixer on medium speed for 3–4 minutes until light and fluffy.
- Add the Eggs and Vanilla, incorporating large eggs one at a time and mixing until well blended, then add pure vanilla extract.
- Mix in Dry Ingredients, sifting all-purpose flour and baking soda gradually into the wet mixture, stirring until no dry flour is visible.
- Divide and Color the Dough into five portions, leaving one white and coloring the other four with food coloring.
- Spoon the Dough onto a Parchment-lined Cookie Sheet, dolloping the white dough and colored dough alternately.
- Flatten and Smooth the Dough, pressing dollops to about 3/4-inch thickness and smoothing the surface.
- Bake the Cookie Bars in a preheated oven at 375°F (190°C) for 10–15 minutes until just set.
- Cool Completely for about 15 minutes in the pan, then transfer to a wire rack to cool for an hour.
- Frost and Decorate the cooled bars with buttercream frosting and optional fall-themed sprinkles.
- Slice and Serve, cutting the cooled bars into squares or rectangles.
Leave a Reply