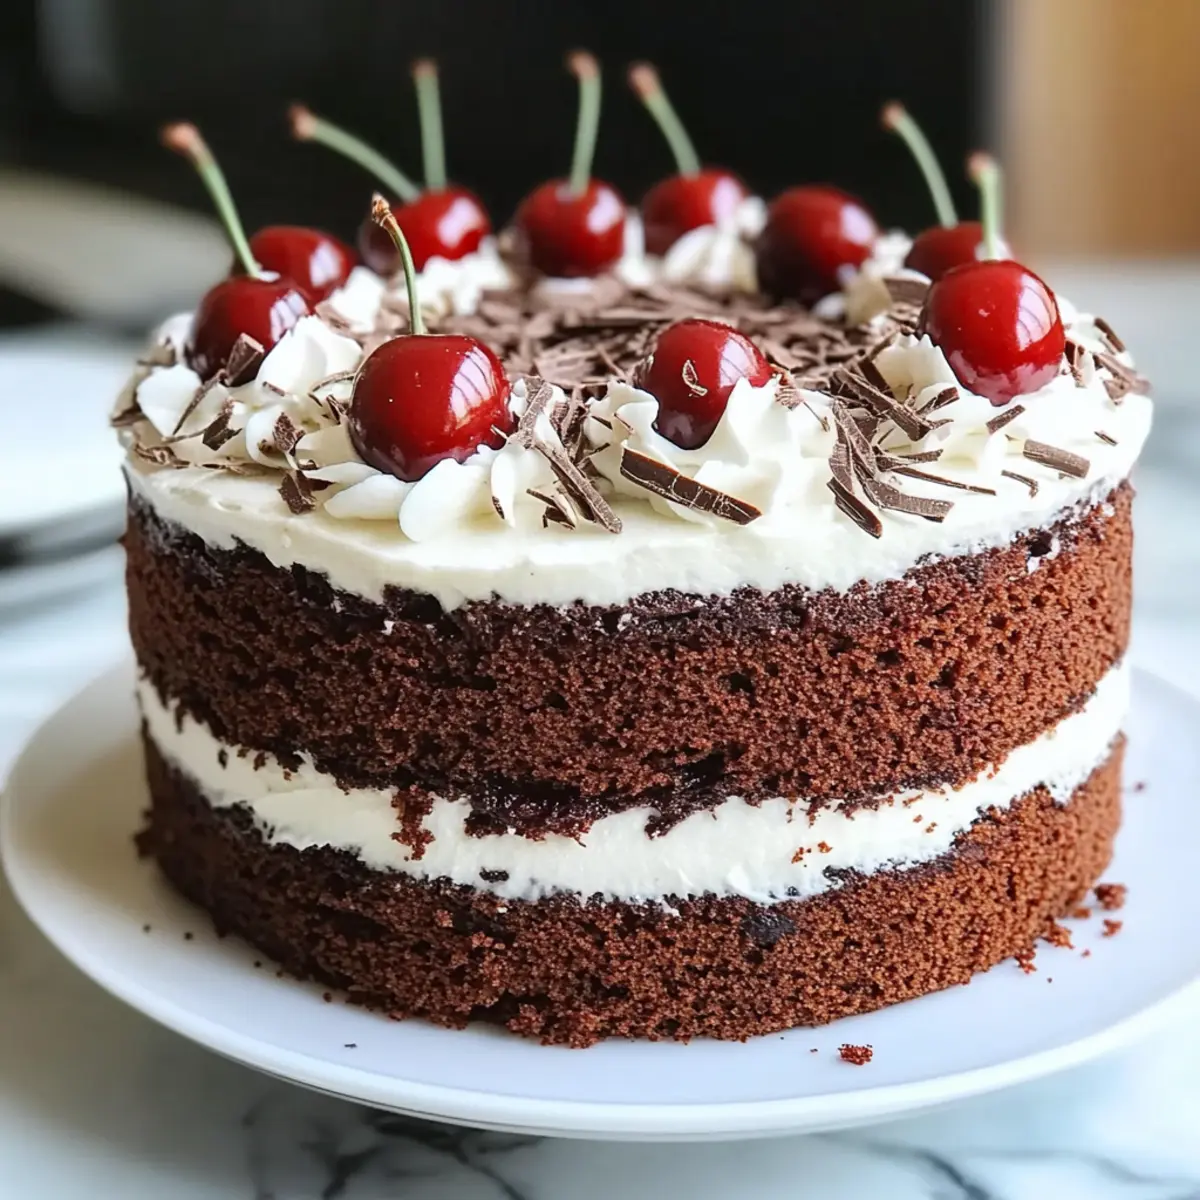
As I sifted through my kitchen, the aroma of chocolate began to fill the air—an instant reminder of the comforting nostalgia that comes with baking the perfect Black Forest Cake. This easy Black Forest Cake recipe combines moist chocolate layers, tangy cherries, and creamy whipped frosting, making it an irresistible choice for birthdays and celebrations. Not only is it a true crowd-pleaser, but it also elevates any gathering to a festive occasion without the fuss of complicated techniques. With just a few ingredients and simple steps, you can create a show-stopping dessert that’s sure to impress! Ready to indulge in a slice of this classic German delight? Let’s dive into the recipe!

Why is Black Forest Cake So Irresistible?
Decadent Layers: The combination of rich chocolate cake and juicy cherries creates a beautifully balanced dessert that will leave you wanting more.
Easy to Make: No need for advanced baking skills! This recipe allows anyone to whip up a stunning cake with just a few simple steps.
Perfect for Celebrations: Whether it’s a birthday party or a festive gathering, this cake is always a show-stopper that impresses guests.
Customizable Delight: Feel free to experiment! Swap cherries for raspberries or even try a vanilla sponge for a unique spin on this classic.
Want to try more delightful desserts? Check out my Christmas Tree Cupcake for festive cheer or give the luscious No Bake Orange Cheesecake a shot for creamy goodness!
Black Forest Cake Ingredients
• Prepare to bake this beloved German dessert with our easy Black Forest Cake recipe!
For the Cake
- All-Purpose Flour – Creates a tender base for the cake layers. (Can substitute with gluten-free flour for a gluten-free version.)
- Cocoa Powder – Provides deep chocolate flavor. (Use high-quality unsweetened cocoa for the best results.)
- Granulated Sugar – Sweetens the cake and balances the cocoa’s bitterness. (Brown sugar may provide a richer flavor.)
- Eggs – Add structure and moisture to the cake. (Egg replacement may not work well in this recipe due to texture requirements.)
- Vegetable Oil – Keeps the cake soft and moist. (Can substitute with melted butter for a richer flavor.)
- Buttermilk – Helps create a smooth, tender crumb. (Use regular milk with a splash of vinegar as a substitute.)
- Baking Soda & Baking Powder – Ensure proper leavening of the cake. (Do not substitute; both are necessary for the rise.)
- Salt – Enhances overall flavor. (Essential for balancing sweetness.)
For the Cherry Filling
- Cherry Filling or Cherries in Syrup – Adds fruity sweetness and classic flavor of Black Forest Cake. (Fresh pitted cherries can be used for a fresher taste.)
- Kirsch or Cherry Juice – Used to keep the cake moist and enhance cherry flavor. (For non-alcoholic version, replace Kirsch with cherry juice.)
For the Frosting
- Heavy Cream – Whipped for a light frosting that contrasts with the rich chocolate layers. (Coconut cream can replace for a non-dairy option.)
- Powdered Sugar – Sweetens the whipped cream for frosting. (Adjust to taste for less sweetness.)
For Decoration
- Chocolate Shavings – Garnish for decoration and added chocolate flavor. (Use a vegetable peeler on a chocolate bar for shavings.)
- Fresh Cherries – Optional fresh toppings for decoration. (Ensure they are ripe for the best flavor.)
Step‑by‑Step Instructions for Easy Black Forest Cake Recipe
Step 1: Preheat the Oven and Prepare Pans
Begin by preheating your oven to 350°F (175°C). While it heats, grease two 9-inch round cake pans with butter or cooking spray and line the bottom with parchment paper. This ensures your layers release easily after baking. Have these pans ready for the batter once mixed.
Step 2: Mix the Dry Ingredients
In a large mixing bowl, whisk together 1 ¾ cups of all-purpose flour, 2 cups of granulated sugar, ¾ cup of unsweetened cocoa powder, 1 ½ teaspoons of baking powder, 1 ½ teaspoons of baking soda, and 1 teaspoon of salt. Stir vigorously until the mixture is well combined, and you’ll notice the rich chocolatey aroma wafting up, inviting you to continue with the Black Forest Cake recipe.
Step 3: Combine Wet Ingredients
Next, add 2 large eggs, 1 cup of buttermilk, ½ cup of vegetable oil, and 2 teaspoons of vanilla extract to the bowl with the dry ingredients. Beat on medium speed for about 2 minutes until the mixture is creamy and smooth. The batter should be rich and velvety, brimming with potential to create delicious layers.
Step 4: Add Boiling Water
Carefully stir in 1 cup of boiling water, mixing slowly to avoid splatters. This step will thin the batter, making it pourable. Once well combined, the batter should look liquidy yet luscious, setting the stage for those moist, indulgent cake layers of your Black Forest Cake.
Step 5: Bake the Cake Layers
Divide the batter evenly between your prepared cake pans. Bake in the preheated oven for 30-35 minutes, or until a toothpick inserted into the center comes out clean. The tops should spring back when lightly touched, indicating that your chocolate layers are perfectly baked and ready to cool.
Step 6: Cool the Cake Layers
After baking, remove the pans from the oven and let them cool in the pans for about 10 minutes. Carefully transfer the cake layers to a wire rack to cool completely. This allows the cakes to set while keeping them moist, crucial for making your delightful Black Forest Cake.
Step 7: Prepare Cherry Filling
In a saucepan over medium heat, combine your cherry filling or pitted cherries with sugar, stirring until the juices start to release. Once bubbling, mix in 2 tablespoons of cornstarch dissolved in a little water to thicken. Cook for about 3-5 more minutes until the mixture is slightly syrupy, creating a beautiful layer for your cake.
Step 8: Whip the Cream
In a large chilled bowl, whip 2 cups of heavy cream with ½ cup of powdered sugar and 1 teaspoon of vanilla extract until stiff peaks form. This fluffy, airy cream will be the perfect topping for your Black Forest Cake layers, contrasting beautifully with the dense chocolate and tart cherry flavors.
Step 9: Layer the Cake
To assemble, place one cake layer on a serving plate. Spread a generous layer of whipped cream over the top, followed by a layer of the cherry filling. Gently place the second cake layer on top, creating a delightful stack of chocolate, cream, and cherries that define the Black Forest Cake.
Step 10: Frost and Decorate
Frost the entire cake with the remaining whipped cream, spreading it evenly around the sides and on top. Decorate with chocolate shavings, made by peeling a chocolate bar with a vegetable peeler, and place fresh cherries on top for a delightful and elegant look you’ll love.
Step 11: Chill Before Serving
Cover the assembled cake with plastic wrap and refrigerate for 2-3 hours before serving. This chilling time allows all the flavors to meld beautifully, enhancing the experience of your homemade Black Forest Cake when enjoyed finally.
What to Serve with Easy Black Forest Cake Recipe
Indulging in a slice of this decadent cake is a rich experience, perfect for enhancing any gathering or celebration.
- Fresh Berries: The vibrant, tart flavors of strawberries or raspberries cut through the sweetness, balancing each bite beautifully.
- Vanilla Ice Cream: A scoop of creamy vanilla ice cream adds a luscious temperature contrast, elevating the dessert experience. Enjoy it melting across the warm cake for a truly delightful treat.
- Coffee or Espresso: A strong cup of coffee or an espresso pairs wonderfully, enhancing the chocolatey notes while providing a delightful pick-me-up.
- Chocolate Ganache: Drizzling a silky chocolate ganache on top provides an extra layer of indulgence, amplifying the richness of the cake.
- Homemade Whipped Cream: For those who love a creamy touch, additional whipped cream is always a welcome companion, enhancing the cake’s fluffy layers.
- Fruit Tart: A light fruit tart on the side adds a refreshing tartness, complementing the richness of the cake beautifully. The contrast in textures is delicious!
- Sparkling Wine: Celebrate with a glass of bubbly! A sweet sparkling wine cleanses the palate after each slice, making every bite feel festive.
- Mint Leaves: A few fresh mint leaves on the side brightens the dish while adding a touch of freshness—perfect for presentation.
- Chocolate-Dipped Strawberries: For an elegant dessert pairing, chocolate-dipped strawberries add a luxurious touch that complements the cake’s flavors.
Expert Tips for Black Forest Cake
-
Use Quality Ingredients: Opt for high-quality cocoa and fresh cherries to truly enhance the taste of your Black Forest Cake.
-
Chill Your Cream: Make sure the heavy cream is very cold before whipping. This helps achieve fluffy peaks and perfect frosting texture.
-
Allow Time to Set: Refrigerate the assembled cake for at least 2-3 hours. This lets the flavors meld together beautifully, creating a richer taste.
-
Avoid Splattering: When adding boiling water to the batter, stir gently to minimize splashes. This ensures a smooth and even texture in your cake layers.
-
Properly Pit Cherries: If using fresh cherries, be thorough in pitting and washing them. This prevents any surprises in your delightful cake slices.
Black Forest Cake Recipe Variations
Feel free to get creative and make this classic dessert your own with these delightful twists!
- Gluten-Free: Substitute all-purpose flour with a gluten-free flour blend to enjoy a cake that’s just as moist and delicious.
- Vegan: Use almond milk, replace eggs with flax eggs, and opt for coconut cream to create a vegan version everyone will love.
- Berry Twist: Swap cherries for fresh raspberries or strawberries for a fruity variation that’s equally stunning and tasty. Fresh berries can elevate the flavor while providing a vibrant pop of color.
- Add Nuts: Incorporate chopped walnuts or pecans into the batter for a delightful crunch that complements the soft chocolate layers. Their nutty flavor gives an unexpected richness, perfect for nut lovers!
- Layered Surprise: Add layers of chocolate ganache between the cake and cherry filling for extra decadence; it’s a chocolate lover’s dream! This extra step creates an indulgent surprise that will impress every guest.
- Different Syrup: For a unique twist, replace Kirsch with orange liqueur or even a splash of espresso to add depth and a touch of warmth to every bite. The flavors will meld beautifully, resulting in a signature touch.
- Flavor Variations: Experiment by infusing your whipped cream with orange or almond extract for an aromatic twist that enhances the cake’s overall flavor profile. Every slice can tell a new story!
Looking for more sweet inspiration? Try my festive Christmas Spice Cake or luscious Thanksgiving Cranberry Cake that are perfect for your upcoming gatherings!
Make Ahead Options
These Easy Black Forest Cake Recipe components are perfect for meal prep, allowing you to save time on busy days! You can bake the cake layers up to 24 hours in advance; simply wrap them tightly in plastic wrap once cooled to keep them moist. The cherry filling can also be prepared up to 3 days ahead and refrigerated; just reheat slightly before assembling to ensure it spreads easily. When ready to serve, layer the cake with whipped cream and cherries. Chill the assembled cake for 2-3 hours before indulging—this allows the flavors to meld perfectly while ensuring it remains just as delicious. Enjoy the ease of impressing guests with your beautiful Black Forest Cake!
How to Store and Freeze Black Forest Cake
Fridge: Store the cake in the refrigerator for up to 3 days. Cover it with plastic wrap or a cake dome to prevent it from drying out while keeping those delicious flavors intact.
Freezer: You can freeze the cake for up to 2 months. Slice the cake before freezing, then wrap each piece in plastic wrap followed by aluminum foil to keep it fresh.
Thawing: When ready to enjoy, simply transfer the wrapped cake to the fridge for a few hours or overnight to thaw gradually.
Reheating: For serving, you might warm individual slices in the microwave for about 10-15 seconds, but keep in mind that this will slightly alter the fluffy whipped cream topping.
Black Forest Cake Recipe FAQs
What should I look for when selecting cherries?
Absolutely! When choosing cherries, look for fresh ones with a deep, rich color and a firm texture. They should be plump and shiny, with no dark spots or blemishes. If you opt for canned cherries, ensure they are packed in juice rather than syrup for a more natural sweetness.
How should I store the Black Forest Cake?
You can store the cake in the refrigerator for up to 3 days. Make sure to cover it with plastic wrap or a cake dome to prevent it from drying out. If you notice the whipped cream losing its fluff, it’s best to consume it sooner rather than later.
Can I freeze Black Forest Cake?
Absolutely! You can freeze the cake for up to 2 months. I recommend slicing it before freezing to make individual servings easier to thaw. Wrap each slice in plastic wrap and then in aluminum foil to protect against freezer burn.
What’s the best way to thaw frozen Black Forest Cake?
When you’re ready to enjoy your cake, gently transfer the wrapped pieces to the fridge and let them thaw overnight or for a few hours. Avoid thawing at room temperature to maintain the texture of the whipped cream.
I’m allergic to nuts; can I still enjoy this recipe?
You’re in luck! This Black Forest Cake recipe is nut-free, making it suitable for those with nut allergies. Always check the labels of your ingredients to ensure they are produced in nut-free facilities if you have a severe allergy.
Why is my cake dense, and how can I fix it next time?
If the cake turned out dense, it might be due to overmixing the batter after adding the flour or not measuring the ingredients accurately. To prevent this in the future, mix the batter until just combined and use a kitchen scale for precision when measuring your ingredients. Also, make sure your leavening agents (baking soda and powder) are fresh for proper rising!
Indulge in Homemade Black Forest Cake Recipe Bliss
Ingredients
Equipment
Method
- Preheat your oven to 350°F (175°C) and prepare two 9-inch round cake pans.
- In a large bowl, whisk together the dry ingredients: flour, sugar, cocoa powder, baking powder, baking soda, and salt.
- Add the wet ingredients: eggs, buttermilk, vegetable oil, and vanilla extract to the dry mixture and beat on medium speed for 2 minutes.
- Carefully stir in the boiling water until the batter is well combined.
- Divide the batter between the prepared pans and bake for 30-35 minutes.
- Let the cakes cool in the pans for 10 minutes before transferring to a wire rack.
- In a saucepan, combine cherry filling or pitted cherries with sugar and heat until juices release, then thicken with cornstarch.
- Whip heavy cream with powdered sugar and vanilla extract until stiff peaks form.
- Place one cake layer on a serving plate, spread whipped cream and cherry filling, then add the second layer.
- Frost the cake with the remaining whipped cream and decorate with chocolate shavings and fresh cherries.
- Refrigerate the assembled cake for 2-3 hours before serving.
Leave a Reply