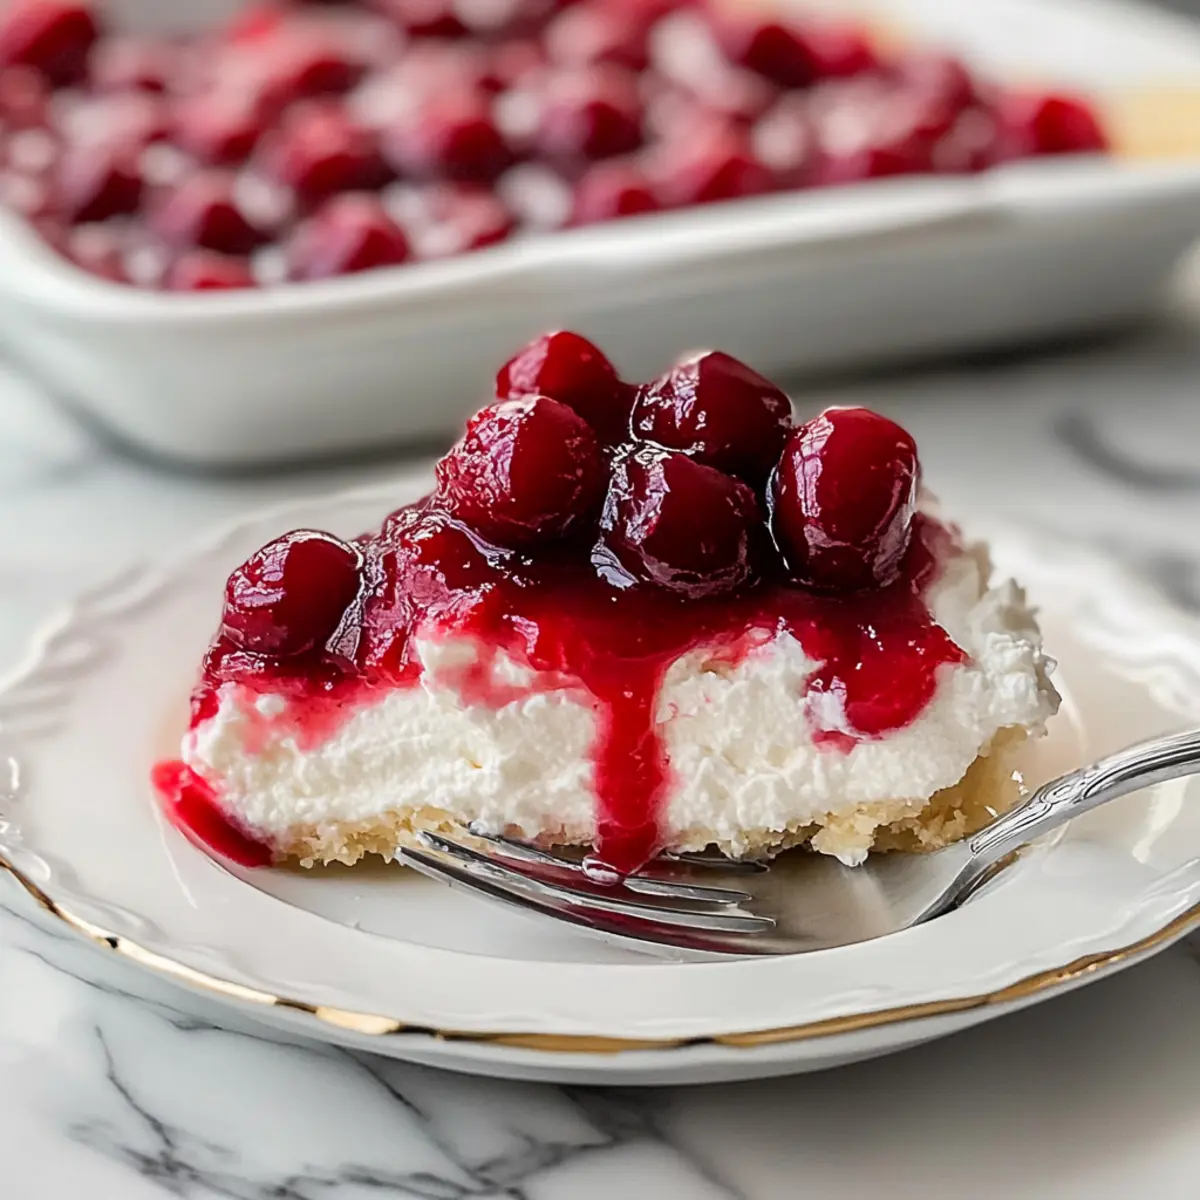
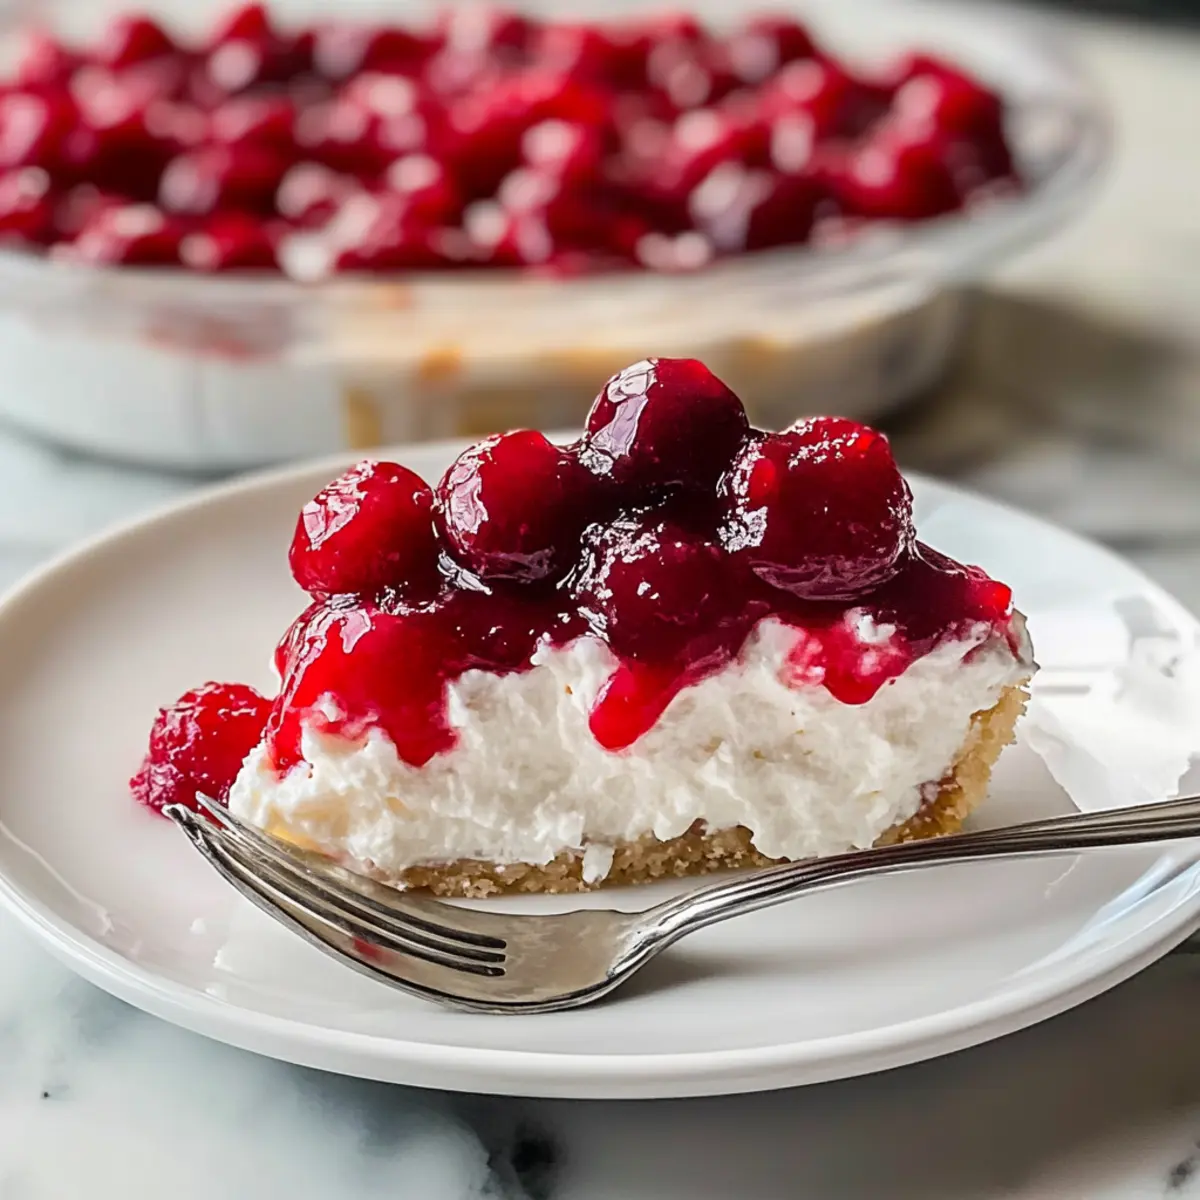
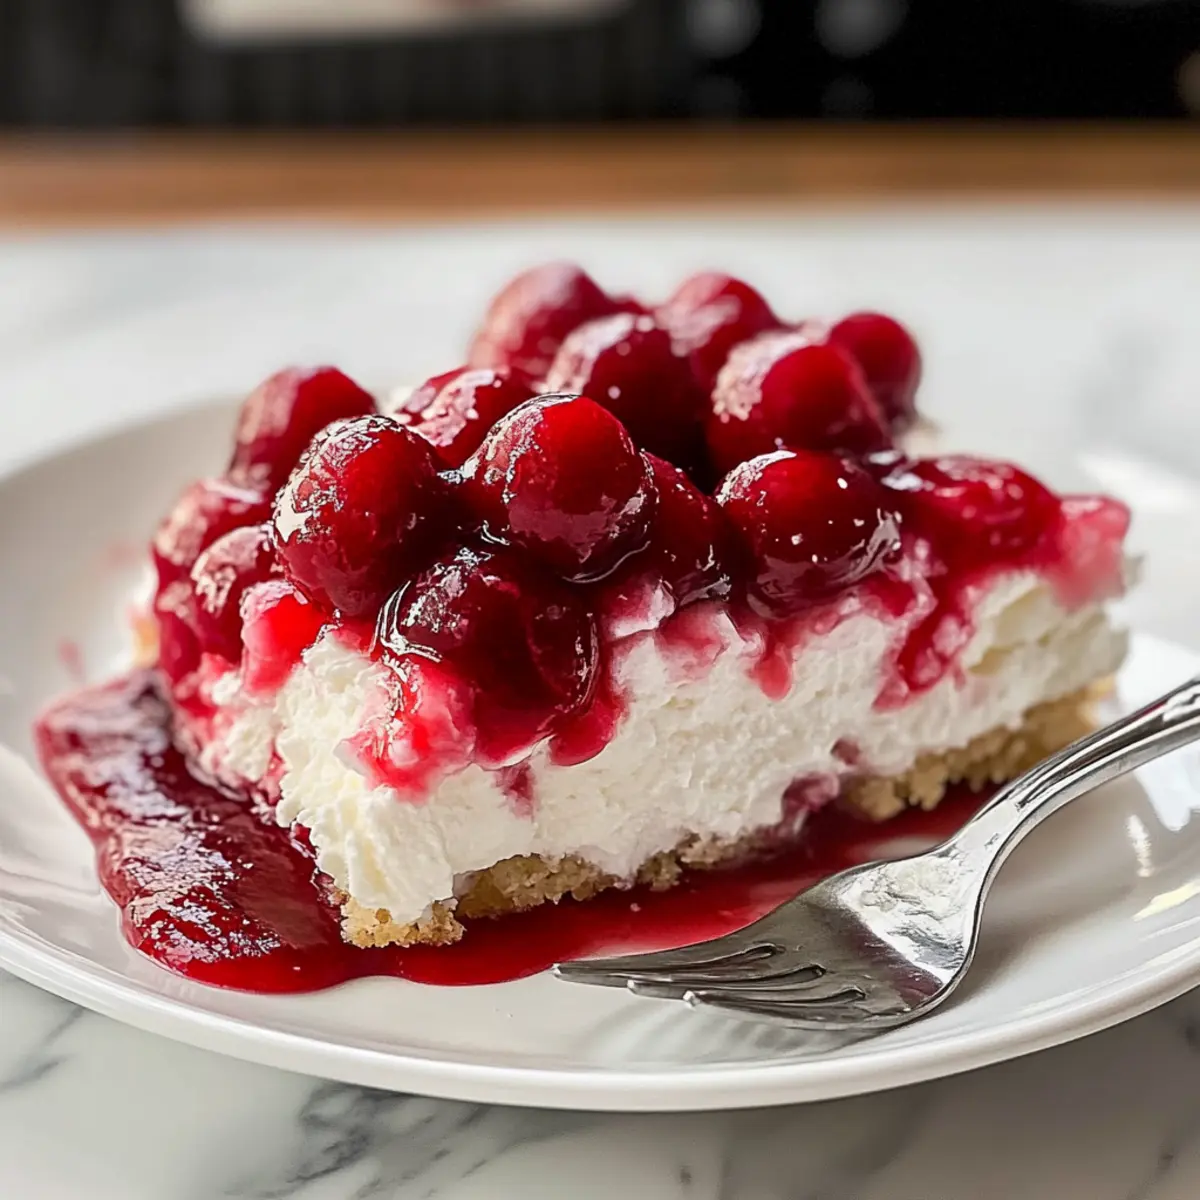
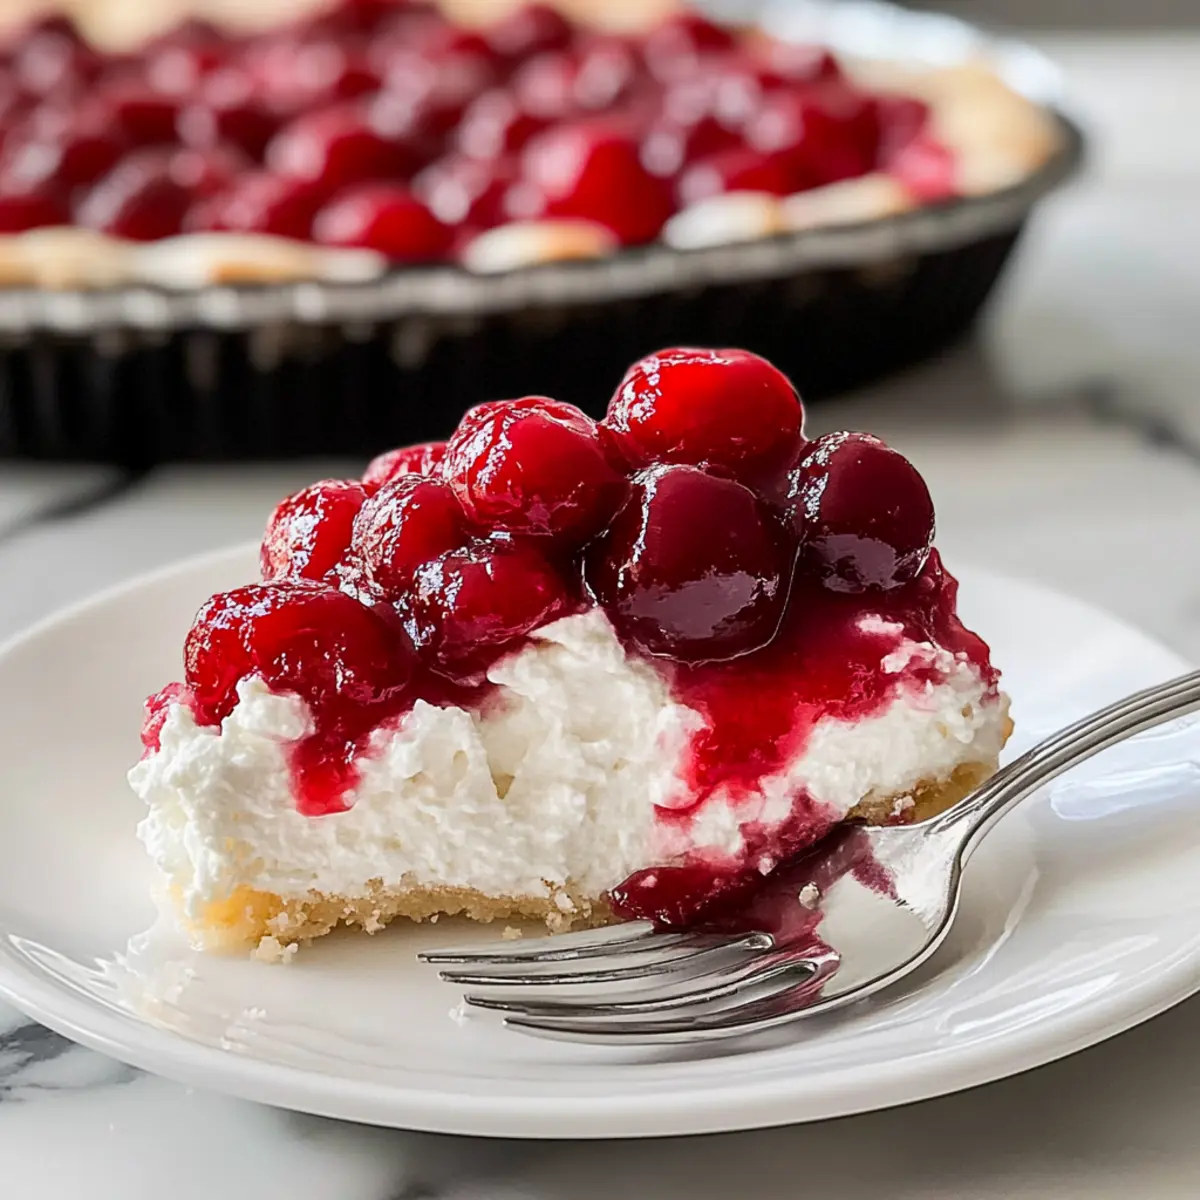
As I watched my friend take a bite of Cherries in the Snow, her eyes lit up with delight, instantly reminding me why this no-bake dessert is a staple at gatherings. Layered with a buttery base, creamy cheesecake filling, and tart cherry topping, it brings a refreshing twist to traditional desserts. Not only is it a breeze to put together, but this treat also caters to a variety of dietary needs, making it a true crowd-pleaser. Imagine showing up at your next potluck with this playful, customizable dessert—everyone will be asking for your secret! So, whether you’re in the mood for gluten-free, vegan, or low-sugar options, Cherries in the Snow has got you covered. Are you ready to indulge in this sweet, creamy delight?
What makes Cherries in the Snow special?
Simplicity: This no-bake dessert is a breeze to prepare, requiring minimal effort and time.
Adaptable: Whether you’re gluten-free, vegan, or just want a low-sugar treat, this recipe easily meets your dietary needs.
Crowd-Pleasing: Perfect for potlucks, it’s sure to impress friends and family with its stunning layers and luscious flavors.
Customizable: Feel free to switch out the cherry pie filling for other delicious fruits like blueberries or strawberries, giving you endless variations!
Make Ahead: With just a couple of hours of chilling time, you can prepare this delightful dessert the day before and enjoy stress-free gatherings.
Serve it chilled, garnished with fresh cherries, and watch it disappear! It’s the ideal sweet ending to any meal, just like my favorite Christmas Popcorn for a festive touch.
Cherries in the Snow Ingredients
For the Creamy Filling
• Cream Cheese – provides creaminess and structure; opt for light cream cheese for a lighter version.
• Powdered Sugar – adds sweetness and helps achieve a smooth texture; can be reduced for a low-sugar option.
• Vanilla Extract – enhances flavor; choose pure vanilla for the best taste.
• Frozen Whipped Topping – gives the dessert a light, airy texture; thaw before use for easy incorporation.
For the Base Layer
• Angel Food Cake – the base layer that softens with cream and cherry; can be store-bought or homemade.
For the Cherry Topping
• Cherry Pie Filling – provides the signature flavor and sweet-tart topping; consider substituting with blueberry or strawberry filling for a twist.
Now you’re one step closer to indulging in this heavenly Cherries in the Snow dessert!
Step‑by‑Step Instructions for Cherries in the Snow
Step 1: Prepare Your Dish
Start by lightly greasing or lining a 9×13-inch baking dish with parchment paper to ensure easy removal later. This will be the foundation for your delicious Cherries in the Snow dessert. Prepping the dish first helps keep your focus on the layers that will create this delightful treat.
Step 2: Cream the Cheese
In a large mixing bowl, beat together the softened cream cheese and powdered sugar using an electric mixer for about 1 to 2 minutes until the mixture is smooth and creamy. Look for a fluffy texture free of lumps; this will ensure that your creamy filling is indulgent and delicious. Scrape down the sides as needed for an even mix.
Step 3: Add Flavor
Next, mix in 1 teaspoon of vanilla extract until well combined. This enhances the flavor profile of your Cherries in the Snow dessert. Then, gently fold in 8 ounces of thawed whipped topping using a rubber spatula, being careful not to deflate the mixture. You want a light and fluffy consistency that holds well for layering.
Step 4: Layer the Cake
Take half of the angel food cake cubes and layer them evenly across the bottom of your prepared baking dish. Ensure the pieces are well-spread to create a sturdy base for the creamy filling. This layer will absorb the sweetness and the creamy elements, softening beautifully over time.
Step 5: Spread the Cream Mixture
Spoon half of your cream cheese mixture over the angel food cake layer, spreading it evenly with a spatula for a smooth finish. You should see the fluffy cream creaminess covering the cake completely. This creamy layer is vital for the signature texture of your Cherries in the Snow dessert.
Step 6: Add Cherry Topping
Next, dollop half of the cherry pie filling over the cream layer, carefully spreading it out to evenly coat the top. The vibrant cherries will provide a beautiful contrast against the creamy filling and cake, making for a stunning visual. This is the signature element that truly defines this dessert.
Step 7: Repeat the Layers
Repeat the layering process with the remaining angel food cake cubes, followed by the remaining cream cheese mixture and then the rest of the cherry pie filling. Take your time to ensure each layer is even, creating a beautiful and delicious Cherries in the Snow dessert that looks as good as it tastes.
Step 8: Chill to Perfection
Cover the assembled dessert with plastic wrap and refrigerate it for at least 2 hours, though allowing it to chill longer overnight will improve slice integrity. This cooldown will help the layers firm up, ensuring you can cut clean slices to impress your guests.
Step 9: Serve and Enjoy
Once chilled, it’s time to slice your Cherries in the Snow dessert. Use a sharp knife for clean cuts, and serve it cold for the best experience. Consider garnishing with fresh cherries or mint for added color and freshness, making this dessert not only delightful to taste but visually stunning as well.
How to Store and Freeze Cherries in the Snow
Fridge: Keep your Cherries in the Snow covered in the refrigerator for up to 3 days. This helps maintain its creamy texture and prevents the dessert from becoming soggy.
Freezer: If you want to enjoy this delightful treat later, you can freeze it for up to a month. Wrap it tightly in plastic wrap and then aluminum foil to prevent freezer burn.
Thawing: To serve after freezing, transfer the dessert to the fridge and let it thaw overnight. This ensures a smooth, creamy filling upon serving.
Reheating: This dessert is best enjoyed chilled. Avoid reheating, as it’s designed to be a cool, refreshing treat perfect for gatherings.
What to Serve with Cherries in the Snow
The vibrant flavors and delectable layers of this dessert invite a range of delightful pairings to create a memorable meal experience.
- Fresh Fruit Salad: A mix of berries and melons adds a refreshing contrast, balancing the sweetness of the Cherries in the Snow beautifully.
- Vanilla Ice Cream: A scoop of creamy vanilla ice cream complements the dessert’s fluffy texture while amplifying the sweet-tart cherry notes.
- Chocolate Biscotti: These crunchy treats offer a rich chocolate contrast, providing a satisfying texture to your dessert experience.
- Mint-Infused Lemonade: This bright drink enhances the fruity essence while refreshing your palate between bites, ideal for warm gatherings.
- Coffee or Espresso: A shot of strong coffee pairs well with the creamy dessert, balancing its sweetness while highlighting the cherry flavors.
- Lemon Sorbet: This light, tangy sorbet refreshes the palate and provides a nice contrast to the rich creamy layers.
- Cheesecake Bites: These mini desserts echo the creamy cheesecake element, creating a delightful extravaganza that’s perfect for dessert lovers.
- Almond Cookies: Nutty and lightly sweet, these cookies add a crunchy element that pairs nicely with the soft layers of the Cherries in the Snow.
Cherries in the Snow Variations & Substitutions
Feel free to unleash your creativity in the kitchen with these delightful twists on the classic Cherries in the Snow dessert!
-
Gluten-Free: Use gluten-free angel food cake or substitute with crushed gluten-free cookies for the base layer. This makes the dessert accessible to everyone.
-
Vegan: Opt for vegan cream cheese and whipped topping in place of the dairy versions. This ensures a creamy indulgence that everyone can enjoy.
-
Low-Sugar: Replace powdered sugar with a sugar alternative like erythritol or stevia for a low-sugar version that doesn’t skimp on sweetness.
-
Fruit Variations: Swap out cherry pie filling for blueberry, strawberry, or mixed berry options. Each choice brings its own refreshing twist and vibrant colors.
-
Nutty Crunch: Add crushed nuts, such as walnuts or pecans, between the layers for an enjoyable crunch and added texture that elevates the experience.
-
Chocolate Drizzle: Finish with a drizzle of melted chocolate on top for a rich contrast that enhances the dessert’s flavor. Chocolate and cherries are a classic duo!
-
Coconut Variation: Incorporate shredded coconut into the cream cheese mixture for a tropical flair that complements the fruity topping beautifully.
-
Zesty Lemon: Mix a teaspoon of lemon zest into the cream filling for a bright citrus note that layers well with the cherry sweetness.
After trying these variations, don’t forget to check out my other favorites like Homemade English Toffee for a sweet surprise or indulge in my festive Joy Christmas Fudge during the holidays!
Make Ahead Options
These Cherries in the Snow are perfect for meal prep, allowing you to indulge in this delightful dessert while saving precious time! You can prepare the creamy filling and layer it on the angel food cake up to 24 hours in advance, ensuring maximum flavor. Simply assemble the dessert but wait to add the cherry pie filling until it’s time to serve; that way, the topping stays vibrant and fresh. Keep the assembled dessert covered in the refrigerator for up to 3 days without compromising its delightful texture. When ready to impress your guests, just slice and serve chilled, garnished with fresh cherries or mint for that extra touch!
Expert Tips for Cherries in the Snow
Softened Cheese: Ensure your cream cheese is fully softened to room temperature. This prevents lumps in your filling, resulting in a smooth texture throughout.
Chill Time Matters: For cleaner slices of your Cherries in the Snow, allow it to chill overnight. This extra time helps the layers set properly and makes cutting easier.
Fold Gently: Use a rubber spatula to gently fold in the whipped topping. This technique keeps the mixture airy, giving your dessert that coveted light, fluffy quality.
Layer Evenly: Distribute the layers evenly in your baking dish. A balanced filling creates a visually appealing dessert that showcases each delicious component beautifully.
Customize Wisely: Feel free to swap the cherry pie filling with other fruits, but remember that the flavor will alter. Always taste as you go for the best results!
Cherries in the Snow Recipe FAQs
What should I look for when selecting cherries for the topping?
Absolutely! When choosing cherries for your topping, look for plump, firm cherries with a vibrant red color. Avoid any that have dark spots or bruises, as these may indicate overripeness. Fresh cherries are ideal, but if you’re opting for pie filling, ensure that it has a quality, rich color and flavor.
How long can I store Cherries in the Snow in the fridge?
Cherries in the Snow can be stored in the refrigerator for up to 3 days. To keep the dessert fresh, cover it securely with plastic wrap or foil. This prevents it from absorbing any unwanted odors and helps maintain its luscious texture.
Can I freeze Cherries in the Snow, and if so, how?
Very! To freeze Cherries in the Snow, start by wrapping the dish tightly in plastic wrap followed by aluminum foil to prevent freezer burn. You can freeze it for up to 1 month. When you’re ready to enjoy, simply transfer it to the fridge to thaw overnight. This gentle thawing ensures the dessert retains its delightful creamy filling.
What if my cream cheese mixture has lumps?
No worries! If your cream cheese mixture has lumps, it likely means the cream cheese wasn’t softened enough. For smoother results, make sure to let your cream cheese sit out at room temperature for about 30 minutes before mixing. If you do encounter lumps, you can use an electric mixer to whip the mixture longer until it’s smooth.
Are there any dietary considerations for Cherries in the Snow?
Certainly! This dessert can easily be adapted for various dietary needs. For a gluten-free version, ensure you use gluten-free angel food cake. To make it vegan, you can substitute regular cream cheese and whipped topping with vegan alternatives, and adjust the pie filling to avoid ingredients derived from animal products. Always check labels for allergens if you’re serving guests with specific dietary restrictions.
How can I customize the flavors?
Feel free to mix and match with your favorite fruits! Instead of cherry pie filling, you can opt for blueberry, strawberry, or even a mixed berry topping. Just remember, the flavor will change accordingly, so taste as you go!
Cherries in the Snow: A Creamy No-Bake Delight to Savor
Ingredients
Equipment
Method
- Prepare your dish by lightly greasing or lining a 9x13-inch baking dish with parchment paper.
- In a large mixing bowl, beat together the softened cream cheese and powdered sugar using an electric mixer until smooth.
- Mix in the vanilla extract until well combined, then gently fold in the thawed whipped topping.
- Layer half of the angel food cake cubes evenly across the bottom of your prepared baking dish.
- Spoon half of the cream cheese mixture over the angel food cake layer, spreading it evenly.
- Dollop half of the cherry pie filling over the cream layer, spreading it out evenly.
- Repeat the layering process with the remaining angel food cake, cream cheese mixture, and cherry pie filling.
- Cover the assembled dessert with plastic wrap and refrigerate for at least 2 hours.
- Once chilled, slice your Cherries in the Snow dessert and serve cold, garnishing with fresh cherries or mint if desired.
Leave a Reply