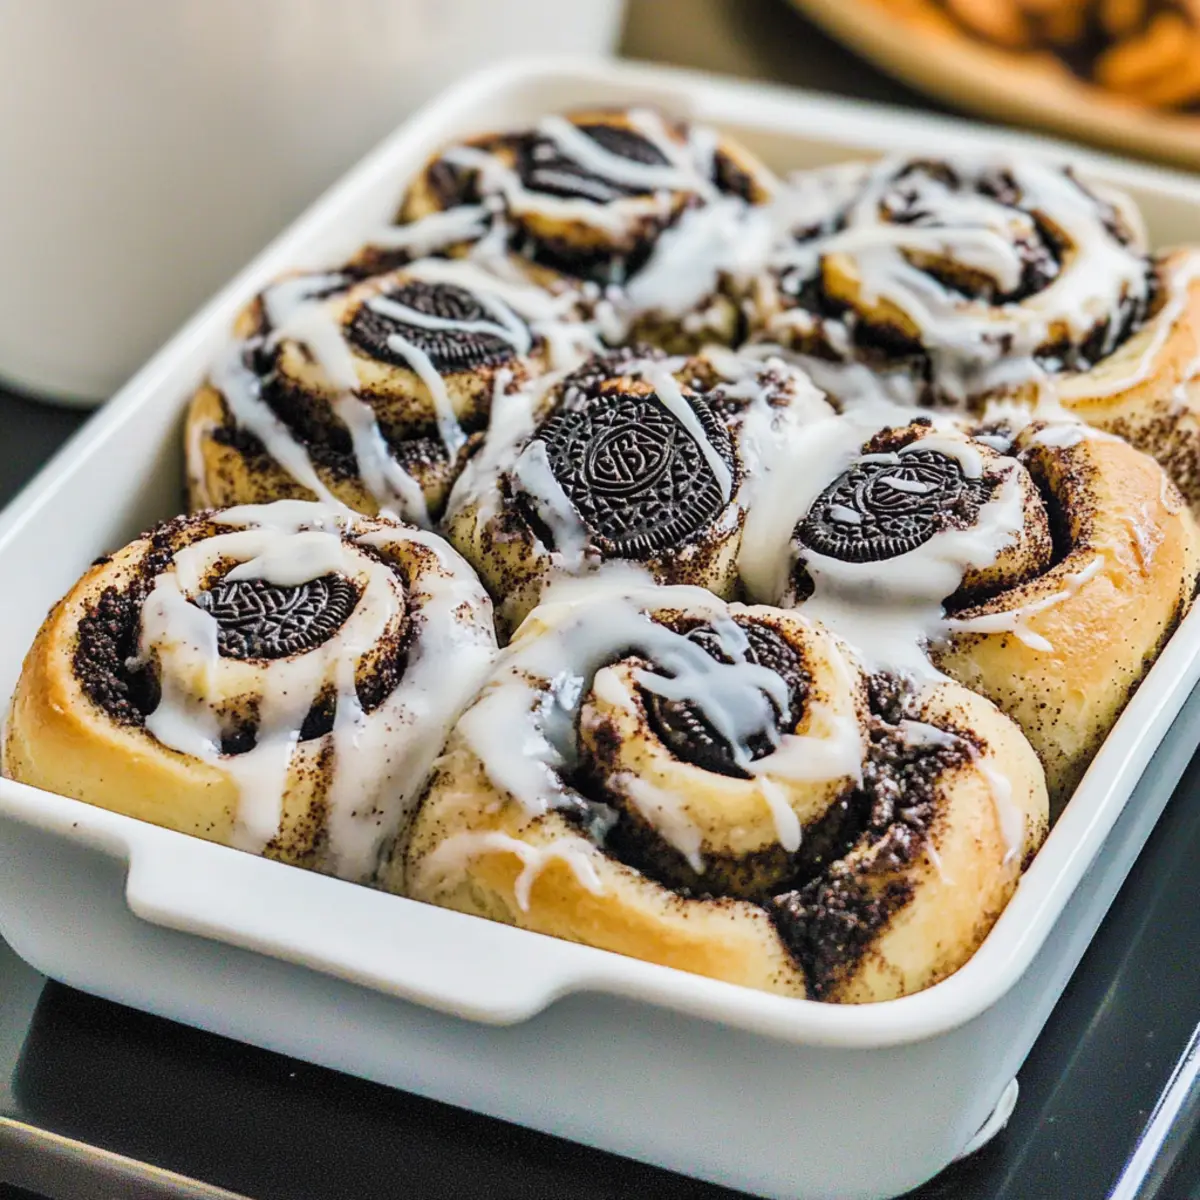
As I stood in my kitchen, the sweet aroma of baking dough intertwined with chocolatey whispers of crushed Oreos, I realized I had stumbled upon something magical—Oreo Cinnamon Rolls with Vanilla Glaze. These delightful creations bring together the comfort of homemade cinnamon rolls and the nostalgic joy of Oreos, making them a perfect addition to any breakfast table or festive gathering. With quick prep and a no-fuss baking process, you’ll find yourself whipping up a batch in no time. Not only do they look stunning, but they invite your loved ones to indulge in a soft, pillowy embrace of flavors that can brighten any day. Curious to see just how easy it is to create this irresistible treat? Let’s dive into the recipe together!
Why are Oreo Cinnamon Rolls irresistible?
Decadent Fusion: These rolls brilliantly combine the beloved flavors of Oreos with the warm comfort of cinnamon rolls, creating a treat that’s hard to resist.
Easy to Make: With minimal effort, you’ll be rewarded with a show-stopping dessert perfect for any occasion or a cozy weekend breakfast.
Sweet Glazed Perfection: Topped with a rich vanilla glaze, each bite melts in your mouth, offering a delightful balance of sweet and creamy.
Versatile Enjoyment: Whether served fresh from the oven or enjoyed as a make-ahead option, these rolls adapt to fit any schedule and palate, making them ideal for gatherings or a simple treat at home.
Nostalgic Appeal: Elevate your brunch game with a nostalgic twist; who can say no to Oreos? For more delightful cinnamon-inspired treats, check out our Pumpkin Cookies Cinnamon or Cinnamon Sugar Pumpkin.
Oreo Cinnamon Rolls Ingredients
For the Dough
• All-Purpose Flour – Provides structure; start with 3 1/2 cups and adjust as needed.
• Instant Dry Yeast – Essential for leavening; substitute with active dry yeast for a longer rise.
• Fine Salt – Balances flavors, enhancing sweetness.
• Granulated Sugar – Sweetens the dough; can replace some brown sugar for a lighter taste.
• Whole Milk – Keeps dough moist; warm it to activate yeast.
• Unsalted Butter – Used to create a rich dough texture; make sure it’s at room temperature.
• Large Egg – Adds richness; room temperature eggs mix better into the dough.
For the Filling
• Light Brown Sugar – Adds sweetness with a hint of molasses flavor; granulated sugar can be used as a substitute.
• Ground Cinnamon – Introduces warm, spicy notes to enhance flavor.
• Black Cocoa Powder – Creates a chocolatey flavor reminiscent of Oreos; use Dutch-process or unsweetened cocoa if necessary.
• Crushed Oreos – Adds the signature Oreo flavor and texture; adjust quantity to taste.
For the Glaze
• Powdered Sugar – Sweetens and gives a smooth texture to the glaze.
• Vanilla Extract – Adds a delightful aromatic note to the glaze.
Each ingredient harmonizes to create the moist, decadent experience that these Oreo Cinnamon Rolls promise. Ready to dive in and embrace the baking process? Let’s make those sweet cravings a reality!
Step‑by‑Step Instructions for Oreo Cinnamon Rolls
Step 1: Prepare the Filling
In a medium bowl, mix together light brown sugar, black cocoa powder, and ground cinnamon until fully combined. The mixture should take on a rich dark color, reminiscent of a chocolatey delight. Set this aside to allow the flavors to meld while you work on the dough.
Step 2: Combine the Dry Ingredients
In a large mixing bowl or stand mixer, whisk together the all-purpose flour, instant dry yeast, and fine salt. This step is crucial as it helps activate the yeast evenly. In just a couple of minutes, you should see an even blend, ensuring a fluffy base for your Oreo Cinnamon Rolls.
Step 3: Prepare the Wet Ingredients
Gently warm the whole milk in the microwave with the unsalted butter and granulated sugar until the butter is melted—about 1 to 1.5 minutes should suffice. Make sure this mixture is warm, not hot, before adding it to the dry ingredients to avoid killing the yeast and create a successful rise in the rolls.
Step 4: Form the Dough
Add the warm milk mixture to the dry ingredients and mix until a sticky dough begins to form. If the dough feels too wet, incorporate additional flour a tablespoon at a time until it reaches a slightly tacky but elastic texture. This process should take about 2-3 minutes of mixing; the dough should start pulling away from the bowl’s sides.
Step 5: Introduce the Oreo Flavor
Gently fold in 1/2 cup of crushed Oreos into the dough, ensuring they are evenly distributed throughout. This step enhances the signature flavor of your Oreo Cinnamon Rolls, creating a delightful chocolatey interior with every bite. You want to see bits of Oreo integrated for a beautiful finish.
Step 6: Allow the Dough to Rest
Cover the dough with plastic wrap and let it rest for 10 minutes at room temperature. This resting period allows the gluten to relax, resulting in a more manageable dough that rolls out smoothly. During this time, you can prepare your rolling surface.
Step 7: Roll Out the Dough
On a lightly floured surface, roll the dough into a 12×18 inch rectangle, ensuring even thickness. Utilizing a rolling pin, aim for about 1/4 inch thickness, which creates the perfect canvas for your filling. Visualize a large, flat try that’s ready to be slathered with buttery goodness.
Step 8: Add the Filling
Spread softened unsalted butter evenly over the rolled-out dough, reaching the edges for maximum flavor. Follow this by sprinkling the prepared cinnamon filling generously across the buttered surface, followed by an even layer of the remaining crushed Oreos. This step is where the magic begins to take shape!
Step 9: Roll and Cut the Logs
Starting from one long edge, carefully roll the dough into a tight log, sealing the filling inside. Use dental floss to cut the log into 9 equal pieces, creating clean cuts without squishing the rolls. This unique method keeps your rolls looking beautiful and uniform for the ultimate presentation.
Step 10: Let the Rolls Rise
Place the cut rolls in a greased pan, ensuring they are positioned with enough space to expand. Cover the pan and let it rise in a turned-off oven for about 30 minutes. You’ll know they’re ready when they have visibly puffed up significantly, bringing you closer to the irresistible Oreo Cinnamon Rolls.
Step 11: Bake to Perfection
Preheat your oven to 350°F (175°C) during the final minutes of the dough rising. Once ready, bake the rolls for 26-30 minutes until golden brown on top and the edges are softly browned. Keep an eye on them; the moment they turn golden, they’re ready to come out for the topping masterpiece!
Step 12: Prepare the Glaze
While the cinnamon rolls are cooling for about 10-20 minutes, mix the powdered sugar and vanilla extract in a small bowl until smooth. Adjust the consistency with a splash of milk if necessary, ensuring it’s pourable yet thick enough to drape beautifully over the warm Oreo Cinnamon Rolls.
Step 13: Drizzle and Serve
Once the rolls have slightly cooled, drizzle the vanilla glaze over them with a spoon for a lovely finishing touch. Let the glaze set slightly before serving. These Oreo Cinnamon Rolls are now ready to delight everyone at your table—share the joy of homemade sweetness!
Oreo Cinnamon Rolls Variations & Substitutions
Feel free to get creative with your Oreo Cinnamon Rolls and make them your own! Each twist adds delightful variety to this beloved treat.
- Dairy-Free: Substitute almond or oat milk and use dairy-free butter for a plant-based version that’s just as indulgent.
- Gluten-Free: Swap all-purpose flour for a 1:1 gluten-free blend to accommodate dietary needs without sacrificing taste.
- Nutty Crunch: Add chopped nuts like walnuts or pecans into the filling for a delightful texture contrast and a rich flavor boost.
- Additional Spice: Enhance the cinnamon with a sprinkle of nutmeg or cardamom in the filling; it adds complexity and warmth to each bite.
- Chocolate Drizzle: For extra decadence, melt dark chocolate and drizzle it over the glazed rolls before serving. A chocolate lover’s dream!
- Oreo Variations: Experiment with different Oreo flavors—try mint or peanut butter for a fun, unexpected twist that elevates your rolls.
- Caramel Delight: Drizzle caramel sauce over the finished rolls or add caramel bits to the filling for a gooey sweetness that complements the Oreo flavor perfectly.
- Cream Cheese Glaze: Switch, or mix, the vanilla glaze with a cream cheese blend for a rich, tangy topping that pairs perfectly with the rolls.
These variations will keep your Oreo Cinnamon Rolls fresh and exciting every time you whip up a batch. And if you’re eager for more tempting ideas, you might enjoy our Baked Apples Cinnamon or Cinnamon Sugar Pumpkin treats that are sure to inspire your baking!
How to Store and Freeze Oreo Cinnamon Rolls
Room Temperature: Store in an airtight container for up to 2 days. Enjoy them warm for the best taste and texture!
Fridge: For longer freshness, keep in the refrigerator for up to 5 days. Reheat individual rolls in the microwave for about 15-20 seconds.
Freezer: Freeze unglazed rolls after baking for up to 3 months. Wrap them tightly in plastic wrap and place in a freezer bag.
Reheating: Bake from frozen at 350°F (175°C) for 15-20 minutes to warm through, then drizzle with vanilla glaze before serving your delicious Oreo Cinnamon Rolls.
What to Serve with Oreo Cinnamon Rolls
Transform breakfast or dessert into a delightful feast with these mouthwatering pairings that complement the indulgent flavors of Oreo Cinnamon Rolls.
-
Whipped Cream: Light and airy, it adds a creamy contrast that enhances the sweet rolls beautifully. A dollop atop each roll transforms them into an irresistible treat.
-
Fresh Berries: Juicy strawberries or tart raspberries introduce a refreshing zing that perfectly balances the richness of the rolls. Their vibrant color also adds a cheerful touch to your table.
-
Crispy Bacon: The savory, salty crunch creates a delicious contrast with the sweetness of cinnamon rolls. Each bite offers a delightful flavor fusion that will keep everyone coming back for more.
-
Vanilla Ice Cream: This classic pairing is a heavenly combination! The melty creaminess of vanilla ice cream elevates the experience, making it feel like a warm, decadent dessert.
-
Cinnamon Spiced Coffee: A warm cup of cinnamon spiced coffee invites comfort and warmth, enhancing the cozy atmosphere at your breakfast table. It’s a wonderful complement that brings out all the flavors beautifully.
-
Caramel Sauce: Drizzle some over the rolls for a sweeter finish that amplifies their decadent nature. It adds a luxurious touch, elevating the dining experience to new levels of indulgence.
-
Hot Chocolate: For a comforting companion, serve hot chocolate alongside. The rich, creamy flavors harmonize perfectly with the chocolatey notes of the rolls, making it a perfect treat for cold mornings.
Expert Tips for Oreo Cinnamon Rolls
-
Dough Temperature: Ensure your milk and butter mixture is warm, not hot, to protect the yeast. If it’s too hot, it can kill the yeast, resulting in dense rolls.
-
Room Temperature Ingredients: Use room temperature butter and eggs for easier blending. This helps produce a more uniform dough and better texture in your Oreo Cinnamon Rolls.
-
Flour Measurement: Avoid packing your flour into the measuring cup. Spoon it in lightly for an accurate measurement and prevent overly dense dough.
-
Cutting Technique: Use unflavored dental floss to cut the rolls without squishing them. This method creates cleaner edges and helps retain their fluffy shape.
-
Make Ahead: For a stress-free morning, prepare the rolls the night before and refrigerate them. Simply let them warm up before baking, ensuring a fresh-out-of-the-oven experience.
Make Ahead Options
These Oreo Cinnamon Rolls are a fantastic choice for busy cooks looking to simplify their mornings! You can prepare the rolls up to 24 hours in advance by following the steps up to the cutting stage. After you’ve cut the rolls, place them in a greased pan, cover tightly with plastic wrap, and refrigerate. When you’re ready to bake, simply allow them to sit at room temperature for about 30 minutes before preheating your oven to 350°F. This gentle warming helps reactivate the yeast, ensuring your rolls will be just as delicious. Enjoy bakery-quality cinnamon rolls without the morning rush!
Oreo Cinnamon Rolls Recipe FAQs
What type of Oreos should I use for the filling?
Absolutely! You can use any variety of Oreos you enjoy—classic, double-stuffed, or even seasonal flavors like pumpkin spice. The preferred choice is double-stuffed for an extra creamy texture but feel free to mix it up according to your taste!
How should I store leftover Oreo Cinnamon Rolls?
For optimal freshness, store your Oreo Cinnamon Rolls in an airtight container at room temperature for up to 2 days. If you need to keep them longer, transfer them to the fridge, where they will last for up to 5 days. Just reheat individual rolls in the microwave for about 15-20 seconds before enjoying!
Can I freeze Oreo Cinnamon Rolls?
Yes! To freeze your cinnamon rolls, wrap each baked roll tightly in plastic wrap and then place them in a freezer bag. This will help prevent freezer burn. They can be frozen unglazed for up to 3 months. When ready to enjoy, simply reheat from frozen at 350°F (175°C) for 15-20 minutes, and drizzle with the glaze afterward.
What should I do if my dough isn’t rising?
If your dough isn’t rising, it might be due to the yeast being inactive. Make sure your milk and butter mixture was warm but not hot to properly activate the yeast. If you’re using active dry yeast instead of instant yeast, be sure to give it a 5-10 minute warm-up in the milk before adding other ingredients. Always check the expiration date on your yeast!
Are these cinnamon rolls safe for pets?
While these Oreo Cinnamon Rolls are delicious for us, they contain ingredients like sugar and cocoa, which can be harmful to pets, especially dogs. It’s best to keep these sweet treats away from them. If you’d like to share a special baked good with your furry friend, consider making dog-friendly treats instead!
Can I use gluten-free flour for this recipe?
Yes! You can substitute all-purpose flour with a 1:1 gluten-free flour blend. Just ensure it contains xanthan gum for proper texture. The rolls might turn out slightly different in texture, but they will still be delightful and enjoyable!
Oreo Cinnamon Rolls: Indulgent Bliss for Sweet Cravings
Ingredients
Equipment
Method
- Prepare the Filling: In a medium bowl, mix together light brown sugar, black cocoa powder, and ground cinnamon until fully combined. Set aside.
- Combine the Dry Ingredients: In a large bowl, whisk together all-purpose flour, instant dry yeast, and fine salt.
- Prepare the Wet Ingredients: Warm whole milk, unsalted butter, and granulated sugar until the butter is melted.
- Form the Dough: Add warm milk mixture to dry ingredients and mix until sticky dough forms. Adjust with more flour if needed.
- Introduce the Oreo Flavor: Fold in crushed Oreos into the dough evenly.
- Allow the Dough to Rest: Cover dough with plastic wrap and let it rest for 10 minutes at room temperature.
- Roll Out the Dough: On a lightly floured surface, roll the dough into a 12x18 inch rectangle.
- Add the Filling: Spread softened unsalted butter, then sprinkle the cinnamon filling and the remaining crushed Oreos.
- Roll and Cut the Logs: Roll the dough tightly, sealing the filling and cutting into 9 equal pieces.
- Let the Rolls Rise: Place cut rolls in a greased pan and let rise in a turned-off oven for about 30 minutes.
- Bake to Perfection: Preheat oven to 350°F and bake the rolls for 26-30 minutes until golden brown.
- Prepare the Glaze: Mix powdered sugar and vanilla extract until smooth; adjust consistency with milk if necessary.
- Drizzle and Serve: Drizzle glaze over cooled rolls and let set before serving.
Leave a Reply