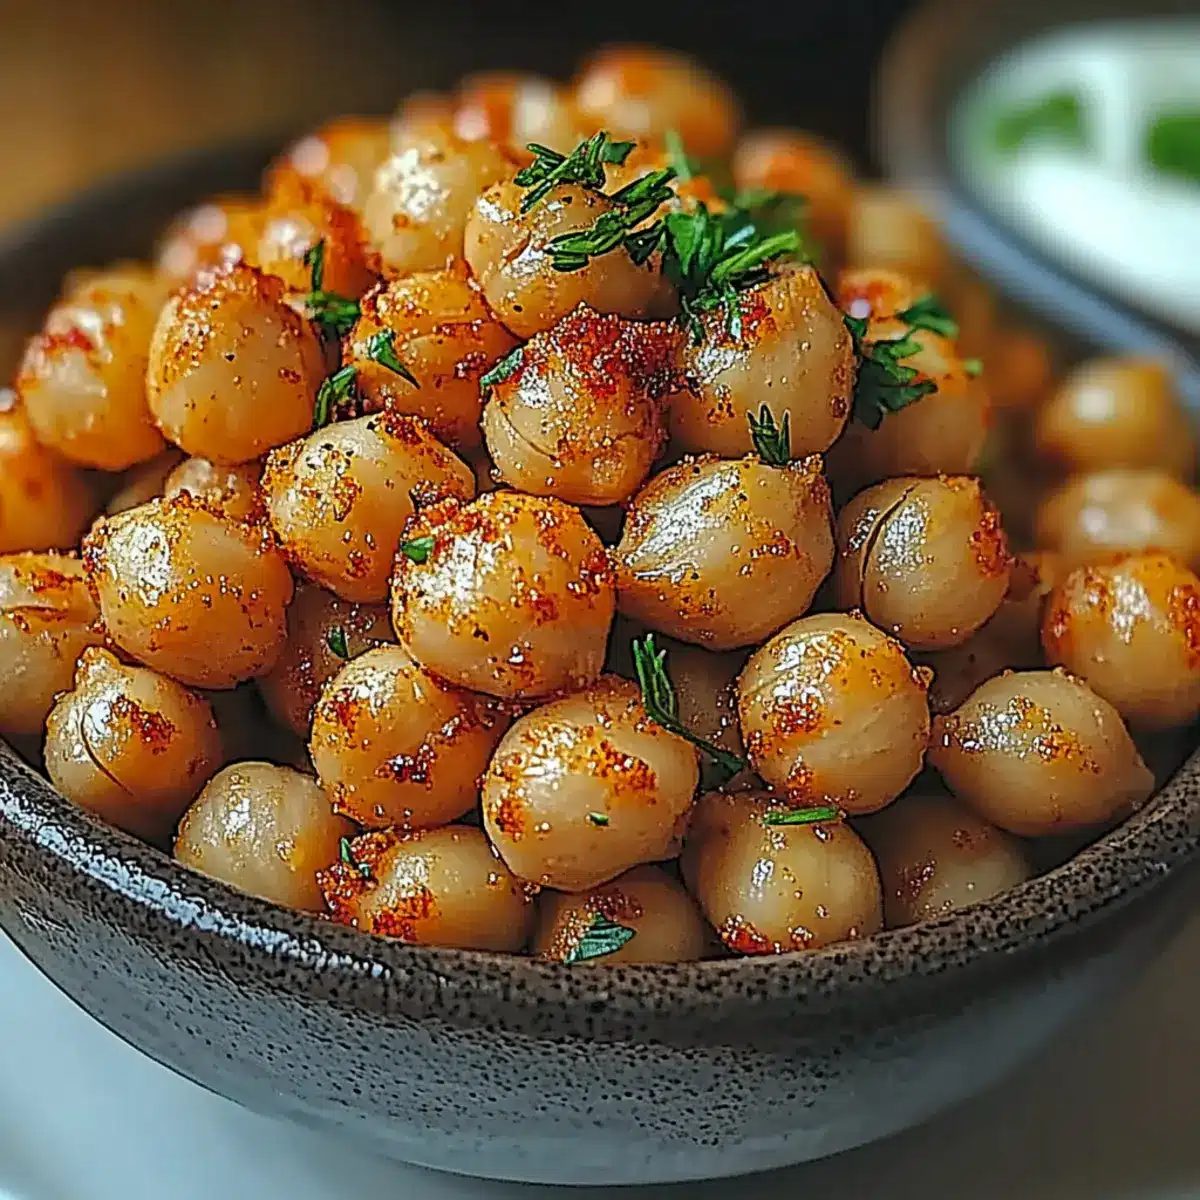
I recently found myself in a battle with snack time—seeking something nutritious yet irresistibly crunchy. That’s when I discovered the magic of Crispy Chickpea Crunchies. By transforming basic canned chickpeas into a high-protein snack, I created a delightfully crunchy treat that’ll crush any cravings for those processed snacks. Not only are these delights quick and easy to whip up in under thirty minutes, but they are also gluten-free and packed with flavor! Perfect for munching during a movie night or as a standout addition to your brunch spread, these crunchies are versatile enough to suit any occasion. Ready to experience the satisfying snap and smoky zing that make these chickpea bites truly irresistible? Let’s get cooking!
Why are Crispy Chickpea Crunchies a must-try?
Irresistible Snack: Once you take a bite, you’ll understand why these crispy bites are everyone’s new obsession—they’re the ultimate crunch!
Quick Preparation: You’ll love how effortlessly these come together in under thirty minutes. No more long waits for gourmet snacks!
Nutritious Option: High in protein and fiber, these Crispy Chickpea Crunchies are the ideal alternative to processed snacks, making them perfect for health-conscious snackers.
Flavor Versatility: Customize them with your favorite spices for a unique twist each time; the possibilities are endless!
Great for Sharing: Whether it’s movie night or brunch, these crunchies are sure to please a crowd—everyone will want to know your secret recipe!
Try pairing them with a refreshing dip, or enjoy them on their own for an explosion of flavor. 🍽️
Crispy Chickpea Crunchies Ingredients
• Get ready for a delicious and healthy snack!
For the Crunchies
- Canned Chickpeas – Provides the base; delivers over 15g of plant-based protein per cup, so ensure they are thoroughly dried for optimal crunch.
- Extra-Virgin Olive Oil – Adds richness and helps spices adhere; can be replaced with other oils for a unique flavor profile.
- Smoked Paprika – Introduces a depth of flavor with a smoky note, or substitute with paprika or curry powder for variation.
- Ground Cumin – Enhances warmth and earthiness; can be omitted or accented with other spices to suit your taste.
- Cayenne Pepper (optional) – Adds gentle heat; adjust based on your spice preference for your Crispy Chickpea Crunchies.
- Sea Salt and Black Pepper – Essential for seasoning to enhance overall flavor.
- Fresh Lemon Juice – Brightens and balances flavors; lime juice is a suitable alternative if you prefer.
For the Yogurt Dip
- Plain Greek Yogurt – Used for a creamy dip; substitute with a cashew-based sauce for a dairy-free option.
- Chopped Fresh Dill – Optional herb for the yogurt dip, contributing a refreshing taste.
Now that you have the ingredients, you’re ready to create this mouth-watering snack that everyone will love!
Step‑by‑Step Instructions for Crispy Chickpea Crunchies
Step 1: Prep Chickpeas
Begin by preheating your oven to 400°F (200°C). Open and drain the canned chickpeas, then rinse them under cold water to remove any excess sodium. Spread the chickpeas on a clean kitchen towel and gently pat them dry. Ensuring they are thoroughly dried is key for achieving that irresistible crunch in your Crispy Chickpea Crunchies.
Step 2: Coat Chickpeas
In a large mixing bowl, drizzle extra-virgin olive oil over the dried chickpeas. Next, add smoked paprika, ground cumin, cayenne pepper (if desired), sea salt, and black pepper. With your hands or a spatula, toss everything together until the chickpeas are evenly coated with the oil and spices, creating a fragrant and flavorful base for your crunchy snack.
Step 3: Bake for Crunch
Spread the seasoned chickpeas in a single layer on a baking sheet lined with parchment paper. Bake in the preheated oven for 25 to 30 minutes, stirring halfway through to ensure even cooking. Watch for the chickpeas to turn golden brown and crispy; this visual cue indicates they are ready. The delightful aroma will fill your kitchen!
Step 4: Prepare Yogurt Dip
While the chickpeas are baking, prepare a creamy yogurt dip. In a separate bowl, whisk together plain Greek yogurt, fresh lemon juice, and chopped dill. This zesty dip complements the Crispy Chickpea Crunchies perfectly, balancing their smoky flavors. Adjust the seasoning to your liking and set aside until the crunchies are ready to serve.
Step 5: Serve
Once the chickpeas are out of the oven and cooled slightly, serve your Crispy Chickpea Crunchies warm or at room temperature. Pair them with the creamy yogurt dip for an extra flavor boost. Enjoy these satisfying snacks right away with family or friends, and revel in the joyous crunch that makes them so addictive!
What to Serve with Crispy Chickpea Crunchies
These deliciously crunchy bites are perfect for elevating any meal or snack time experience!
- Creamy Avocado Dip: This buttery dip provides a luscious contrast to the crispy texture of the chickpeas, enhancing the overall flavor profile.
- Quinoa Salad: With fresh veggies and zesty dressing, a salad adds a refreshing element that balances the crunchiness perfectly.
- Spicy Hummus: Pair these crunchies with hummus for a delightful Mediterranean twist—savory and rich, it’s a classic combo!
- Roasted Vegetable Platter: Seasonal veggies create a hearty spread, bringing out the earthy flavors in the chickpea crunchies while adding color to the table.
- Herbed Couscous: Fluffy couscous seasoned with fresh herbs makes for a light, satisfying side that complements the chickpeas magnificently.
- Chilled White Wine: A crisp, chilled white wine like Sauvignon Blanc brightens the palate, making it a delightful drink choice for serving.
- Citrusy Fruit Salad: The freshness and sweetness of a fruit salad, with a touch of citrus, creates an enjoyable balance against the spicy crunchiness.
- Dark Chocolate Bark: For a sweet ending, dark chocolate offers a luxurious contrast to the savory flavors, satisfying your sweet tooth while finishing off the meal beautifully.
- Sparkling Lemonade: A refreshing, bubbly drink to cleanse the palate, sparkling lemonade gives a fun and festive twist to your snack experience.
- Cheese Platter: Pair with a variety of cheeses for a blend of flavors and textures that can elevate your snacking to a whole new level.
Make Ahead Options
These Crispy Chickpea Crunchies are perfect for meal prep, allowing you to save time on busy weeknights! You can prep the chickpeas by rinsing, drying, and seasoning them up to 24 hours in advance; simply store them in an airtight container in the refrigerator. This will keep them fresh and flavorful. When you’re ready to enjoy your snack, just spread the seasoned chickpeas on a baking sheet and bake as instructed (remember to check for that golden-brown color!). For the yogurt dip, you can mix the ingredients and refrigerate it for up to 3 days, ensuring that everything is just as delicious when you serve it. Enjoy the convenience of healthy snacking without the rush!
Expert Tips for Crispy Chickpea Crunchies
- Drying Chickpeas: Ensure chickpeas are completely dry before roasting; moisture leads to sogginess instead of that delightful crunch.
- Even Coating: Use a large bowl when tossing the chickpeas with oil and spices to guarantee an even distribution, preventing clumping.
- Monitor Baking: Keep an eye on the color while baking; remove them when golden-brown to avoid a bitter taste and enjoy perfect Crispy Chickpea Crunchies.
- Storage Solutions: For optimal freshness, store in an airtight container with a paper towel inside to absorb any moisture and refrigerate for up to 4 days.
- Customize Flavors: Experiment with different spice combinations or herbs to create unique takes on your Crispy Chickpea Crunchies, keeping snack time exciting!
Crispy Chickpea Crunchies Variations
Feel free to get creative and customize your Crispy Chickpea Crunchies with these simple ideas that will excite your taste buds!
- Dairy-Free Dip: Swap plain Greek yogurt with a creamy cashew-based dip to make it fully vegan while maintaining richness.
- Spice Up: Experiment with different spices! Try adding a pinch of chili powder or turmeric for a flavor twist.
- Nutty Flavor: Incorporate a sprinkle of nutritional yeast into the chickpeas for a cheesy, nutty flavor that’s perfect for vegan diets.
- Sweet & Spicy: After baking, drizzle a bit of honey or maple syrup, combined with chili flakes, for a sweet and spicy treat.
- Herb Essence: Fresh herbs like rosemary or thyme can be tossed in before baking, infusing the crunchies with aromatic flavors.
- Crispy Edamame: For a unique variation, swap chickpeas for roasted edamame—rich in protein and equally satisfying!
- Texture Twist: Add a handful of chopped nuts like almonds or pecans to the chickpeas before baking for an added crunch and nutty flavor.
- Zesty Citrus: Try replacing the lemon juice with lime juice for a fresh, zesty kick that complements the smoky spices beautifully.
Consider serving these delightful bites alongside refreshing homemade dips like your choice of guacamole or hummus, making your snack time even more enjoyable! For further inspiration, check out my recipes for Grilled Chicken Legs or Honey Butter Chicken—both of which would be wonderful as part of a hearty meal!
Storage Tips for Crispy Chickpea Crunchies
Room Temperature: Allow the chickpea crunchies to cool completely before storing at room temperature in an airtight container for up to 2 days.
Fridge: Store in an airtight container with a paper towel to absorb moisture; they will stay fresh for up to 4 days while maintaining some crunch.
Freezer: For longer storage, freeze portions in airtight bags for up to 3 months. Just remember to reheat in a preheated oven to regain that satisfying crunch!
Reheating: To best enjoy your Crispy Chickpea Crunchies, reheat in the oven at 350°F (175°C) for about 10 minutes, ensuring they are thoroughly warmed and crispy again.
Crispy Chickpea Crunchies Recipe FAQs
What type of canned chickpeas should I use for the best results?
Absolutely! Opt for low-sodium or no-salt-added canned chickpeas to have better control over the seasoning of your Crispy Chickpea Crunchies. Ensure they are well-drained and rinsed to remove excess sodium and any canning liquid before using.
How should I store leftover crunchy chickpeas?
After allowing your Crispy Chickpea Crunchies to cool, store them in an airtight container at room temperature for up to 2 days. If you refrigerate them, use a container with a paper towel inside to absorb moisture, keeping them fresh for up to 4 days.
Can I freeze Crispy Chickpea Crunchies?
Yes, for longer freshness! Place your cooled chickpea crunchies in an airtight freezer bag, ensuring to remove as much air as possible. They can be frozen for up to 3 months. When ready to enjoy, simply reheat them in a preheated oven at 350°F (175°C) for about 10 minutes to restore their delightful crunch.
What can I do if my chickpeas turn out soggy instead of crispy?
No worries, this can happen! Ensure when prepping your chickpeas that they are completely dried after rinsing; use a clean kitchen towel to pat them dry. If they are already soggy, you can try baking them a bit longer and monitoring closely until they become crisp.
Are Crispy Chickpea Crunchies safe for people with allergies?
These crunchies are inherently gluten-free and suitable for vegan diets. However, if you or your guests have specific allergies, be cautious with spices and dips. Always check ingredient labels and make substitutions where necessary—like using a dairy-free yogurt alternative for the dip if lactose sensitivity is a concern.
What will I do with all the leftover yogurt dip?
Fret not! The yogurt dip is incredibly versatile. Store it in an airtight container in the fridge for up to one week. Use it as a delightful spread on sandwiches, a topping for grain bowls, or even as a creamy dressing for salads. The flavor only gets better with time!
Crispy Chickpea Crunchies: Your New Favorite Protein Snack
Ingredients
Equipment
Method
- Preheat your oven to 400°F (200°C). Open and drain the canned chickpeas, then rinse under cold water. Pat them dry with a kitchen towel.
- In a large mixing bowl, drizzle olive oil over the chickpeas. Add smoked paprika, ground cumin, cayenne pepper, sea salt, and black pepper. Toss until evenly coated.
- Spread the chickpeas in a single layer on a baking sheet lined with parchment paper. Bake for 25 to 30 minutes, stirring halfway through.
- In a separate bowl, whisk together Greek yogurt, fresh lemon juice, and chopped dill for the dip.
- Serve warm or at room temperature with the yogurt dip. Enjoy!
Leave a Reply