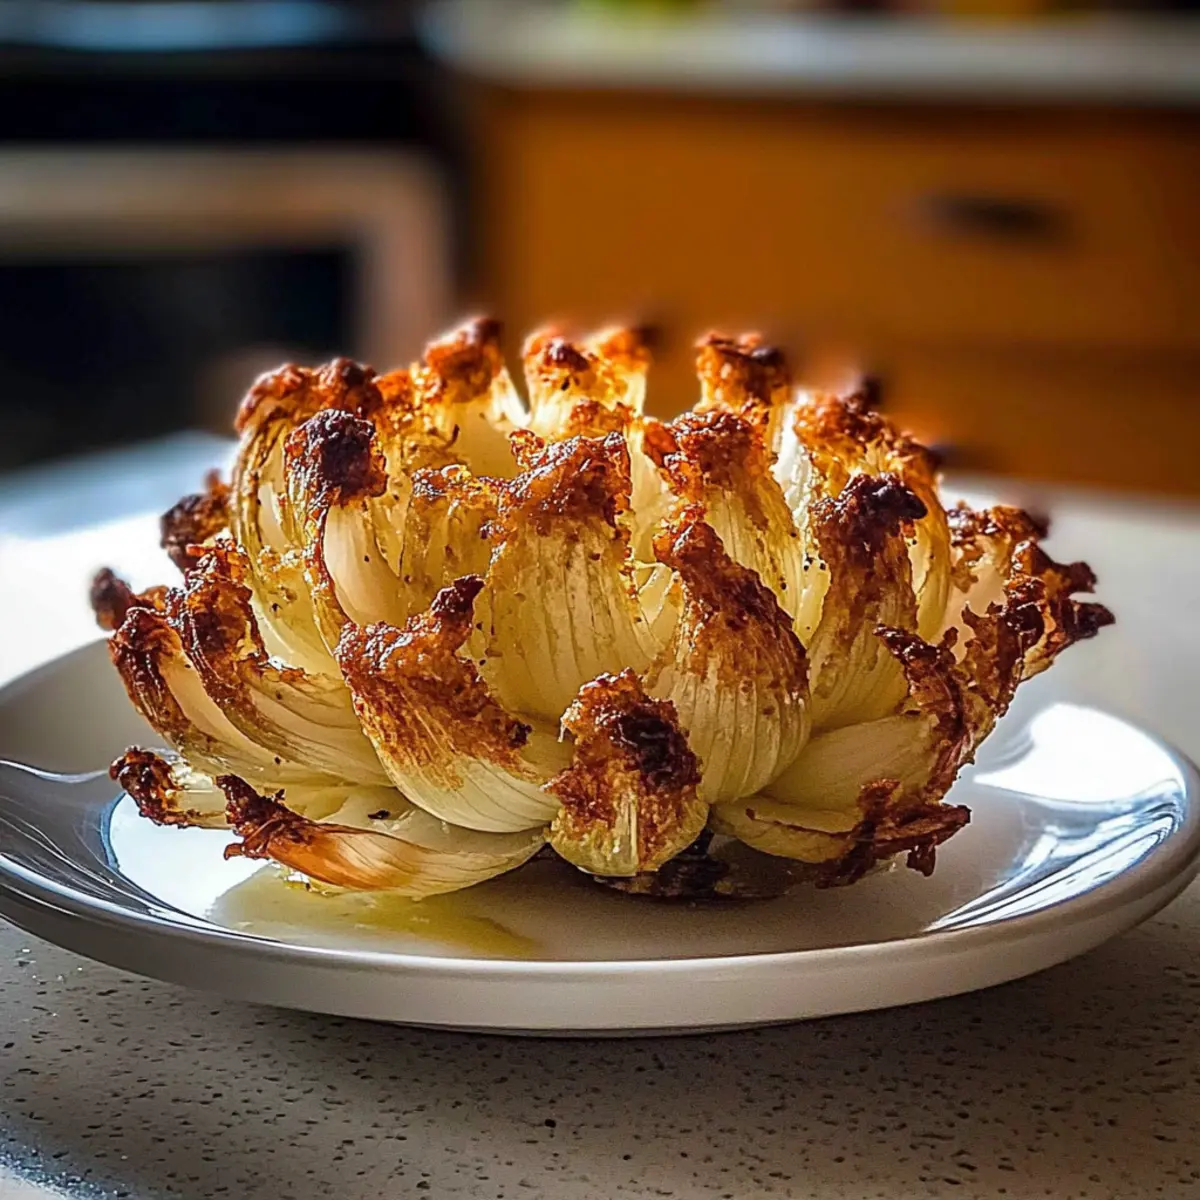
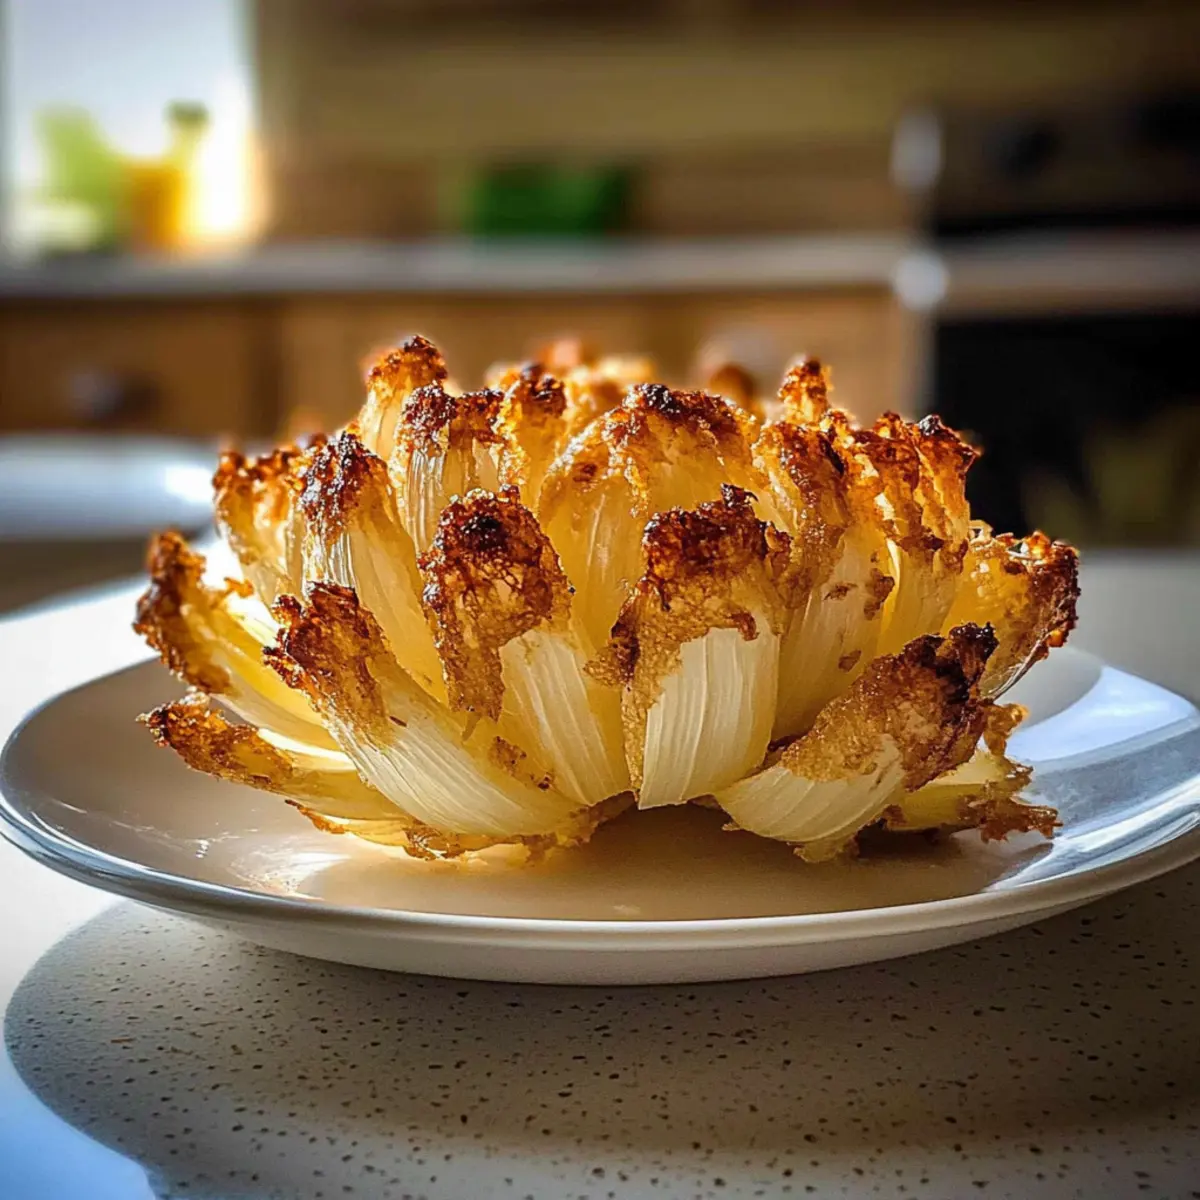
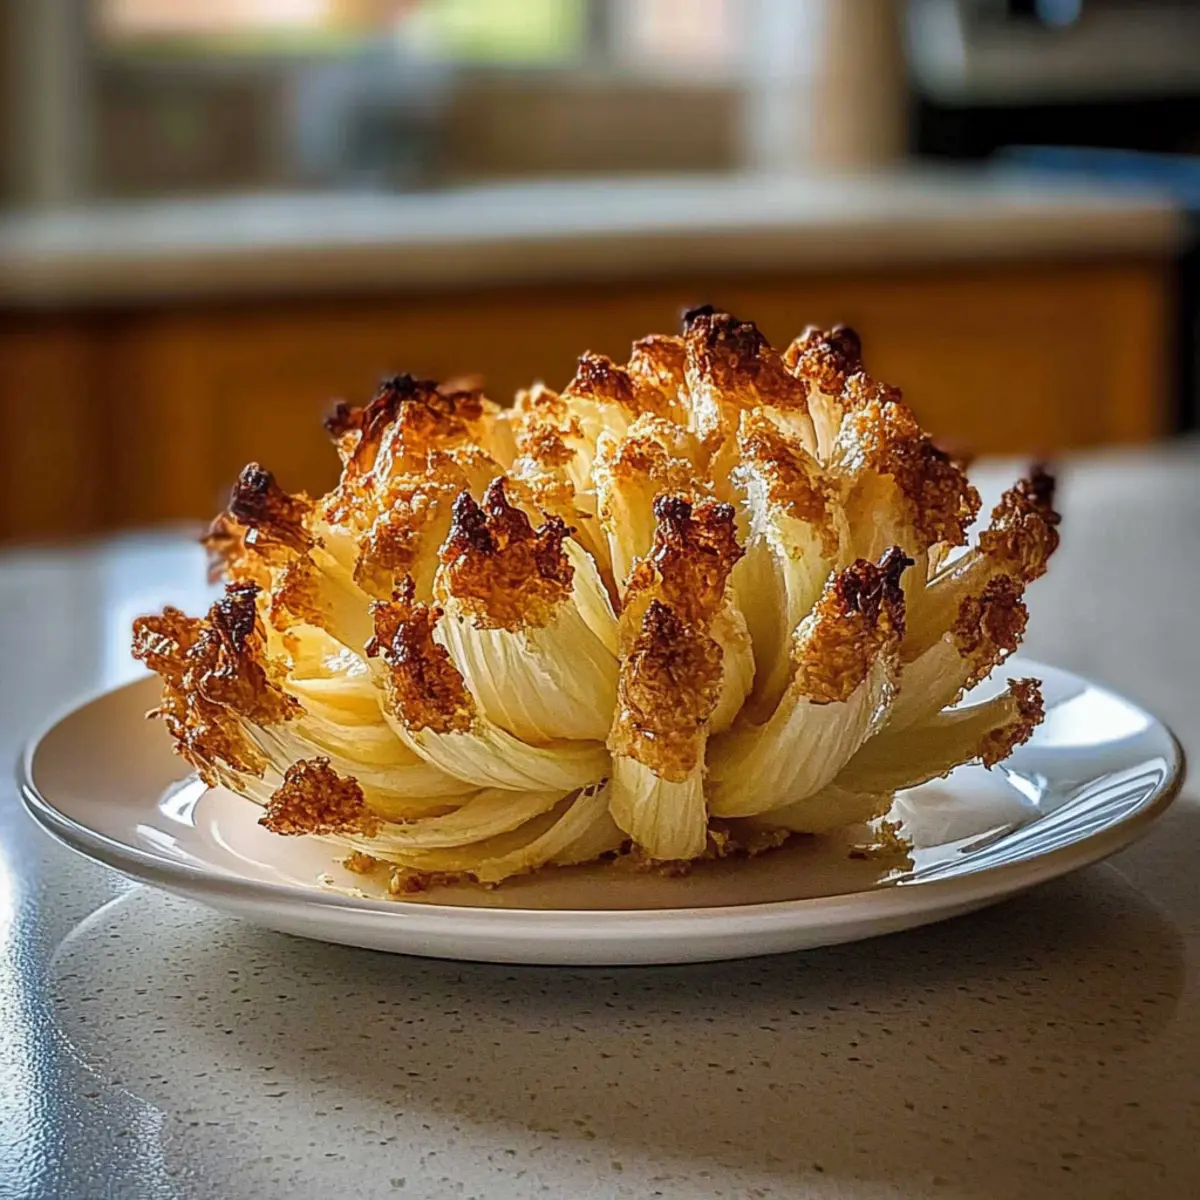
The tantalizing aroma of savory spices fills the kitchen as I prepare to make something special—an amazing blooming onion in the oven! This delightful appetizer brings a healthier twist to a classic favorite without sacrificing that satisfying crunch. As I gently slice the onion, peeling back each petal, I can’t help but smile, knowing this guilt-free version offers all the deliciousness with none of the heaviness of frying. It’s perfect for feeding a crowd or simply treating myself to something fun and exciting. Plus, it’s incredibly easy to whip up, making it an ideal choice for any gathering or a cozy night in. Curious about how to create this beautiful centerpiece that’s sure to impress your friends and family? Let’s dive into the details!
Why Is This Blooming Onion So Amazing?
Healthier Twist: This oven-baked blooming onion offers all the flavor of the classic favorite without the guilt.
Crispy Perfection: With a crunchy exterior and tender petals, each bite provides satisfying textures.
Easy to Make: Perfect for home chefs, this recipe requires minimal effort and ingredients, ideal for a quick appetizer.
Versatile Ingredients: Swap in gluten-free flour or different onion varieties to suit your preferences.
Crowd-Pleaser: Serve it at gatherings, and watch it disappear—the shareable petals make it a hit!
Dipping Delights: Pair with a custom dipping sauce for an exciting flavor experience! If you’re looking for more delicious dips, check out my easy homemade dips.
Amazing Blooming Onion Ingredients
For the Onion
- Large Yellow Onion – Essential for structure and the classic blooming effect.
- Olive Oil (2 tablespoons) – Helps create a golden-brown crust; avocado oil is a great alternative.
For the Coating
- All-Purpose Flour (½ cup) – Provides the desired crispiness; substitute with gluten-free flour for a different dietary option.
- Paprika (1 teaspoon) – Imparts color and smokiness; try smoked paprika for an extra flavor boost.
- Garlic Powder (½ teaspoon) – Enhances the overall taste; fresh garlic offers a stronger flavor profile.
- Cayenne Pepper (¼ teaspoon, optional) – Adds a nice spicy kick; feel free to omit for milder flavors.
- Salt (½ teaspoon) – Balances flavors; adjust to your taste preference.
- Black Pepper (¼ teaspoon) – Adds subtle heat; freshly ground pepper is recommended for best results.
For the Wet Dip
- Milk (½ cup) – Works with egg to help the coating adhere; almond milk substitutes nicely for a dairy-free version.
- Large Egg (1) – Binds the coating well; a flax egg makes it vegan-friendly.
Dipping Sauce Suggestion
- Mayonnaise, Ketchup, Horseradish: Mix for a flavorful dip that pairs perfectly with your amazing blooming onion in oven!
Get ready to gather friends and family around this delightful dish that promises a fun and guilt-free snacking experience!
Step‑by‑Step Instructions for Amazing Blooming Onion In Oven
Step 1: Preheat Your Oven
Begin by preheating your oven to 400°F (200°C). While it heats, prepare a baking sheet by lining it with parchment paper, ensuring an easy cleanup later. This step sets the stage for your amazing blooming onion in oven to achieve that perfect golden-brown crispiness during baking.
Step 2: Prepare the Onion
Peel the outer skin from your large yellow onion and slice off about half an inch from the top. Using a sharp knife, carefully make 12-16 vertical cuts downward, stopping just before you reach the root. Gently separate the onion petals in a blooming fashion, taking care not to break them apart.
Step 3: Create the Coating Mixture
In a shallow bowl, whisk together the all-purpose flour, paprika, garlic powder, cayenne pepper, salt, and black pepper until evenly combined. In another bowl, mix the milk and egg, creating a wet dip that will help your dry coating adhere beautifully to the onion. This mixture will ensure your amazing blooming onion in oven is both flavorful and crispy.
Step 4: Coat the Onion
Carefully dip the peeled and sliced onion into the milk mixture, allowing excess liquid to drip off. Next, dredge the onion in the flour mixture, making sure to coat all petals thoroughly for maximum crunchiness. The even coverage of the coating is essential for that perfect oven-baked texture.
Step 5: Bake to Perfection
Place the coated onion heartily on the prepared baking sheet, then drizzle olive oil over the top, ensuring it’s evenly distributed. Slide the sheet into the preheated oven and bake for 30-40 minutes, or until the onion is tender and golden brown, visually checking for the crisp and crunchy finish you desire from your amazing blooming onion in oven.
Step 6: Prepare the Dipping Sauce
While the blooming onion is baking, whip up a flavor-packed dipping sauce. In a bowl, combine mayonnaise, ketchup, horseradish, paprika, garlic powder, and cayenne pepper. Whisk until smooth and well blended, creating a delightful complement to your crispy onion appetizer that will be ready by the time your blooming onion finishes baking.
Step 7: Serve and Enjoy
Once your blooming onion is out of the oven, let it cool for a minute before serving hot. Carefully place it on a serving platter with your delicious dipping sauce alongside. Watch as family and friends gather around to pull apart the gourmet petals of this amazing blooming onion in oven, ready for guilt-free enjoyment!
Amazing Blooming Onion Variations & Substitutions
Feel free to get creative and give your blooming onion a personal twist—your taste buds will thank you!
-
Gluten-Free: Use a gluten-free flour blend instead of all-purpose flour for a deliciously crispy spin.
-
Dairy-Free: Substitute regular milk with almond or oat milk to make this treat completely dairy-free and equally tasty.
-
Vegan: Swap the egg for a flax egg made from 1 tablespoon of ground flaxseed mixed with 2.5 tablespoons of water for a vegan version.
-
Flavor Boost: Experiment with different spices! Try adding cayenne pepper for heat or Italian herbs for an aromatic touch. The right spices can elevate your onion’s flavor profile significantly.
-
Onion Variety: Use sweet Vidalia onions or colorful red onions to enhance both flavor and presentation. The sweetness of Vidalia can create a delightful contrast against the spices, while red onion adds a vibrant hue.
-
Texture Twist: For extra crunch, sprinkle panko breadcrumbs on top of the onion before baking. This creates a thicker, crunchier layer that is simply irresistible.
-
Spice Level: Adjust the amount of cayenne pepper in your flour mix to tailor the heat to your liking. Whether you prefer a mild treat or a spicy kick, it’s all up to you!
-
Dipping Sauce Variety: Create a variety of dipping sauces such as a spicy chipotle mayo or a tangy mustard sauce. Explore my easy homemade dips for even more delicious options that pair beautifully with your blooming onion!
Storage Tips for Amazing Blooming Onion In Oven
Fridge: Store leftovers in an airtight container for up to 2 days to keep the blooming onion fresh and flavorful.
Freezer: For longer storage, freeze the blooming onion wrapped tightly in plastic wrap for up to 1 month. Let it cool completely before freezing.
Reheating: To restore crispiness, reheat in a preheated oven at 350°F (175°C) for 10-15 minutes. Avoid microwaving, as it can make the petals soggy.
Avoiding Sogginess: Don’t coat the onion too far in advance to prevent it from losing its crunchiness when stored.
Make Ahead Options
Prepare your amazing blooming onion in oven ahead of time to save precious minutes on busy evenings! You can slice the onion and coat it with the seasoning mix up to 24 hours in advance. Simply wrap the prepared onion tightly in plastic wrap and refrigerate it to maintain its freshness and prevent browning. When you’re ready to serve, pull it out, dip it in the wet mixture, and proceed with baking. Just remember not to coat the onion too early to keep the petals crisp when baked. This way, you’ll have a delightful appetizer ready in no time, with all the indulgent taste and none of the rush!
What to Serve with Guilt-Free Oven-Baked Blooming Onion
Looking to create a memorable meal around this delightful appetizer? Here are some fantastic pairings to elevate your gathering.
- Creamy Mashed Potatoes: Their rich, buttery texture complements the crispy onion while adding comfort to the meal.
- Zesty Green Salad: A fresh, vibrant salad with lemon vinaigrette balances the blooming onion’s richness and provides a bright, refreshing contrast.
- Savory Dipping Sauces: Don’t just stick with one! Offer a trio of dips like ranch, spicy aioli, and sweet chili for fun variety and excitement.
- Homemade Sliders: Mini sandwiches filled with your favorite protein, like grilled chicken or portobello mushrooms, create a full and satisfying dinner that pairs beautifully with the appetizer.
- Roasted Vegetable Medley: Colorful roasted veggies bring a crunch and vibrancy to the plate, ensuring a healthful balance at your table.
- Crispy Chicken Tenders: A crowd favorite, these offer a delicious savory option alongside the blooming onion, making your meal feel like a festive feast.
- Chilled White Wine: A glass of crisp Sauvignon Blanc or a refreshing Prosecco enhances the flavors and completes the dining experience beautifully.
- Simple Fruit Platter: Fresh fruits like strawberries, grapes, and melon provide a sweet contrast that cleanses the palate between bites.
Every choice offers a unique flavor and texture that highlights the oven-baked blooming onion while keeping your guests delighted!
Tips for the Best Blooming Onion
- Sharp Knife Required: Use a sharp knife for precise cuts to help petals open beautifully without any tears.
- Mind the Root: Avoid cutting through the root of the onion; doing so will keep the petals intact and help maintain structure.
- Coat Just Before Baking: Don’t coat the onion too far in advance; this helps avoid sogginess and ensures crispy petals.
- Bake in Single Layer: Arrange the coated onion in a single layer on the baking sheet to ensure even baking—no overcrowding for your amazing blooming onion in oven!
- Check for Doneness: Keep an eye on the onion while baking. Every oven is different, and you want it golden brown and tender but not burnt.

Amazing Blooming Onion In Oven Recipe FAQs
How do I choose the best onion for this recipe?
Absolutely! A large yellow onion is ideal for achieving that classic blooming effect thanks to its flavor and structure. Look for firm onions with smooth, unblemished skins. Avoid any that show dark spots or soft areas, as these can indicate over-ripeness.
How should I store leftovers of the blooming onion?
Very! If you have any leftovers, store them in an airtight container in the fridge for up to 2 days. To keep them fresh and flavorful, consume them within that timeframe. When you’re ready to enjoy them again, simply reheat the blooming onion in a preheated oven at 350°F (175°C) for about 10-15 minutes to restore some of that delicious crispiness.
Can I freeze the blooming onion for later use?
Absolutely! To freeze your amazing blooming onion in the oven, let it cool completely after it’s baked. Wrap it tightly in plastic wrap and then place it in a freezer bag. It’ll stay good for up to 1 month. When you’re ready to use it, thaw it in the refrigerator overnight and reheat in the oven for that crispy quality again!
What if my blooming onion doesn’t open up properly?
Oh no, that can be a bummer! If your onion doesn’t bloom as expected, it might be due to not cutting deep enough or cutting through the root. Be sure to make those vertical cuts all the way down, stopping just before reaching the root so that the petals stay intact. If this happens, don’t worry too much; it’ll still be delicious!
Is this dish suitable for people with dietary restrictions?
Very! This recipe is vegetarian-friendly, and you can easily make it vegan by using a flax egg and substituting almond milk for the regular milk. For gluten-free options, just swap out the all-purpose flour with a gluten-free blend. It’s a great appetizer for a variety of dietary preferences!
How do I achieve the perfect crispy texture?
To get that crunchy exterior, make sure you apply the dry coating evenly and avoid coating the onion far in advance. Also, bake it in a single layer with enough space on the baking sheet to ensure it crisps nicely as it bakes. The key is to keep an eye on it in the oven, so you catch it at that perfect golden brown stage!
Amazing Blooming Onion In Oven That’s Guilt-Free and Crispy
Ingredients
Equipment
Method
- Preheat your oven to 400°F (200°C) and prepare a baking sheet lined with parchment paper.
- Peel the onion's outer skin and slice off about half inch from the top. Make 12-16 vertical cuts, being careful not to cut through the root, then gently separate the petals.
- In a shallow bowl, whisk together flour, paprika, garlic powder, cayenne, salt, and black pepper. In another bowl, mix together milk and egg.
- Dip the onion in the milk mixture, allowing excess liquid to drip off, then dredge in the flour mixture, coating thoroughly.
- Place the coated onion on the baking sheet and drizzle olive oil over the top. Bake for 30-40 minutes until tender and golden brown.
- While baking, mix mayonnaise, ketchup, horseradish, paprika, garlic powder, and cayenne for the dipping sauce.
- Let the baked onion cool briefly before serving with the dipping sauce.
Leave a Reply