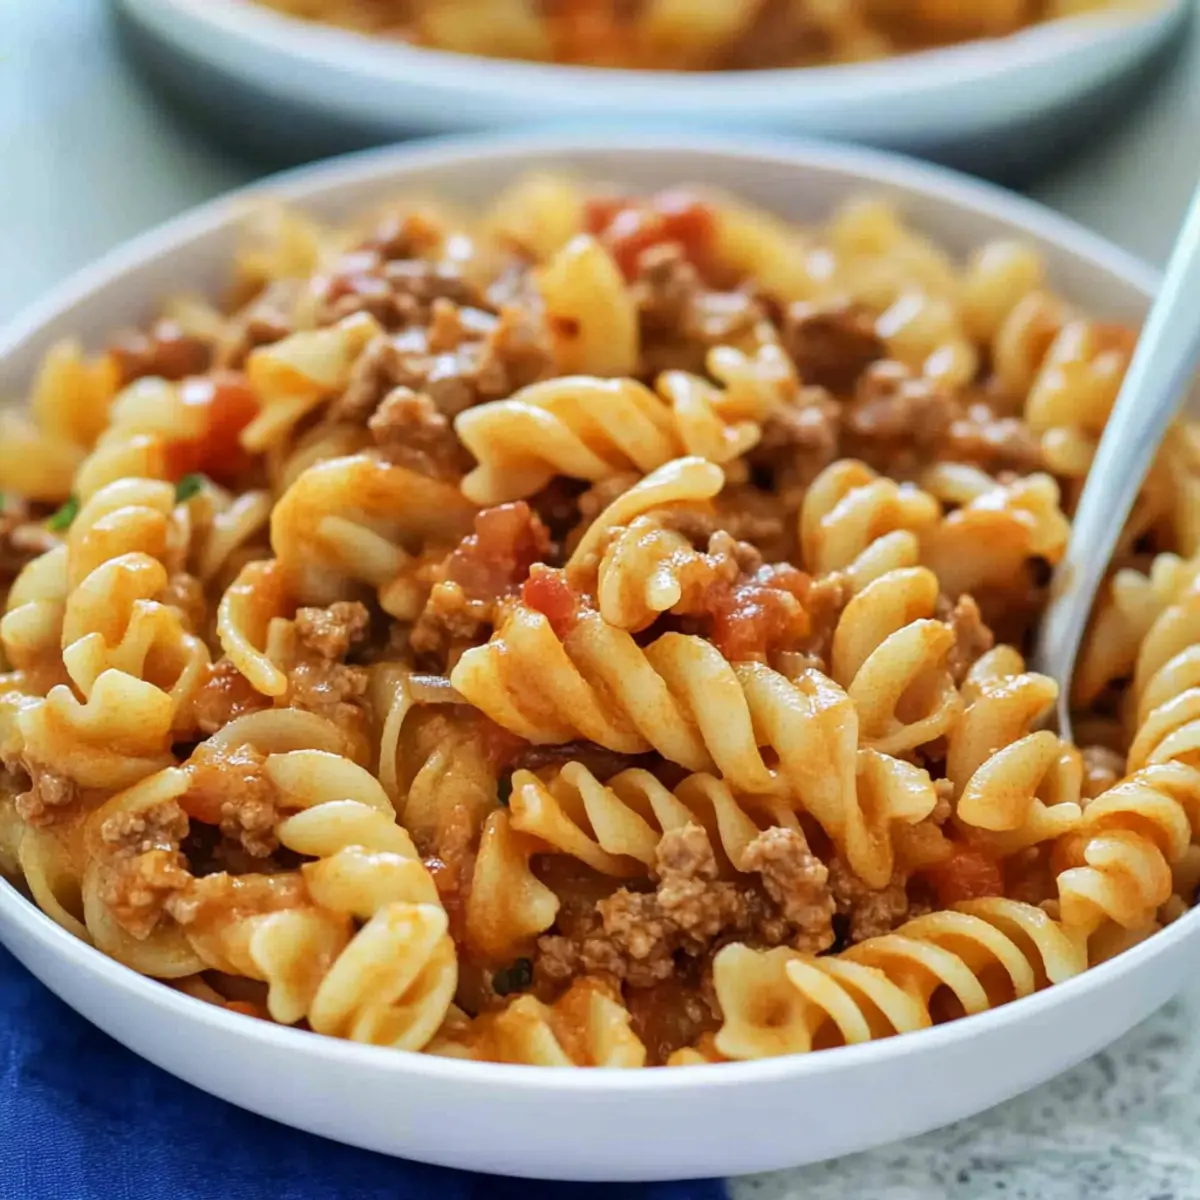
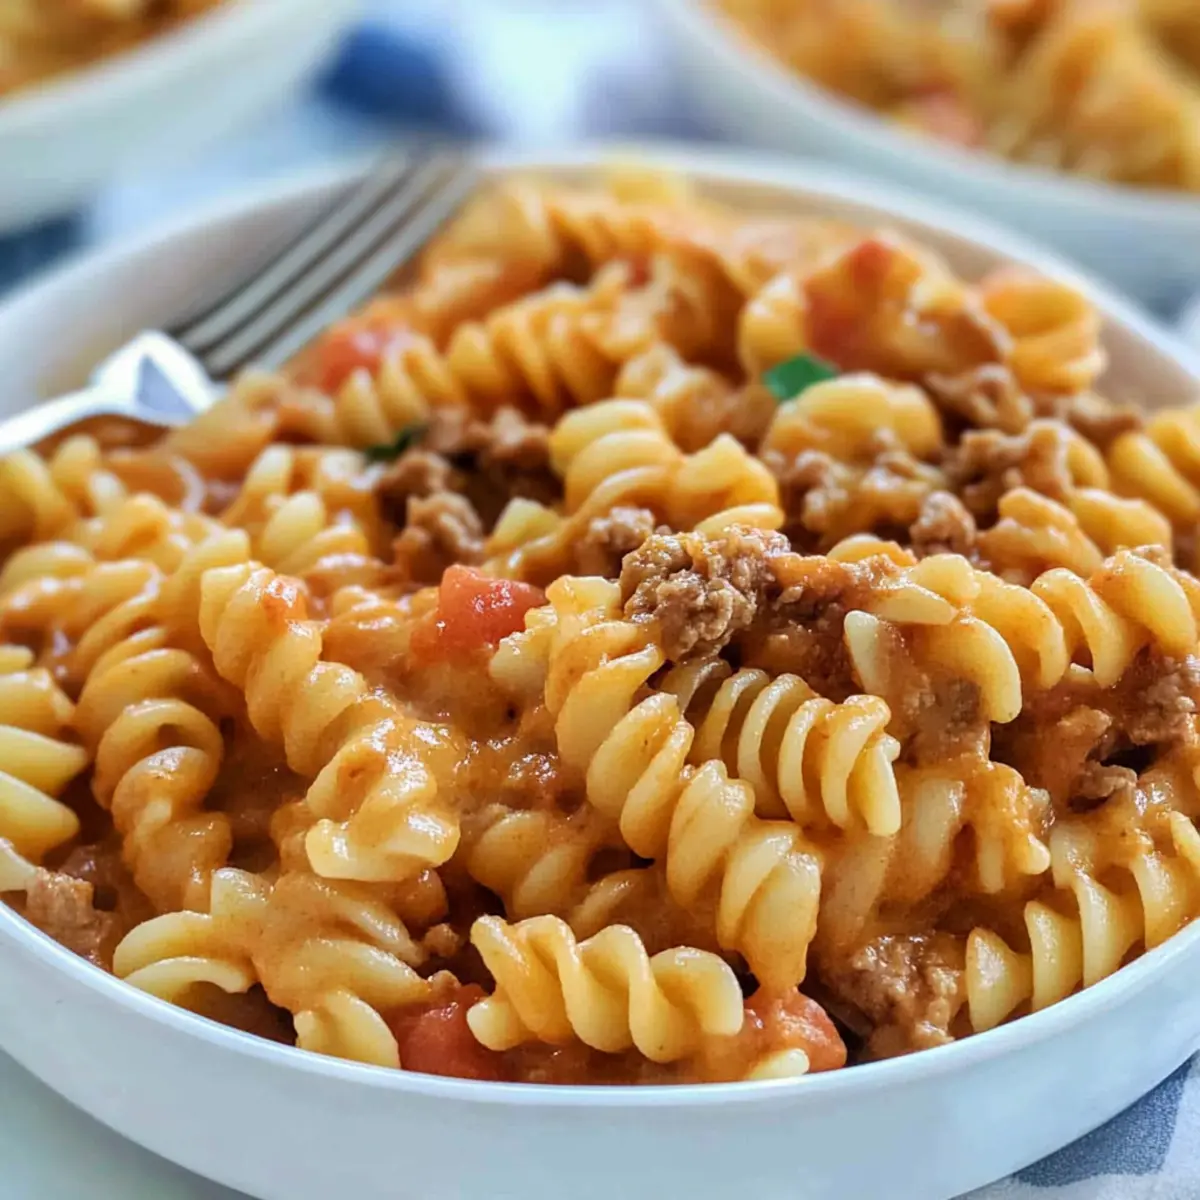
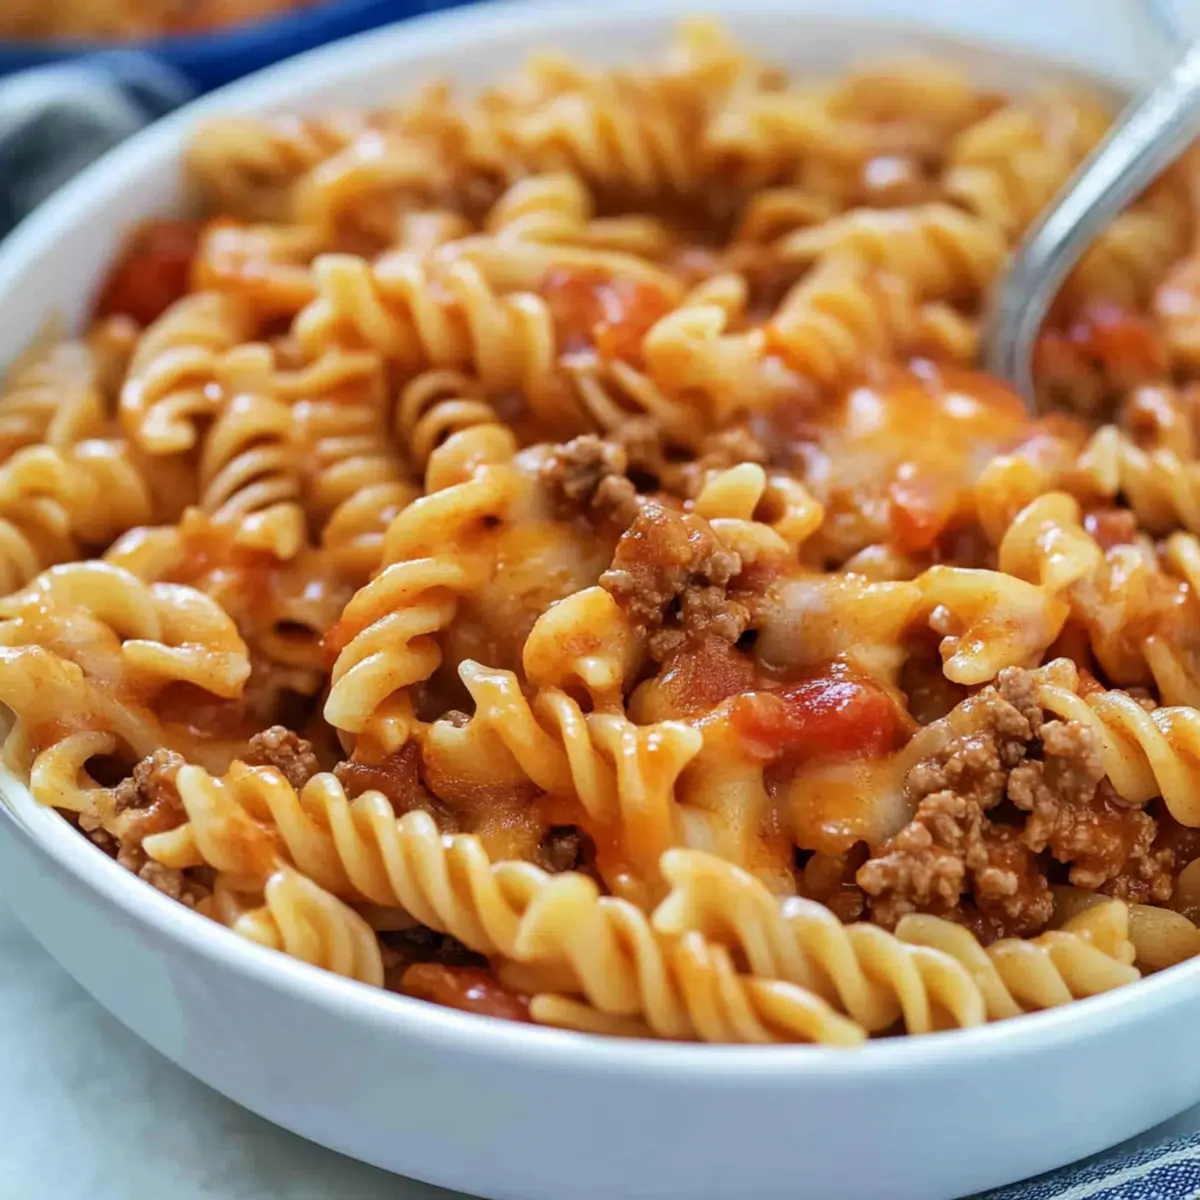
As I stood in my kitchen, the aroma of sizzling ground beef mixed with zesty taco seasoning enveloped me like a warm hug, instantly transporting me to those cozy family dinners of my childhood. This Cheesy Taco Pasta is my go-to dish for busy weeknights, and the best part is it can be whipped up in under 30 minutes with just five simple ingredients. It’s a delightful blend of comfort food and convenience that the entire family adores, making dinner stress a thing of the past. Imagine a creamy, cheesy sauce wrapping around tender rotini, infused with vibrant salsa for that extra zing! Not only is this dish a quick lifesaver for hectic evenings, but it’s also a crowd-pleaser that caters to even the pickiest of eaters. So, are you ready to dive into your new favorite weeknight meal?
Why Is This Cheesy Taco Pasta So Special?
Quick and Easy: This delightful dish comes together in just 30 minutes, making it perfect for those busy weeknights when time is of the essence.
Family-Friendly: Kids and adults alike will love the creamy, cheesy goodness wrapped around rotini, creating a meal that suits all taste buds.
Five Ingredients: With only five simple ingredients, preparation is a breeze—no complicated shopping lists here!
Versatile Options: Feel free to swap ground beef for turkey or leave out the meat entirely for a vegetarian twist.
Crowd-Pleaser: This dish is a guaranteed hit at the dinner table and is sure to become a staple in your home, worthy of your best family recipes like Cheesy Corn New or One Pot Pasta.
The Cheesy Taco Pasta is everything you need for a fulfilling, delicious meal without the stress!
Cheesy Taco Pasta Ingredients
For the Pasta
- Rotini – Perfectly holds the creamy sauce and taco flavors; any pasta shape works if rotini isn’t available.
- Water – Helps dissolve taco seasoning for even flavor distribution; adjust if using different seasoning brands.
For the Filling
- Ground Beef – Adds hearty protein; consider ground turkey or chicken for a lighter option.
- Taco Seasoning – Infuses the pasta with classic taco flavors; using homemade seasoning can enhance the dish’s taste.
- Salsa – Provides a tangy, spicy kick; can be omitted for a milder taste or swapped with diced tomatoes.
With these simple ingredients, you’ll whip up the delicious Cheesy Taco Pasta in no time!
Step‑by‑Step Instructions for Cheesy Taco Pasta
Step 1: Cook the Rotini
Begin by bringing a large pot of salted water to a rolling boil over high heat. Add the rotini and cook according to the package directions, usually around 8-10 minutes, until al dente. Stir occasionally to prevent sticking. Once done, drain the pasta and set it aside, allowing the steam to escape while you prepare the filling.
Step 2: Brown the Beef
In a large skillet or pot, heat a drizzle of oil over medium heat. Add the ground beef, crumbling it as you cook. Stir frequently, allowing it to brown evenly for about 5-7 minutes. The meat should be no longer pink and have a rich brown color. Once cooked, drain any excess fat to keep your Cheesy Taco Pasta deliciously light.
Step 3: Add Seasoning
Next, sprinkle in the taco seasoning over the browned beef, stirring to coat the meat evenly. Pour in 1 cup of water, mixing well to incorporate the seasoning fully. Allow the mixture to simmer for about 3-5 minutes until most of the water evaporates, leaving a thick, flavorful coating on the beef. This step infuses your Cheesy Taco Pasta with that irresistible taco flavor.
Step 4: Combine Ingredients
Once the beef mixture is ready, add the drained rotini to the skillet, gently folding it into the beef and seasoning for an even blend. Then, stir in the salsa, ensuring every piece of pasta is coated and vibrant with flavor. This delightful mix will form the base of your creamy Cheesy Taco Pasta.
Step 5: Melt the Cheese
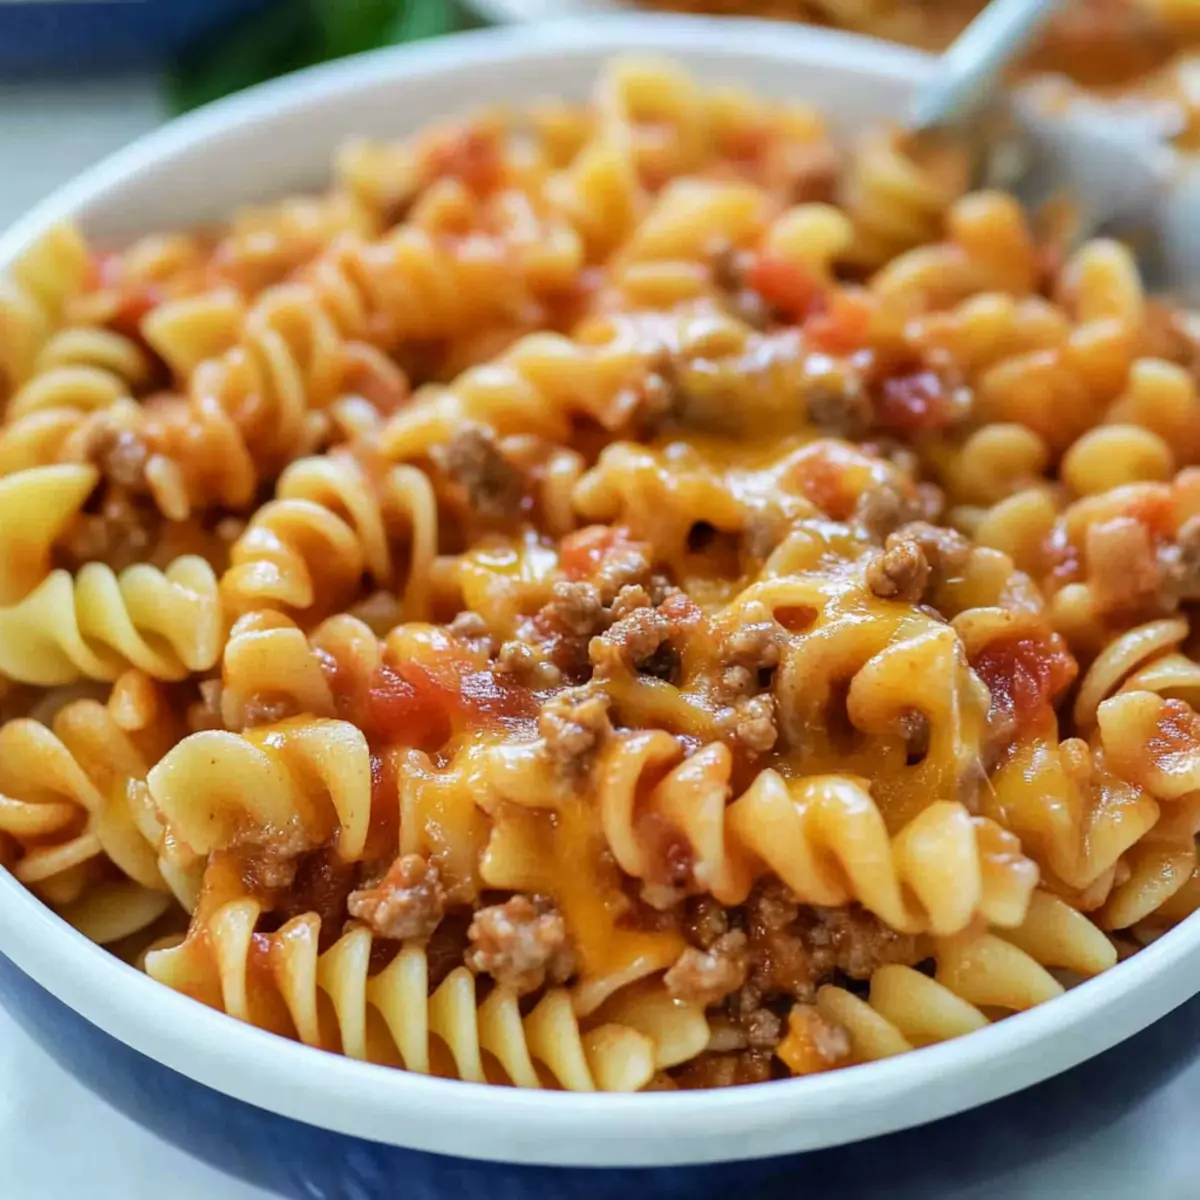
Remove the skillet from heat and gradually mix in 1.5 cups of shredded cheese, stirring until it melts into a gooey, creamy sauce. This rich cheese will bind the flavors while enhancing the texture of your dish. For an extra cheesy touch, sprinkle the remaining cheese on top and let it sit for a minute to melt before serving.
Step 6: Serve and Enjoy
Finally, spoon the Cheesy Taco Pasta into bowls, showcasing the melted cheese and colorful salsa. Serve it warm for a cozy family dinner. This dish pairs wonderfully with garlic bread or a fresh green salad, elevating your mealtime experience while highlighting the creamy, comforting textures you’ve created.
What to Serve with Cheesy Taco Pasta
Elevate your dining experience with delightful sides that complement this creamy, cheesy favorite.
-
Garlic Bread: The crispy, buttery slices add a delightful crunch, perfect for scooping up every cheesy bite.
-
Fresh Green Salad: Light and crisp, a salad with mixed greens and a zesty vinaigrette provides a refreshing contrast to the richness of the pasta.
-
Steamed Veggies: Broccoli or green beans add a nutritious touch, balancing the meal with their fresh crunch and vibrant color.
-
Corn on the Cob: Sweet, juicy corn brings a pop of summer flavors that harmonizes beautifully with the taco spices.
-
Creamy Avocado Dip: This cool, creamy dip pairs wonderfully; its smooth texture balances out the dish’s warmth, creating an enticing combination.
-
Margaritas: A refreshing margarita complements the zesty taco flavors in the dish perfectly, adding a festive touch to your dinner table.
-
Chocolate Chip Cookies: For a sweet finish, classic cookies bring comforting nostalgia, making for a sweet end to a fulfilling meal.
How to Store and Freeze Cheesy Taco Pasta
Fridge: Store leftover Cheesy Taco Pasta in an airtight container for up to 5-7 days, ensuring the cheese remains creamy and delicious.
Freezer: For longer storage, freeze the pasta in a freezer-safe container for up to 3 months. Thaw in the fridge overnight before reheating.
Reheating: Reheat in the microwave or on the stovetop over low heat, adding a splash of water or milk to restore the creamy texture if needed.
Make-Ahead Tip: Prepare the Cheesy Taco Pasta ahead of time, store in portions in the fridge, and enjoy a quick meal whenever hunger strikes!
Make Ahead Options
These Cheesy Taco Pasta is perfect for meal prep enthusiasts! You can cook the rotini and brown the ground beef up to 3 days in advance; simply store them separately in airtight containers in the refrigerator. For best results, keep the pasta slightly undercooked (al dente) to prevent mushiness when reheating. You can also mix the beef with taco seasoning and water ahead of time, allowing the flavors to meld beautifully. When you’re ready to serve, simply combine the prepared components, stir in the salsa, and melt the cheese together over medium heat for creamy, comforting results just like freshly made!
Cheesy Taco Pasta Variations
Customize your Cheesy Taco Pasta to delight your taste buds and cater to all preferences!
-
Turkey Swap: Use ground turkey instead of beef for a leaner option. It still delivers delicious flavors while cutting back on fat.
-
Vegetarian Delight: Leave out the meat and add extra veggies like bell peppers or zucchini. This twist makes the dish lighter and just as satisfying!
-
Creamy Spin: Stir in a dollop of sour cream or cream cheese for an even creamier sauce. This will take comfort to the next level!
-
Extra Heat: Spice things up with diced jalapeños or a sprinkle of red pepper flakes if you crave some warmth. Your taste buds will thank you!
-
Cheese Lovers: Add different cheese varieties like pepper jack for a kick or mozzarella for that lovely stretch factor. Each choice enhances the dish’s richness.
-
More Nutrition: Toss in black beans or corn to boost fiber and nutrients. Not only do they add texture, but they bring balanced flavors to your table.
-
Saucy Substitutes: Replace salsa with diced tomatoes for a milder taste, or try a spicy peach salsa for a fresh, fruity twist. This variation will regularly surprise your family.
-
Serve it Differently: Change up how you serve by turning it into a casserole! Layer the pasta with additional cheese in a baking dish and bake until bubbly. It’s perfect for a satisfying family meal.
For more easy meal ideas, consider also making some Cheesy Corn New or trying out a comforting One Pot Pasta to accompany this delightful Cheesy Taco Pasta!
Helpful Tricks for Cheesy Taco Pasta
-
Perfect Timing: Cook the pasta al dente to ensure it holds up against the creamy sauce. Undercooking slightly will allow flavors to meld beautifully.
-
Flavor Boost: For a deeper taste, brown the beef with chopped onions or garlic. This adds richness that elevates your Cheesy Taco Pasta significantly.
-
Keep it Creamy: Stir the cheese in off the heat to prevent clumping and ensure a smooth, creamy sauce. A gentle mix makes all the difference!
-
Season Smart: Adjust taco seasoning to taste; some brands are saltier than others. Always taste the beef mixture before adding it to the pasta.
-
Storage Tips: Cool leftovers before storing in an airtight container, and reheat in the microwave. This helps maintain the creaminess of your Cheesy Taco Pasta.
Cheesy Taco Pasta Recipe FAQs
How do I choose ripe ingredients for my Cheesy Taco Pasta?
Absolutely! When selecting ingredients, choose rotini that is firm and free from cracks. For the ground beef, look for bright red color without any dark spots or off smells. Salsa should be fresh, vibrant, and colorful. If you’re using canned salsa, check the expiration date and ensure it’s not past its prime.
What is the best way to store leftover Cheesy Taco Pasta?
Very! Store your leftover Cheesy Taco Pasta in an airtight container in the refrigerator for up to 5-7 days. Make sure it cools to room temperature before sealing to maintain quality. Remember to reheat it gently to keep the creamy texture intact!
Can I freeze Cheesy Taco Pasta? How?
Of course! To freeze Cheesy Taco Pasta, let it cool completely, then portion it into freezer-safe containers, leaving some space for expansion. It can be stored for up to 3 months. When you’re ready to enjoy it, thaw it in the fridge overnight, then reheat it on the stovetop with a splash of water or milk to restore the creaminess.
What should I do if my Cheesy Taco Pasta turns dry after reheating?
No worries! If your pasta seems dry, add a small splash of water or milk when reheating. Stir well to redistribute the sauce. Cover the dish for a minute or two to help steam the pasta, making it creamy and delicious again.
Are there any dietary considerations I should keep in mind?
Indeed! For those with allergies, ensure your taco seasoning and salsa are free from gluten and other allergens. If cooking for younger kids or those sensitive to spice, you can omit the salsa or choose a milder version. Additionally, for pet owners, keep the dish out of reach, especially due to ingredients like salsa that can be harmful to cats and dogs.
Can I use alternative proteins in my Cheesy Taco Pasta?
Certainly! Ground turkey, chicken, or even lentils can be great substitutes for ground beef. Cook them the same way to retain moisture and flavor. If you’re aiming for a vegetarian option, just omit the meat entirely and consider adding black beans or corn for added texture and protein.
Cheesy Taco Pasta: 30-Minute Family Delight Ready in a Flash
Ingredients
Equipment
Method
- Begin by bringing a large pot of salted water to a rolling boil over high heat. Add the rotini and cook according to the package directions, usually around 8-10 minutes, until al dente. Drain and set aside.
- In a large skillet or pot, heat a drizzle of oil over medium heat. Add the ground beef, crumbling it as you cook for about 5-7 minutes until browned. Drain excess fat.
- Sprinkle taco seasoning over the cooked beef, stirring to coat. Pour in 1 cup of water and simmer for about 3-5 minutes until most of the water evaporates.
- Add the drained rotini to the skillet, folding it into the beef mixture. Stir in the salsa until every piece of pasta is coated.
- Remove from heat and mix in 1.5 cups of shredded cheese until melted. For extra cheesiness, sprinkle remaining cheese on top and let it sit for a minute.
- Spoon the Cheesy Taco Pasta into bowls and serve warm.
Leave a Reply