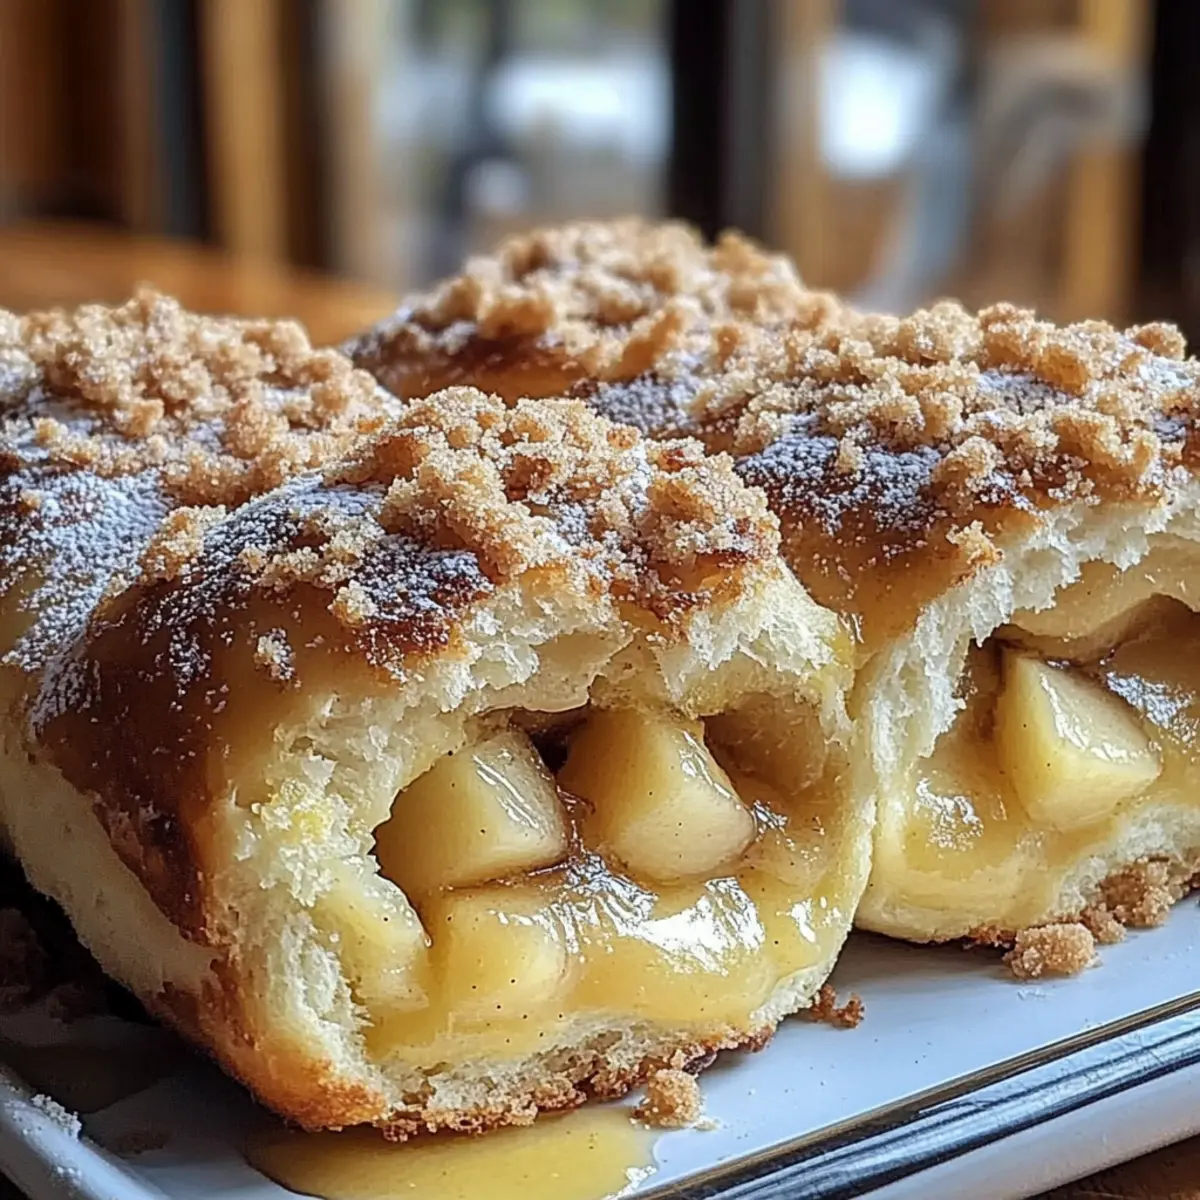
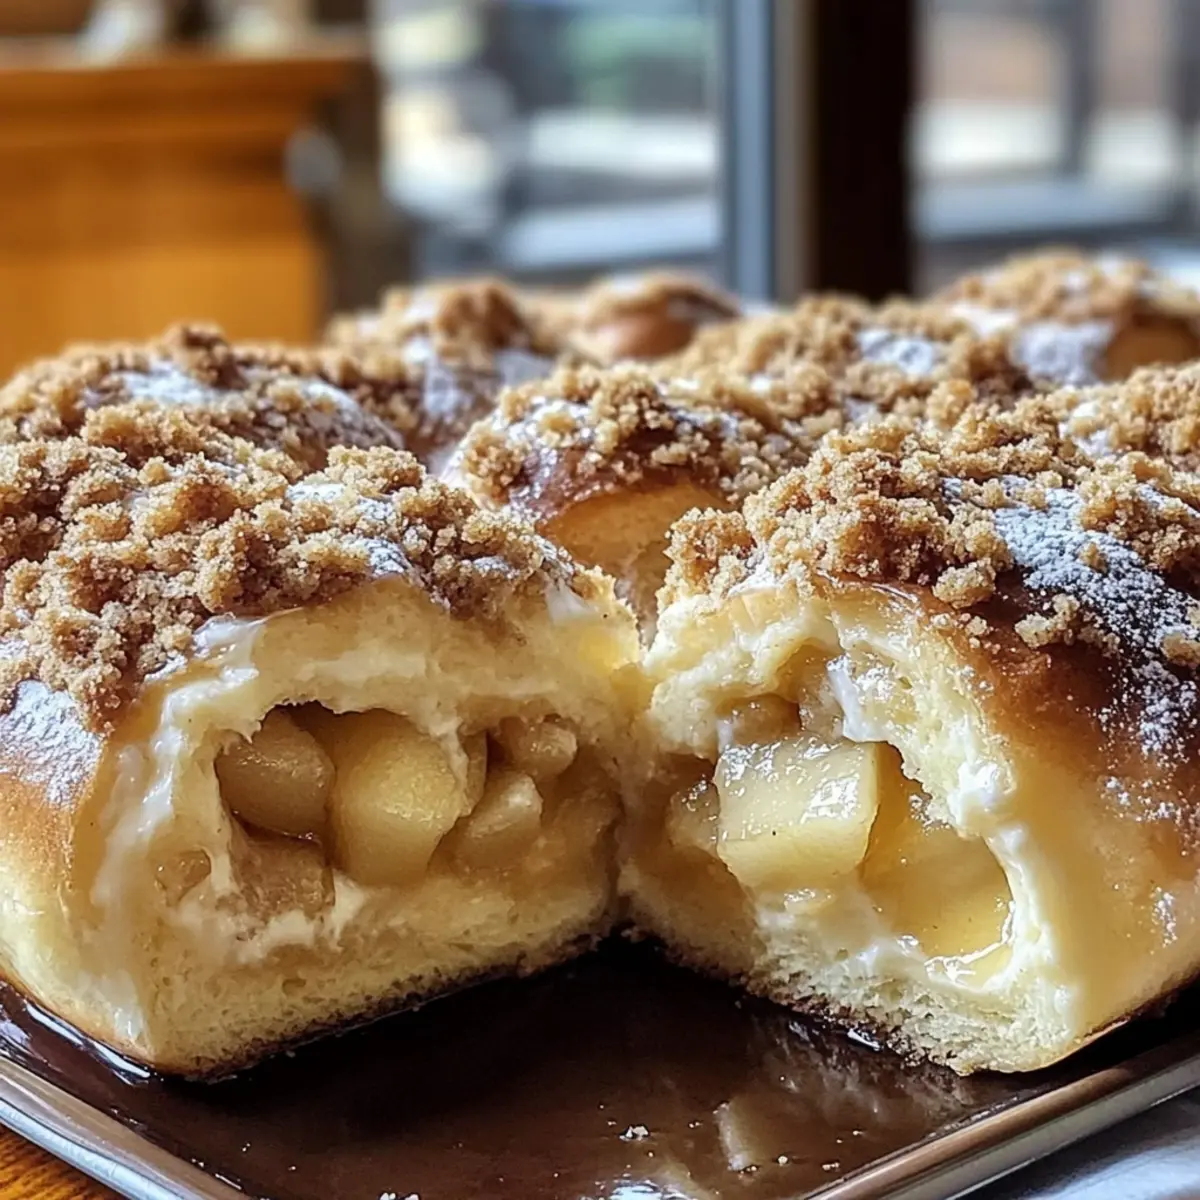
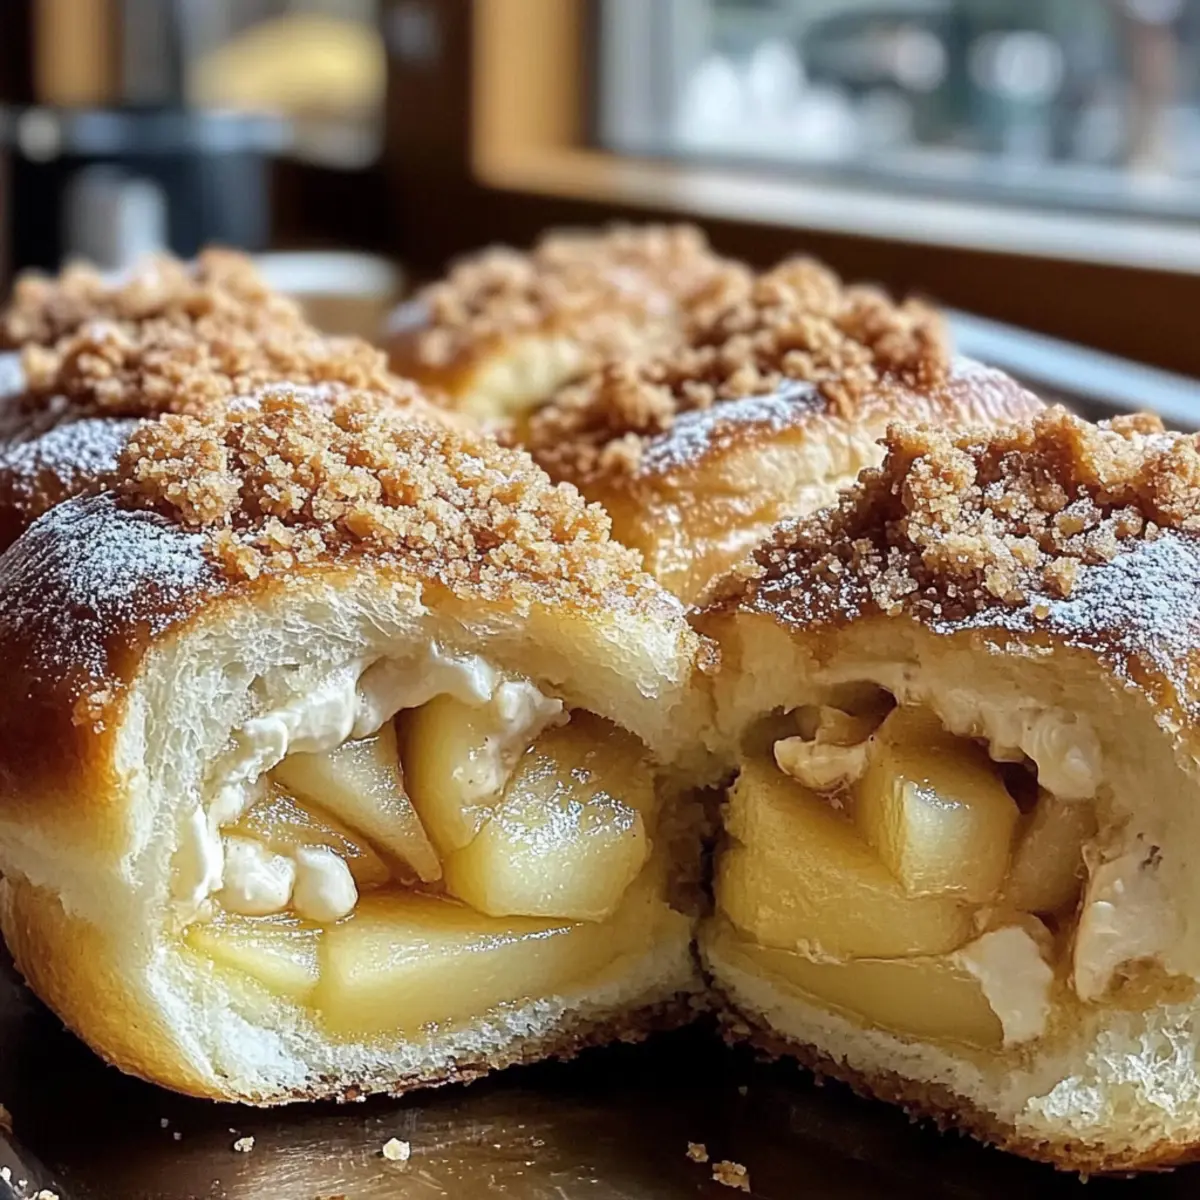
As the warm aroma of cinnamon fills my kitchen, I’m reminded of cozy gatherings and sweet indulgences that make life a little better. The star of today’s show is my irresistible Apple Cheesecake Crumble Buns—an enchanting blend of soft, flaky dough and a creamy cream cheese filling that’s impossible to resist. Not only are these little treats a feast for the eyes, but they also offer a delightful crunch from the crumble topping that feels both comforting and indulgent. Plus, whether you’re entertaining friends or treating yourself to a well-deserved dessert, this recipe is incredibly adaptable, with gluten-free and dairy-free options for everyone to enjoy. Are you ready to embark on a baking adventure that will leave your kitchen smelling divine? Let’s dive in!

Why Are These Buns Irresistible?
Irresistible flavor awaits you: The combination of creamy cheesecake and sweet apples wrapped in flaky dough is simply divine.
Adaptable to Everyone: Offering gluten-free, vegan, and dairy-free options ensures everyone can indulge in this delightful treat.
Crowd Pleaser: Perfect for gatherings, these buns impress guests with their elegant appearance and scrumptious taste.
Comforting and Cozy: The warm scent of cinnamon and baked apples creates an inviting atmosphere that feels like home.
Quick and Easy: With straightforward instructions and minimal prep time, you’ll be enjoying your handmade treats in no time.
Just the Right Texture: Soft, fluffy buns paired with a crunchy crumble topping deliver a satisfying bite every time.
For similar delightful variations, check out my Pumpkin Cheesecake Cozy or whip up some Fried Strawberry Cheesecake for a fun twist!
Apple Cheesecake Crumble Buns Ingredients
For the Dough
- All-Purpose Flour – Essential for structure; swap with a gluten-free flour blend for a gluten-free treat.
- Sugar – Sweetens both the dough and filling; adjust based on your sweetness preference.
- Baking Powder – Acts as a leavening agent ensuring the dough rises beautifully.
- Baking Soda – Works alongside acidic ingredients for better leavening and texture.
- Salt – Enhances flavor and balances the sweetness perfectly.
- Unsalted Butter – Creates tenderness; ensure it’s chilled and cubed to keep the dough flaky.
- Buttermilk – Moistens the dough; can be replaced with regular milk mixed with a splash of vinegar for acidity.
- Apple – Adds natural sweetness and moisture; alternatives like pears or mixed berries work wonders for different flavors.
- Cinnamon – Provides that warm, inviting flavor; consider using nutmeg or allspice for a unique touch.
For the Cheesecake Filling
- Cream Cheese – The star ingredient for a rich texture; opt for dairy-free cream cheese to make it dairy-free.
- Egg – Sets the filling beautifully; a flax egg serves as a vegan alternative.
- Vanilla Extract – Infuses depth and warmth into the filling.
For the Crumble Topping
- Rolled Oats – Forms the crunchy base of the topping, adding delightful texture.
- Brown Sugar – Contributes sweetness and richness; feel free to substitute with white sugar if you prefer.
- Melted Butter – Binds the topping ingredients together; for a non-dairy option, coconut oil is a great substitute.
Get ready to create these Apple Cheesecake Crumble Buns, an irresistible dessert treat that will have everyone coming back for more!
Step‑by‑Step Instructions for Apple Cheesecake Crumble Buns Irresistible Dessert Treat
Step 1: Prepare the Dough
In a large mixing bowl, whisk together 2 cups of all-purpose flour, 1/4 cup of sugar, 1 tablespoon of baking powder, 1/2 teaspoon of baking soda, and 1/2 teaspoon of salt. Cut in 1/2 cup of chilled, cubed unsalted butter using a pastry cutter until the mixture resembles coarse crumbs. Gradually add 3/4 cup of buttermilk while stirring until just combined. Gently fold in one diced apple and 1 teaspoon of cinnamon to enrich your Apple Cheesecake Crumble Buns.
Step 2: Make the Cheesecake Filling
In a separate bowl, beat together 8 ounces of softened cream cheese and 1/4 cup of sugar using a hand mixer until the mixture is smooth and creamy, with no lumps. Add one egg and 1 teaspoon of vanilla extract, then mix until fully incorporated. This luscious filling is what makes the Apple Cheesecake Crumble Buns so irresistible, so ensure it’s well blended and creamy.
Step 3: Preheat the Oven
Preheat your oven to 375°F (190°C) to prepare for baking these delightful buns. While the oven heats up, line a baking sheet with parchment paper to ensure the buns don’t stick while baking, making cleanup a breeze. This step is essential to create the golden-brown crust you’ll want for your Apple Cheesecake Crumble Buns.
Step 4: Assemble the Buns
On a lightly floured surface, roll out the dough into a large rectangle about 1/2 inch thick. Cut it into 3-inch squares, and place a generous tablespoon of the cheesecake filling in the center of each square. Carefully fold all corners towards the center and pinch to seal tightly, ensuring the filling remains hidden as they bake.
Step 5: Prepare and Top with Crumble
In a medium bowl, combine 1/2 cup of rolled oats, 1/4 cup of brown sugar, 1/4 cup of melted butter, and 1 teaspoon of cinnamon, mixing until crumbly. Sprinkle this mixture generously over the assembled buns, adding a delightful crunch to each bite. This crumble topping elevates the Apple Cheesecake Crumble Buns to heavenly levels.
Step 6: Bake
Carefully transfer the assembled buns onto the prepared baking sheet, ensuring they’re spaced apart for even baking. Place the sheet in the preheated oven and bake for 20-25 minutes or until the buns appear golden brown and puffed. The aroma of baked apples and cinnamon will fill your kitchen during this time, making it hard to resist!
Step 7: Cool and Serve
Once the Apple Cheesecake Crumble Buns are beautifully baked, remove them from the oven and allow them to cool on the baking sheet for about 5 minutes. This brief cooling period allows the filling to set slightly. Transfer them to a wire rack to cool slightly further before serving warm. These delicious buns are a perfect treat to enjoy with family and friends!
Apple Cheesecake Crumble Buns Variations
Feel free to get creative and make this recipe your own with delightful twists and substitutions!
- Gluten-Free: Use a gluten-free flour blend in place of all-purpose flour for a delicious, allergen-friendly version.
- Dairy-Free: Swap out cream cheese for dairy-free alternatives and use coconut oil instead of butter for a completely dairy-free treat.
- Fruit Variation: Experiment with apples, pears, or even mixed berries to give each batch a seasonal flair that beckons with fresh flavors.
- Vegan-Friendly: Replace the egg with a flax egg (1 tablespoon flaxseed meal mixed with 2.5 tablespoons water) for a vegan take on this delightful dessert.
- Nutty Crumble: Add chopped nuts like pecans or walnuts to the crumble topping for an extra texture and a nutty flavor that complements the sweet filling beautifully.
- Warm Spice: Swap cinnamon for nutmeg or allspice, or even add a splash of vanilla extract to the dough for an aromatic change that makes your buns even more inviting.
- Sweetener Swap: Experiment with honey or maple syrup instead of sugar for a natural sweetness that adds depth to both the dough and filling.
For even more inspiration, don’t miss my recipe for Baked Apples with Cinnamon Whipped Cream—perfect for adding to your dessert repertoire!
Make Ahead Options
These Apple Cheesecake Crumble Buns are perfect for meal prep, allowing busy cooks to enjoy their baking with minimal fuss. You can prepare the dough and cheesecake filling up to 24 hours in advance; simply refrigerate them separately in airtight containers to maintain freshness. Additionally, you can assemble the buns and cover them tightly with plastic wrap, storing them in the fridge for up to 3 days. To ensure they bake up beautifully, add the crumble topping just before baking. When you’re ready to serve, preheat the oven and bake the buns directly from the refrigerator—just as delicious with that homemade touch and a time-saving boon for any busy weeknight!
What to Serve with Apple Cheesecake Crumble Buns
Imagine the sweet aroma mingling with the comforting sounds of laughter as you gather around the table, ready to enjoy a delightful spread.
-
Vanilla Ice Cream: A scoop on the side creates a luscious contrast, melting into the warm buns for the ultimate indulgence.
-
Caramel Sauce: Drizzling over the buns adds an extra layer of sweetness and richness that complements the apples beautifully.
-
Fresh Whipped Cream: Light and airy, it balances the dense cheesecake filling, making each bite even more delightful.
-
Cinnamon Sugar Dusting: A sprinkle on top enhances the warmth of cinnamon while adding a touch of sweetness, making every bite special.
-
Decadent Hot Chocolate: The rich, creamy chocolate drink pairs wonderfully with the sweet flavors, perfect for cozy gatherings.
-
Autumn Fruit Salad: A mix of pears and berries adds a fresh and zesty contrast, enhancing the flavors of the baked buns.
-
Earl Grey Tea: A fragrant cup of tea elevates the experience, creating a charming blend of aromas and flavors at your table.
-
Pumpkin Spice Latte: For a seasonal touch, this warm beverage mirrors the cozy spices of the buns, crafting a perfect pairing.
Embrace the joy of sharing with these delightful accompaniments that elevate your Apple Cheesecake Crumble Buns to the next level!
Storage Tips for Apple Cheesecake Crumble Buns
Room Temperature: Store in an airtight container at room temperature for up to 2 days to keep them soft and fresh.
Fridge: If you need extra time, refrigerate the buns in an airtight container for about a week to maintain their flavor and moisture.
Freezer: For long-term storage, wrap the buns tightly in plastic wrap and then in aluminum foil or a freezer-safe bag. They can last up to 3 months without losing flavor or texture.
Reheating: To enjoy these irresistible Apple Cheesecake Crumble Buns warm, reheat in the oven at 350°F (175°C) for about 10 minutes or microwave for 20-30 seconds, ensuring they remain soft and delicious.
Expert Tips for Apple Cheesecake Crumble Buns
-
Chill Your Butter: Use cold butter in the dough to ensure the buns turn out flaky and tender. Room temperature butter can lead to a more dense texture.
-
Don’t Overmix: Mix the dough until just combined to maintain a light and airy texture in your Apple Cheesecake Crumble Buns. Overmixing can result in toughness.
-
Sealing Technique: Ensure you pinch the dough corners tightly when assembling the buns; this keeps the creamy cheesecake filling from leaking during baking.
-
Crumble Consistency: Aim for a crumbly texture with your topping; if it’s too wet, the crunch factor diminishes. Adjust butter accordingly for perfect crunch.
-
Variations Galore: Feel free to experiment with fruits and spices; swapping apples for pears or adding a touch of nutmeg can give your buns a unique twist!
-
Serve Warm: These buns are best enjoyed fresh out of the oven while they’re warm. A drizzle of caramel sauce over the top will enhance their irresistible appeal!
Apple Cheesecake Crumble Buns Recipe FAQs
How do I choose the right apples for this recipe?
Absolutely! When selecting apples, look for firm varieties like Granny Smith or Honeycrisp, as they provide a nice balance of sweetness and tartness. Ensure they are free from blemishes and dark spots. For the best sweetness, choose apples that are slightly overripe but still firm to touch.
How should I store my Apple Cheesecake Crumble Buns?
For room temperature storage, keep the buns in an airtight container for up to 2 days. If you want them to last longer, refrigerate them in an airtight container for about a week. This will help maintain their freshness and flavor.
Can I freeze the Apple Cheesecake Crumble Buns?
Certainly! To freeze, tightly wrap each bun in plastic wrap, then place them in a freezer-safe bag or wrap in aluminum foil. They can last up to 3 months. When you’re ready to enjoy, just reheat them in the oven at 350°F (175°C) for approximately 10 minutes or microwave for about 20-30 seconds.
What if my cheesecake filling is lumpy?
Very! If you notice lumps in your filling, it’s likely due to the cream cheese being too cold when mixed. Ensure your cream cheese is at room temperature before beating it with sugar; mix thoroughly until completely smooth. It’s always a good idea to beat the cream cheese separately before adding the egg and vanilla to create an ultra-smooth filling.
Are there any allergy considerations for this recipe?
Yes! This recipe can easily be adjusted for various dietary needs. For a nut-free version, be mindful of the ingredients in your dairy-free cream cheese. To make it gluten-free, substitute all-purpose flour with a gluten-free flour blend. Always check labels of processed ingredients for potential allergens.
What is the best way to reheat leftovers?
To enjoy your leftover Apple Cheesecake Crumble Buns warm, preheat your oven to 350°F (175°C). Place the buns on a baking sheet and reheat for about 10 minutes. Alternatively, for a quicker option, microwave each bun for 20–30 seconds, ensuring they heat evenly without drying out.
Apple Cheesecake Crumble Buns Irresistible Dessert Treat
Ingredients
Equipment
Method
- Prepare the Dough: In a large mixing bowl, whisk together the flour, sugar, baking powder, baking soda, and salt. Cut in the butter until the mixture resembles coarse crumbs. Gradually add the buttermilk while stirring. Fold in the diced apple and cinnamon.
- Make the Cheesecake Filling: In a separate bowl, beat together cream cheese and sugar until smooth. Add the egg and vanilla extract and mix until fully incorporated.
- Preheat the Oven: Preheat your oven to 375°F (190°C). Line a baking sheet with parchment paper.
- Assemble the Buns: Roll out the dough into a rectangle. Cut into squares and place a tablespoon of cheesecake filling in the center of each. Fold corners to the center and seal tightly.
- Prepare and Top with Crumble: Mix oats, brown sugar, melted butter, and cinnamon until crumbly. Sprinkle over the assembled buns.
- Bake: Transfer the buns to the baking sheet and bake for 20-25 minutes until golden brown.
- Cool and Serve: Allow the buns to cool for about 5 minutes, then transfer to a wire rack.
Leave a Reply